Low water pressure can turn a simple shower into a frustrating experience and make everyday tasks like washing dishes or filling a tub take longer than they should. If you’re dealing with weak flow from faucets, inconsistent pressure on upper floors, or poor performance from appliances, installing a water pressure booster pump is one of the most effective solutions. Designed to amplify low incoming pressure, whether from municipal lines or well systems, a booster pump ensures strong, steady flow throughout your home.
Most homes operate best at 50 to 60 psi. When pressure drops below 40 psi, performance suffers. Above 80 psi, plumbing and appliances are at risk. This guide walks you through choosing, installing, and maintaining the right pump to increase water pressure with a pump safely, efficiently, and for long-term performance.
Choose the Right Booster Pump System
Selecting the correct pump depends on your water source, household size, and existing pressure. Two main types dominate residential use: traditional booster systems and all-in-one smart units.
Traditional Booster Pump with Tank
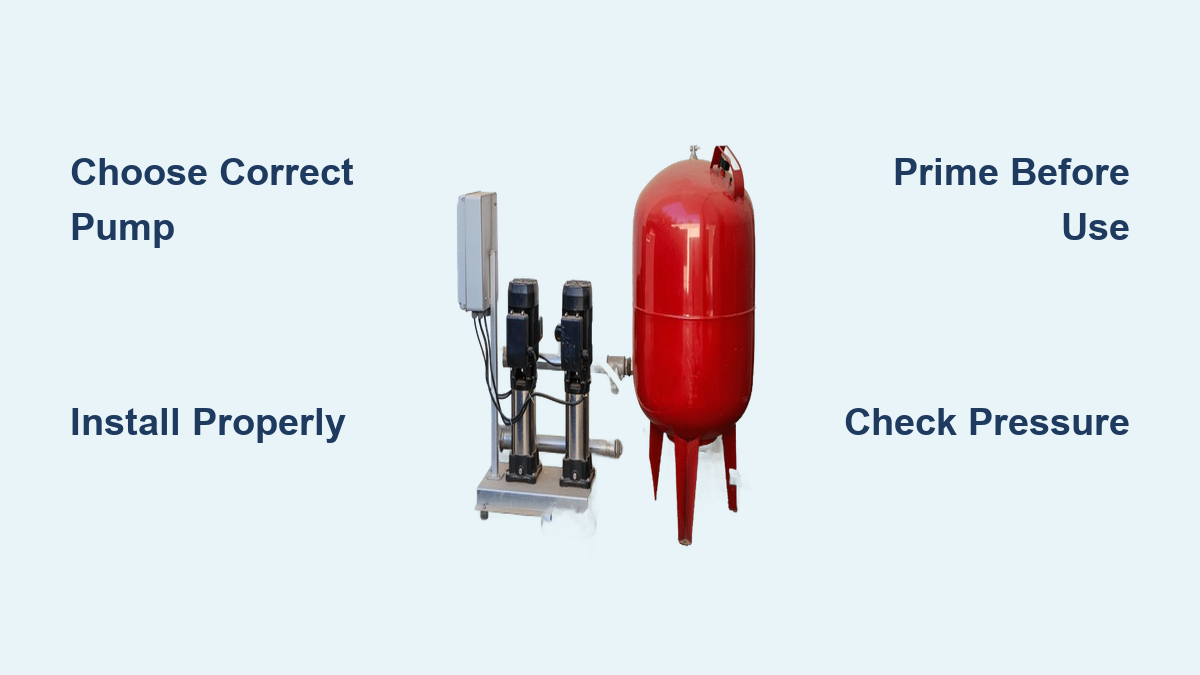
This setup includes separate components: a centrifugal pump, diaphragm pressure tank, check valve, and pressure switch. It is ideal for homes with consistent low pressure and access to a utility space.
• Maintains 40 to 60 psi using a 30/50 or 40/60 pressure switch
• Requires more space and plumbing work
• Cost-effective for DIY-savvy homeowners
• Best for municipal water under 40 psi or well systems with fluctuating output
The pressure tank stores energy by compressing air against water via a rubber diaphragm, reducing pump cycling and extending lifespan.
Smart All-in-One Booster Pumps
Modern units integrate pump, tank, controls, and protection features into a single compact housing. These models offer adjustable output ranges and built-in safety features.
• Adjustable output: 22 to 80 psi
• Built-in check valve and pressure sensor
• Self-protecting: auto-shutdown on blockage, dry run, or power loss
• Quiet operation suitable for indoor installation
• Easy setup with front-panel digital controls
Match Pump to Your Water Source
Choosing the right system depends on where your water comes from and how you use it.
• Municipal water with low pressure: Booster pump with tank increases pressure without altering city supply
• Well water with cycling issues: Constant pressure system adjusts speed for steady output
• Multi-story home: High-output booster compensates for 0.433 psi loss per foot of elevation
• High-demand household: Variable-speed or smart pump handles multiple fixtures simultaneously
Avoid installing a booster if your pressure already exceeds 75 psi, as it may cause over-pressurization and damage.
Install the Pump Correctly
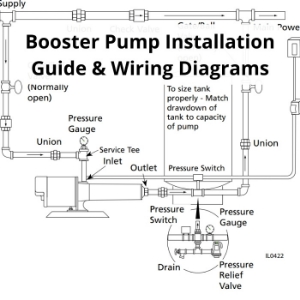
Proper installation ensures safety, efficiency, and longevity. Whether using a standalone pump or all-in-one unit, follow these core steps.
Position and Prepare the Inlet Line
Mount the pump near the main water line, after the water meter. Use a 90-degree elbow to connect the supply, ensuring clean, burr-free pipe cuts. Flush the line before connecting to prevent debris from entering the pump.
Always install the pump on a level, vibration-resistant surface. Use rubber pads or a concrete pad if needed.
Connect to the Main Supply
Run a copper or PEX line from the street-side of the meter to the pump inlet. Install a check valve immediately after the pump to prevent backflow into municipal lines. Add a shut-off valve before the pump for maintenance access.
Set Up the Pressure Tank (Traditional Systems)
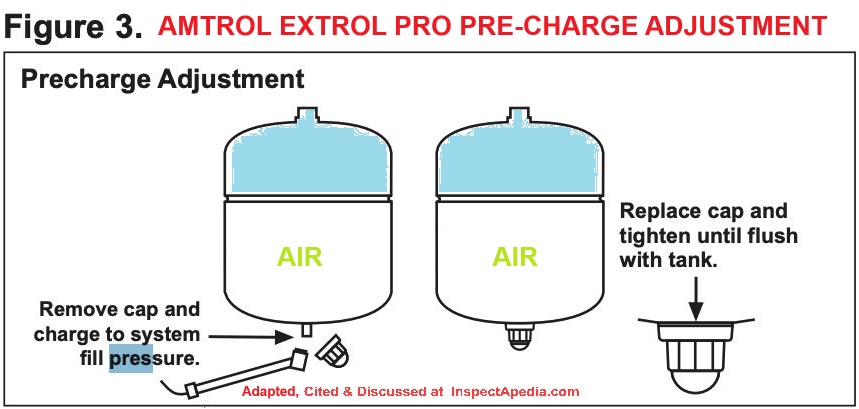
Pre-charge the diaphragm tank with air to 2 to 3 psi below the pump cut-in pressure. For example, for a 40/60 switch, set air charge to 37 psi. Use a standard tire gauge and air compressor to adjust. Ensure the tank is half water, half air. A waterlogged tank causes rapid cycling.
Wire the Pump on a Dedicated Circuit
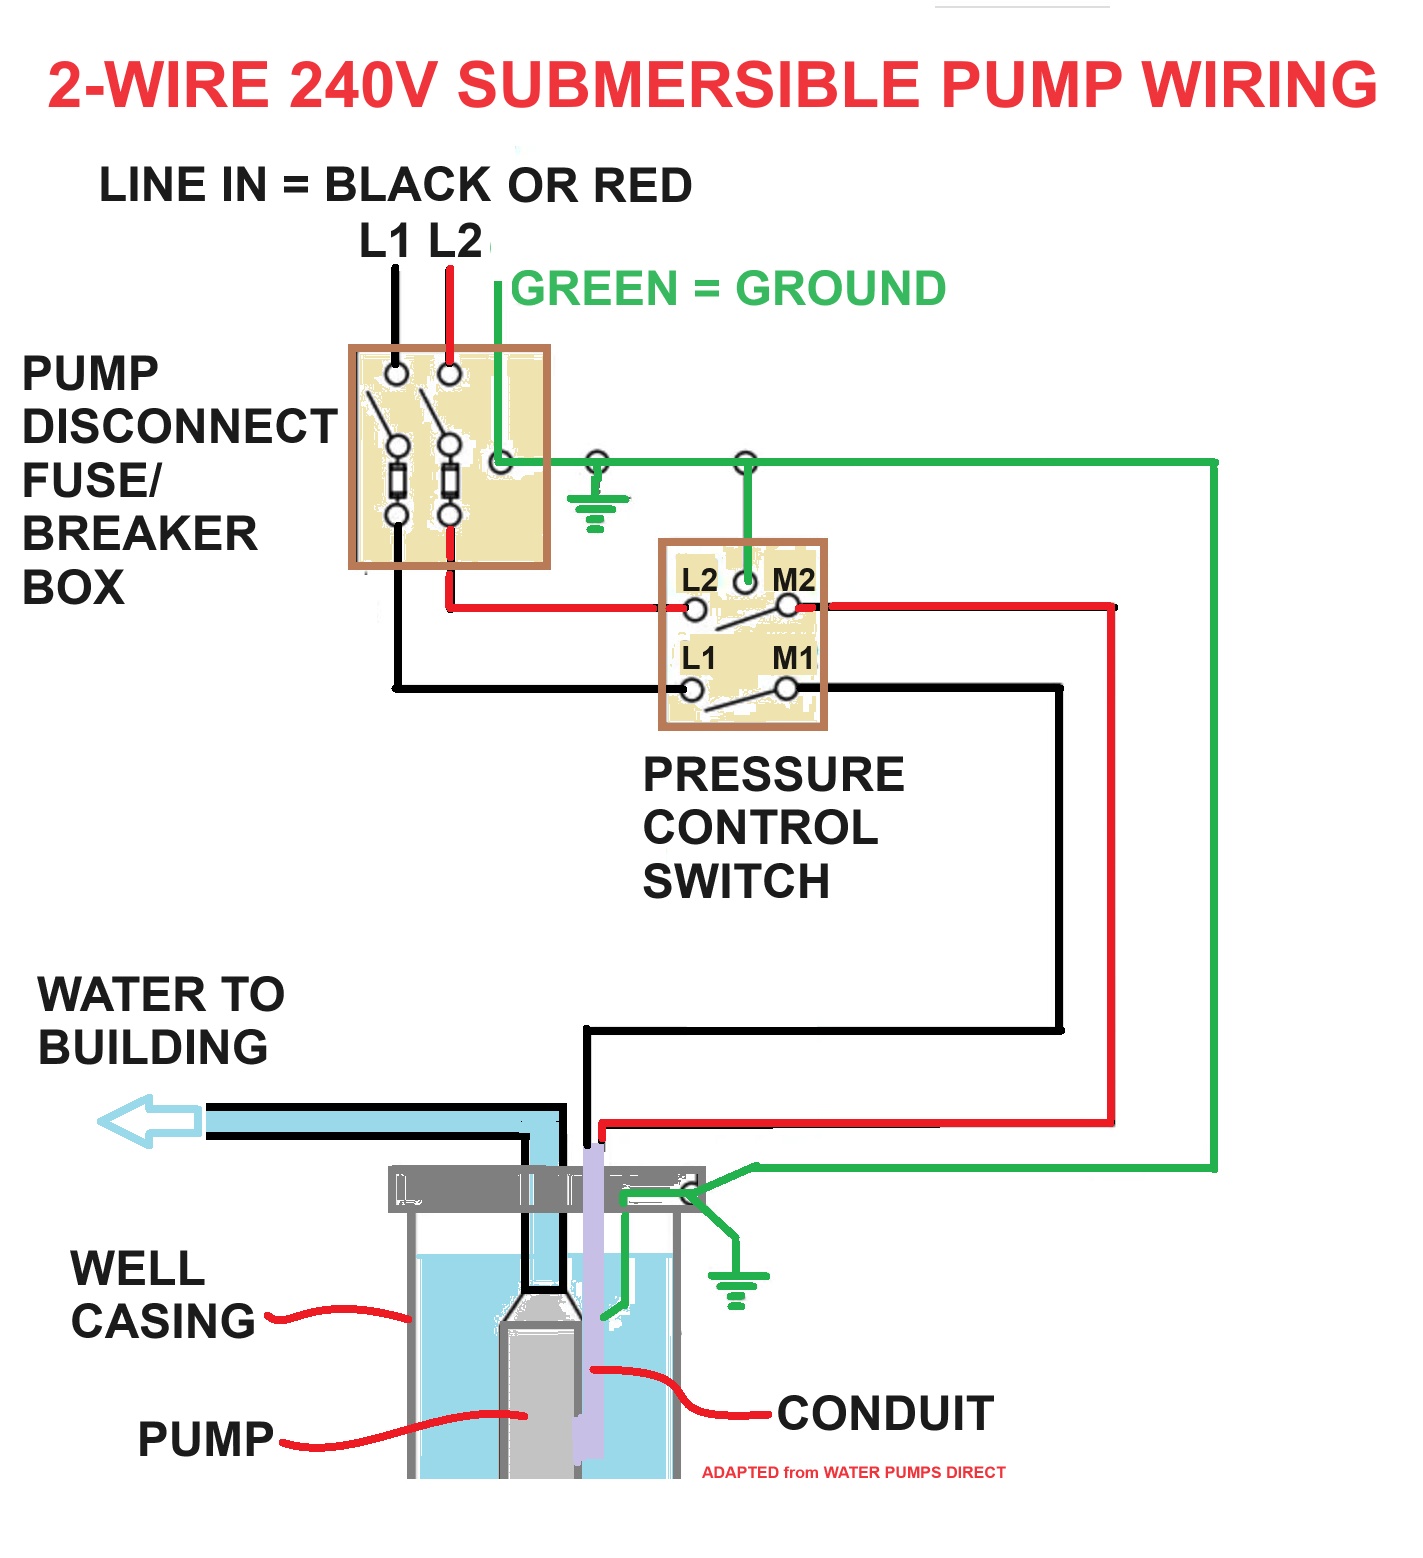
Electrical safety is critical. Most booster pumps require their own circuit.
Required electrical setup includes 120V or 240V depending on pump size, a dedicated breaker typically 15 to 20 amps, conduit from panel to pump with lock nut securing entry, and GFCI protection if installed outdoors or in damp areas.
Wiring steps: Turn off main power. Feed wires through conduit. Connect black wire to breaker terminal, white wire to neutral bar, and green wire to grounding screw on pump base. Tighten all connections and strip insulation cleanly.
Prime and Start the Pump
Never run a centrifugal pump dry. This can destroy the impeller and seals in seconds.
How to Prime the Pump
Fill the pump casing with water before first use. For all-in-one units, fill the system via the inlet until water flows out the top. Skipping this step risks cavitation, which creates air bubbles in the pump causing noise and damage.
Power Up and Adjust Pressure
Open the main water supply. Plug in or switch on the pump. Set pressure to maximum temporarily to test. Watch for initial spike, which is normal during stabilization. Use control panel buttons to lower to 50 to 75 psi, the ideal range.
On smart pumps, set cut-in and cut-out points for custom cycling.
Optimize Pressure and Monitor Performance
Once installed, fine-tune the system for consistent, safe operation.
Use Pressure Gauges for Diagnostics
Install gauges at the inlet to confirm incoming pressure and at the outlet to monitor delivered pressure targeting 50 to 75 psi. Sudden drops or spikes indicate leaks, clogs, or switch failure.
Prevent Over-Pressurization
Never exceed 75 psi at fixtures. If your home has a pressure reducing valve, adjust it to 75 psi or lower. Some municipalities require pressure reducing valves when supply exceeds 80 psi.
Over-pressurization can damage water heaters, dishwashers, and toilets.
Handle Multi-Fixture Demand
Test the system under load by opening kitchen faucet and bathroom shower simultaneously. Observe outlet gauge. Pressure should remain stable. The pump should respond instantly without lag. A well-sized booster maintains flow even during high-demand periods.
Troubleshoot Common Pump Issues
Even properly installed systems can develop problems. Use this guide to diagnose and fix fast.
No Pressure Increase
Possible causes include clogged inlet filter, air lock in pump, dry or unprimed pump, or failed impeller.
Fix by shutting off power, cleaning inlet screen, re-priming the pump, and checking for blockages in valves or pipes.
Pump Runs Continuously
Causes include hidden leak in plumbing, failed pressure switch, or waterlogged tank.
Solution involves inspecting for wet spots or dripping joints, replacing pressure switch if not shutting off at cut-out, and draining tank to re-pressurize air side.
Rapid Cycling
Cause is loss of air charge in diaphragm tank.
Fix by turning off pump and draining tank, checking air pressure with tire gauge, recharging to 2 psi below cut-in pressure, and restarting system.
Loud Noises or Vibrations
Causes include loose mounting, cavitation, or undersized piping.
Solutions include tightening pump feet and using anti-vibration pads, ensuring full priming before startup, and upgrading from 3/4-inch to 1-inch pipe if flow is restricted.
Maintain the System for Long Life
Regular checks prevent failures and extend pump life to 10 to 15 years or more.
Monthly Checks
Inspect pressure gauges for normal readings. Listen for unusual sounds or constant running.
Quarterly Maintenance
Look for leaks at joints and valves. Ensure pump is dry and free of moisture.
Annual Service
Test tank air charge. Clean inlet filter if equipped. Verify cut-in and cut-out pressures match settings. Inspect electrical connections for corrosion.
Stainless steel models require zero lubrication and resist corrosion.
Know When Not to Use a Booster Pump
A pump is not always the answer. Avoid installation if incoming pressure exceeds 75 psi, as it risks over-pressurization. Do not install if pipes are undersized or clogged; upgrade plumbing first. Avoid if multiple leaks exist; repair before boosting. Avoid if fixtures have low flow due to aerators; clean or replace first.
A booster amplifies what is already in the system. Fix restrictions first.
Compare Pump Options and Alternatives
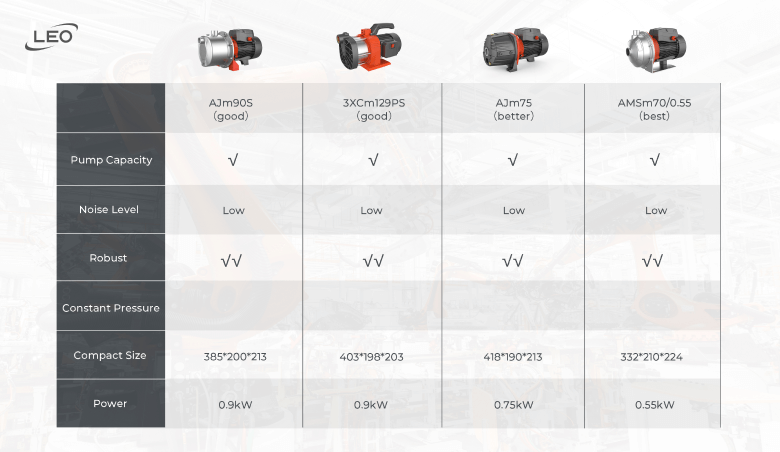
Different solutions work better for different situations.
• Booster pump works best for whole-house low pressure with high effect and costs $500 to $2,000
• Smart all-in-one works best for easy install and quiet use with very high effect and costs $800 to $1,500
• Adjust pressure reducing valve works best for slight pressure tuning with low effect and costs $0 to $50
• Clean aerators works best for weak shower only with localized effect and costs under $10
• Replace pipes works best for corroded plumbing with high effect and costs $1,000 to $5,000
• Constant pressure system works best for well water stability with highest effect and costs $1,500 to $3,000
For well owners, a constant pressure system is the gold standard, adjusting motor speed in real time for city-like flow.
Follow Safety and Code Requirements
Backflow Prevention
A check valve is mandatory when connecting to municipal lines. Some areas require RPZ devices for added protection.
Electrical Safety
Use proper wire gauge such as 12 AWG for 20A circuit. Seal conduit entries to prevent moisture. Ground the pump using the green wire and grounding screw.
Pressure Limits
Maximum safe pressure is 80 psi. Recommended maximum at fixtures is 75 psi. Install a pressure reducing valve if supply exceeds safe levels.
Exceeding limits voids warranties and risks burst pipes.
Key Takeaways for Increasing Water Pressure with a Pump
Successfully increasing water pressure with a pump requires measuring your current pressure first using a gauge at an outdoor spigot. Ideal readings fall between 50 and 60 psi, while anything below 40 psi indicates you need a booster.
Choose between a traditional booster pump with a separate diaphragm tank or a modern all-in-one smart unit. Traditional systems offer more customization and are cost-effective for DIY installation. Smart all-in-one units like the AQUASTRONG provide easier setup, quieter operation, and automatic protection features.
Installation demands proper plumbing connections including a check valve and pressure gauges, electrical wiring on a dedicated circuit, and correct positioning near the main water line. Always prime centrifugal pumps before first use to prevent catastrophic damage to the impeller.
Set your target pressure between 50 and 75 psi. Never exceed 80 psi at any fixture. Test the system under load by running multiple fixtures simultaneously to ensure stable pressure delivery.
Perform monthly, quarterly, and annual maintenance checks. Monitor tank air charge, inspect for leaks, and verify pressure settings remain accurate. With proper care, your pump system will deliver reliable performance for 10 to 15 years or longer.
For complex installations or uncertain diagnoses, consult a licensed plumber or contact a professional service provider.
Frequently Asked Questions About Increasing Water Pressure with a Pump
What is the ideal water pressure for a home?
The ideal water pressure for most homes ranges between 50 and 60 psi. Pressure below 40 psi is considered low and causes poor performance from fixtures and appliances. Pressure above 80 psi risks damage to plumbing and should be reduced using a pressure limiting valve.
Can a booster pump increase pressure from a well?
Yes. Booster pumps work effectively with well water systems. For well applications, consider a constant pressure system that adjusts pump speed in real time to maintain steady pressure. Ensure the pressure tank is properly pre-charged to 2 psi below the cut-in pressure for optimal performance.
How much does it cost to install a water pressure booster pump?
Traditional booster pump systems cost between $500 and $2,000 including materials and basic installation. Smart all-in-one units range from $800 to $1,500. Professional installation adds labor costs. Complex installations involving plumbing modifications may cost more.
How long does a booster pump last?
With proper maintenance, a standard booster pump lasts 10 to 15 years. Stainless steel models can last 15 years or longer due to corrosion resistance. Diaphragm tanks typically require replacement every 5 to 10 years if they become waterlogged.
Do I need a permit to install a booster pump?
Permit requirements vary by location. Many municipalities allow booster pump installation without a permit when connecting to existing plumbing. However, backflow prevention devices may be required by code. Always check local regulations before installation.