A failing check valve can cause pressure loss in your Coleman lantern, leaks in your pressure washer, or inconsistent flow in lab equipment. These small components regulate one-way flow in fuel, air, and fluid systems, but over time, varnish, corrosion, or mineral buildup can seize them in place.
Knowing how to remove a check valve properly protects your equipment from thread damage and housing cracks. This guide covers every proven method across lanterns, pressure washers, HPLC systems, and compressors. You’ll learn the right tools, chemical treatments, torque specs, and safety steps to get the job done right the first time.
Diagnose Before Removing
Before reaching for tools, confirm the check valve is actually the issue. Premature disassembly increases the risk of damage.
Test for Valve Failure
Use these field tests to determine if removal is necessary:
- Pump Rise Test (Coleman Devices): Pump 20 to 25 times, depress the handle fully without engaging the air stem, then rest a finger on the pump hole. A fast-rising handle confirms valve failure. A slow rise may only need cleaning.
- Breath Test (Removed Valves): Blow through both ends. Air should pass in one direction only. Bidirectional flow means the ball is stuck or the seat is pitted.
- Rattle Check: Shake the valve gently. A clear rattle means the internal ball or spring moves freely. Silence suggests it is seized by varnish or rust.
- Visual Inspection: Look for pitting, corrosion, or debris like leather shavings blocking the chamber.
Only proceed to removal if testing confirms failure or if cleaning in place fails.
Soak With Chemical Solvents
Never force a stuck valve without trying chemical loosening first. Many seized valves free up after proper soaking.
Choose the Right Cleaner
Match the solvent to the type of buildup:
- Carburetor Cleaner: Best for dissolving fuel varnish in lanterns and stoves. Fill the pump cylinder and let sit for hours or days. Avoid contact with paint or plating.
- Vinegar (5% Acetic Acid): Mild acid for light rust and mineral deposits. Soak for several hours. Safe for brass.
- CLR or Lime Away: Stronger option for hard water scale. Limit exposure to one hour. Rinse thoroughly with warm water afterward.
- Naval Jelly (Phosphoric Acid): Ideal for heavily corroded removed valves. Apply with a toothbrush, wait one hour, then rinse.
- Penetrating Oils (PB Blaster, Liquid Wrench): Soak threads overnight. Essential before any mechanical attempt.
- WD-40: Use sparingly for light internal rust on moving parts.
Apply With Precision
For in-fount valves, tilt the unit so the pump cylinder is upright. Fill nearly to the top with cleaner. Insert the pump slightly to push fluid past the valve into the inlet tube. Seal the top and let it sit. Agitate gently every few hours. After soaking, try the breath or pump test again. If it works, removal may not be needed.
Use Heat Carefully

Controlled heat expands the brass housing slightly, breaking the bond of seized threads.
Indirect Heat Method
Heat a steel rod (3/8″ or 1/2″) until red hot. Press it against the valve body for 1 to 2 seconds. Let cool completely for 15 to 30 minutes. Repeat 2 to 3 times if needed. This thermal cycling often loosens stubborn valves without risking damage.
Avoid Direct Flame
Never apply a torch directly. Solder joints in founts and pump tubes melt at low temperatures around 360°F. Excessive heat can warp or crack the housing, leading to leaks or total failure.
Remove With a Modified Screwdriver
For intact valves with usable slots, this is the first mechanical method.
Prepare the Tool
Grind a flathead screwdriver to fit snugly. For 8×32 valves, use about 1/8″ width. For 1/4″×32 valves, use about 7/64″ width. Ideal blade thickness is around 3/32″. Maximum width should not exceed 3/8″ to avoid fount damage.
Step-by-Step Removal
- Dry the area after soaking.
- Insert the screwdriver into the pump cylinder.
- Seat the blade fully in the slot.
- Tap the handle lightly with a hammer to set the bite.
- Apply firm downward pressure and turn counterclockwise.
- Use a wrench on the screwdriver shaft for extra leverage if needed.
Warning: If resistance is high, stop. Forcing it strips the slot, requiring destructive extraction.
Extract With an Easy-Out Tool

When the valve is seized or the slot is stripped, use a screw extractor.
Select the Right Size
| Valve Type | Recommended Extractor |
|---|---|
| 8×32 Threaded | #2 or #3 Easy-Out |
| 1/4″×32 Threaded | #4 Easy-Out |
| NRV (Rubber Pip) | #4 Easy-Out |
| Large Air Stem | #5 Extractor |
Drill and Extract
- Soak in penetrating oil overnight.
- Use a 5/32″ drill bit to create a pilot hole in the center.
- Drill about ½” deep. Use a drill extension if needed.
- Insert the easy-out (reverse-threaded).
- Tap lightly with a hammer to seat.
- Turn counterclockwise with a tap handle or socket wrench.
The extractor bites into the metal and pulls the entire assembly out, even if it is corroded.
Post-Extraction Cleanup
Remove brass shavings with a small brush or dental pick. Inspect threads in the housing. Run a tap if damaged. Flush with solvent to clear debris.
Use a Locking Removal Tool
The safest, most reliable method, especially for vintage units.
Commercial Tools
Tools from Old Coleman Parts (OCP) or custom designs lock securely into the valve. The double-ended bit fits the slot or threads. A spacer and wingnut secure the tool. A wrench turns the entire assembly, pulling the valve straight out. Success rate is nearly 100%, preventing cam-out and slot stripping.
DIY Version
Make your own with a 1/2″ steel rod (6″ long), two matching nuts, one washer, and a drill and tap set. Drill a hole through the rod to fit the valve stem. Thread one nut onto the rod, add the washer, then the second nut. Insert the rod through the stem and tighten the nuts against the washer to grip. Turn the rod counterclockwise to unscrew the valve. This method applies even pressure and avoids damaging surrounding parts.
Replace Pressure Washer Check Valves
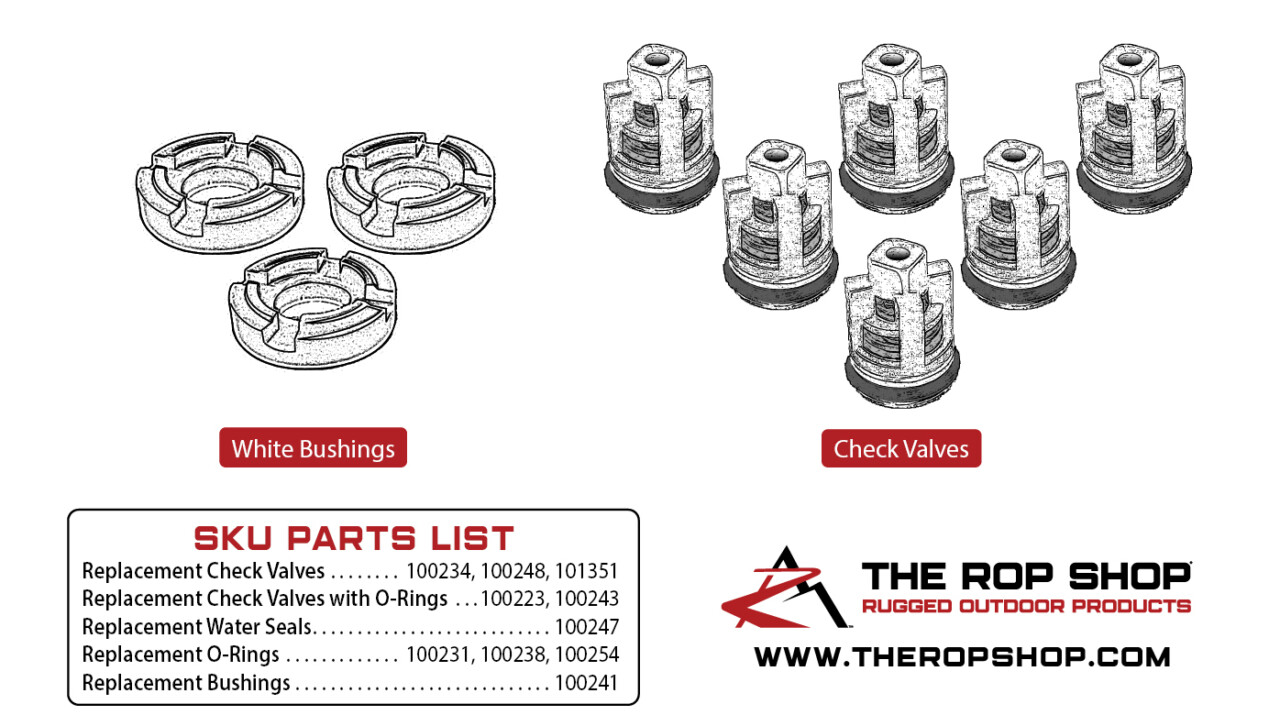
These operate under high stress and often fail due to calcium buildup.
Shut Down Safely
Elevate the engine to prevent oil leaks. Turn off and disconnect power. Relieve all system pressure before disassembly.
Disassemble the Pump Head
- Remove bolts with an Allen wrench.
- Rock the head gently to separate it from the body.
- Pull out bushings and water seals, noting orientation.
- Extract check valve assemblies (seal, housing, spring, ball).
They may come out as a unit or in pieces.
Clean the Manifold
Use a toothbrush and a CLR/water mix to scrub calcium deposits. Rinse thoroughly and dry completely.
Install New Valves
On the discharge side, insert the seal first. Press gently until seated. Torque the plug to 219 in-lbs. On the suction side, insert valves into openings. Seat gently. Install black seals with the grooved side down. Reinstall bushings with grooves facing out. Align the head with pistons. Apply blue Loctite to bolts. Torque head bolts to 221 in-lbs and do not exceed this value.
Test Immediately
Run with water flowing. Check for leaks and pressure stability. Never operate dry.
Service HPLC and Compressor Valves

High-precision and high-pressure systems require specialized care.
HPLC Pump Check Valves (Vanquish Systems)
- Flush the pump head with solvent using the purge function.
- Stop flow and wait for pressure to drop to zero.
- Use a Size 13 open-end wrench to remove the check valve nut.
- Extract the cartridge with tweezers.
- Replace with a new cartridge and nut if worn.
These are precision parts. Do not reuse if seals are compromised.
Bauer Air Compressor Valves
Use a DIY rod-and-nut tool. Take a 1/2″ steel rod, two nuts, and one washer. Drill a center hole to fit the valve stem. Insert the rod and tighten nuts against the washer to grip. Turn counterclockwise. This works for both intake and discharge valves and prevents damage to delicate manifolds.
Upgrade and Reinstall
Once removed, improve performance and longevity.
Clean and Inspect
Soak in vinegar or naval jelly. Rinse with water, then alcohol to dry. Check the ball, spring, and seat for wear.
Add a Viton O-Ring
Many vintage valves lack O-rings. Upgrade with Viton material (chemical and heat resistant) at 1.5mm width, 7mm ID, and 10mm OD. This improves sealing and reduces reliance on the air stem.
Reinstall Correctly
Hand-tighten only. Over-tightening strips soft brass threads. Test with pump rise or breath test before full reassembly.
Avoid Common Mistakes
Even experienced users make errors that damage equipment.
- Using a standard screwdriver: Too wide or thick, which guarantees slot stripping.
- Skipping chemical soak: Increases risk of breakage.
- Applying direct flame: Melts solder and ruins founts.
- Over-torquing bolts: Strips aluminum threads in pressure washers.
- Reusing damaged O-rings: Causes immediate leaks.
- Ignoring air stem function: Many assume the check valve must seal perfectly, but the air stem provides the final seal.
Frequently Asked Questions About Check Valve Removal
What is the easiest way to remove a stuck check valve?
The easiest method is chemical soaking followed by a modified screwdriver. Soak the valve in penetrating oil overnight, then use a properly sized flathead screwdriver with firm downward pressure and counterclockwise turns. If the slot strips, switch to an easy-out extractor.
Can you remove a check valve without destroying it?
Yes, using a locking removal tool. Commercial tools from Old Coleman Parts or DIY versions with a steel rod, nuts, and washer lock into the valve and unscrew it cleanly. Success rates approach 100% with these methods, preserving the original valve.
What dissolves varnish in check valves?
Carburetor cleaner is the most effective solvent for fuel varnish. Fill the pump cylinder and let it sit for several hours or days. For removed valves, naval jelly (phosphoric acid) works well on heavy oxidation. Vinegar handles light rust and mineral deposits.
How do you remove a check valve from a pressure washer?
Disconnect power and relieve pressure. Remove the pump head bolts with an Allen wrench. Rock the head gently to separate it. Extract the check valve assemblies from the manifold. Clean calcium deposits with CLR, then install new valves with proper torque specs (219 in-lbs for plugs, 221 in-lbs for head bolts).
What size easy-out do I need for a check valve?
Use a #2 or #3 easy-out for newer 8×32 threaded valves. Use a #4 easy-out for older 1/4″×32 valves and NRV (rubber pip) valves. Use a #5 extractor for large vintage air stems with soldered heads. Always drill a 5/32″ pilot hole first.
Why does my check valve keep seizing?
Seizing happens due to fuel varnish buildup, rust, or mineral deposits. In vintage Coleman lanterns, decades of fuel residue create hard deposits. In pressure washers, calcium buildup is the main culprit. Regular cleaning and proper storage prevent recurrence after removal.
Key Takeaways for Successful Check Valve Removal
Knowing how to remove a check valve correctly preserves your equipment and saves money. Start with diagnostic tests to confirm the valve is truly the problem. Always attempt chemical soaking before mechanical force. Use the right extractor size for your specific valve type. For vintage units, invest in a locking removal tool to preserve original parts.
For pressure washers, follow torque specifications exactly and never exceed 221 in-lbs on head bolts. Test all systems immediately after reassembly to catch leaks early. With the right approach, even the most stubborn check valve can be removed cleanly and replaced for years of reliable service.