Is your water tank overflowing or your pump running dry? A faulty float switch is often the culprit behind these frustrating water level issues. This small device controls your pump automatically, and when it fails, you risk significant water waste or equipment damage.
You can learn how to fix float switch in water tank systems with simple tools and this guide. We will cover testing continuity, adjusting counterweights, rewiring for correct operation, and sealing leaks to restore full automation.
Diagnose Float Switch Failure Symptoms
Confirm the float switch is the actual problem before disassembling your system. Many pump issues mimic switch failure but stem from electrical faults or clogged lines instead.
Check Pump Behavior Patterns
Observe how your system responds to changing water levels to identify the root cause.
* Pump runs nonstop: Likely caused by a float stuck in the “up” position or wiring set to Normally Open.
* Pump never starts: Possible broken wire, blown fuse, or switch stuck in the open position.
* Pump cycles rapidly: Indicates turbulence or float bouncing near inlet jets.
If the pump ignores water level changes but works manually, the float switch is probably at fault.
Test Switch Continuity with Multimeter
Use a multimeter to verify electrical function safely and accurately.
1. Turn off power at the Miniature Circuit Breaker (MCB).
2. Disconnect wires from the switch completely.
3. Set multimeter to continuity or ohms mode.
4. Clip probes to blue (common) and black (switched) wires.
5. Manually lower the float to see continuity near 0 Ω.
6. Raise the float to confirm an open circuit reading.
No change in reading means the internal tilt switch is damaged or debris prevents movement.
Inspect for Physical Obstruction
Remove the access panel and visually check the float mechanism for binding.
* Is the float tangled in tank supports or inlet pipes?
* Does it move freely up and down the tether?
* Are grease, sludge, or algae coating the float surface?
In wastewater tanks, MAC5 models resist clogging better than MAC3, but buildup still occurs over time. Clean with a soft brush and rinse thoroughly.
Adjust Float Switch Settings Accurately
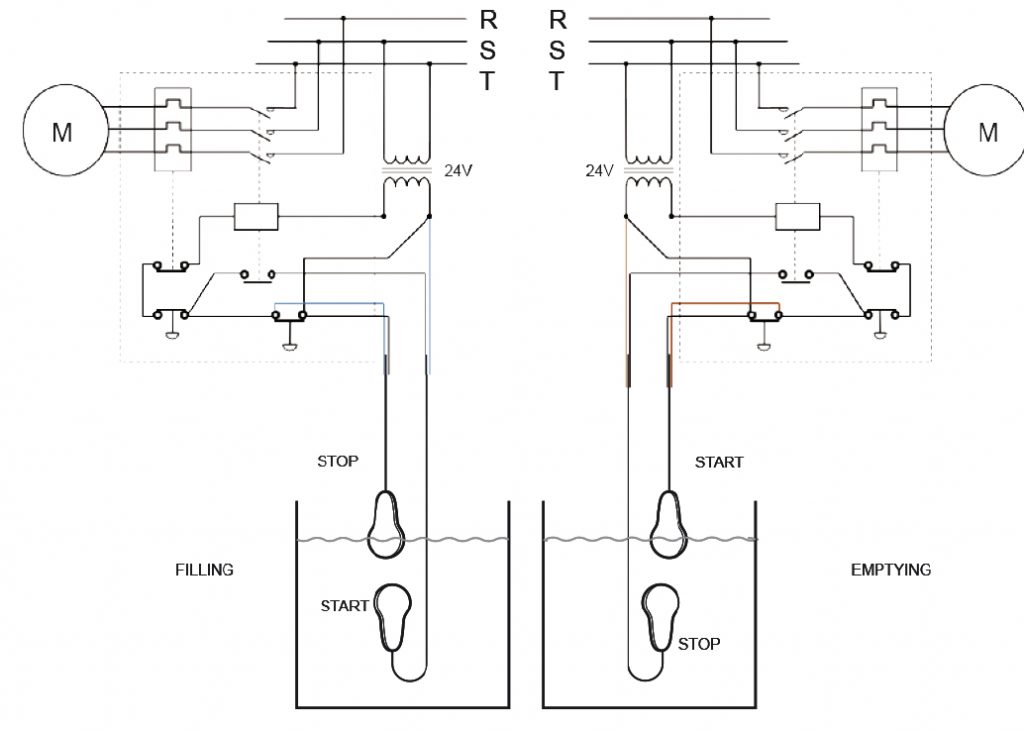
Even a working float may cause problems if improperly adjusted for your specific tank needs. Wrong water levels lead to overflow or dangerous dry-running conditions.
Set Pump-Off Water Level
The counterweight position controls exactly when the pump shuts off during filling.
* Move counterweight up the cable to lower the cutoff point so the tank stops filling sooner.
* Move counterweight down to raise the cutoff point so the tank fills higher.
Use a ruler or laser level to align the counterweight with your desired maximum water line. Aim for ±2 mm accuracy for best results.
Adjust Pump-On Water Level
The cable length between the anchor and float determines when the pump restarts.
* Longer cable allows the float to drop further, creating a lower restart level.
* Shorter cable stops the float higher, creating a higher restart level.
Trim or re-secure the tether to achieve the correct low-water mark. Note that cable length does not affect shutoff, as only the counterweight controls that.
Prevent False Triggers from Turbulence
Strong inflow can jiggle the float and cause erratic cycling in your system.
* Position the float away from direct inlet flow paths.
* Use a stilling well or vertical guide tube to stabilize movement.
* Select MAC5 switches for sewage applications to reduce false triggers.
Rewire for Correct Operation Mode

Wrong wiring turns a Normally Closed switch into a Normally Open one, causing continuous pump operation. Fixing this wiring error is quick and essential for proper function.
Connect for Fill Control Mode
For standard tank filling, you must use the Normally Closed (NC) configuration.
* Connect blue and black wires to complete the circuit when the float is down.
* Leave the brown wire disconnected unless using reversible or changeover models.
This ensures the pump runs when water is low and stops automatically when full.
Verify Contactor Wiring Sequence
Larger systems often use a contactor to handle higher electrical loads safely.
1. Run Phase and Neutral from MCB to contactor terminals 1 and 3.
2. Connect pump to contactor outputs 2 and 4.
3. Link terminal 1 to coil terminal A1.
4. Connect terminal 3 to float switch blue wire.
5. Connect float switch black wire back to terminal 3 to complete the coil circuit.
When the float drops, the circuit closes, energizing the coil and starting the pump.
Direct Wire Small Pumps
Submersible or small transfer pumps often connect directly without a contactor.
* Join pump blue to float blue.
* Connect pump purple (live) to float black.
* Ensure proper grounding for safety.
No polarity sensitivity exists in the switch itself, but correct phase and neutral alignment matters for motor life.
Seal and Prevent Water Leaks
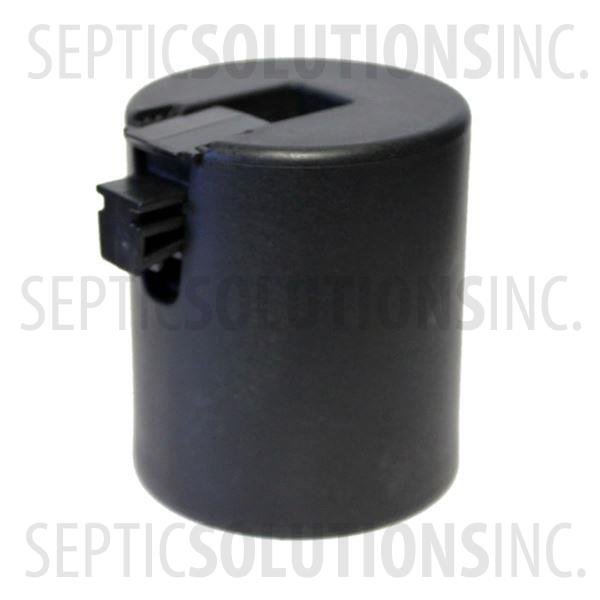
A leaking gland seal leads to water damage, corrosion, and serious electrical hazards. Fixing the seal ensures long-term reliability for your system.
Inspect Gland Seal Integrity
Check the internal components after removing the float switch from the tank.
* Inspect the internal black plastic flap inside the gland carefully.
* Replace if displaced or cracked since it will not compress properly.
A damaged flap allows water to travel down the wire into your electrical connections.
Reassemble with Proper Wire Fit
Mismatched wire diameter causes leaks at the entry point of your tank.
* Use replacement wire close to the original gauge for best fit.
* Apply sealant like molly coat to the flap if wire sizes differ.
* Reinstall gland nut securely with a hand-tight plus quarter turn.
Test for leaks by simulating operation and monitoring for drips over one hour.
Upgrade for Outdoor Use
Exposed or humid environments require extra protection for electrical components.
* Install a weatherproof enclosure for all electrical connections.
* Use GFCI protection on the circuit to prevent shock hazards.
* Wrap connections with heat shrink tubing or waterproof tape.
Replace or Upgrade Components
Repair is not always enough, and replacement or system upgrades may restore full function.
Choose Right Model for Application
Match the switch to your specific water type for best performance.
* MAC3: Best for clean water tanks like rainwater or potable supply.
* MAC5: Designed for wastewater, grease, or solids with built-in counterweights.
Avoid using MAC3 in sewage applications as it is prone to jamming from debris.
Install Dual-Level Monitoring
Advanced control requires multiple activation points within the same tank.
* Use a stem-mounted float switch with multiple floats.
* Set one float for low-level alarm and another for pump activation.
* Ideal for large tanks needing staged pumping or dry-run alerts.
Consider Low-Pressure Cut-Off Alternative
Install a low-pressure safety switch in systems where float switches fail often.
* Attaches to pump discharge line to detect pressure drops.
* Cuts power if pressure drops, indicating a dry run condition.
* Requires manual reset, which is not ideal during showers but prevents burnout.
Use this alongside a float switch for dual protection against failure.
Test and Maintain System
Final verification ensures safe and lasting operation for your water management system. Regular upkeep prevents future failures and extends component life.
Simulate Full Operation Cycle
Restore power and verify system function through a complete cycle.
1. Drain tank slightly or manually lower float.
2. Pump should start immediately upon lowering.
3. Raise float fully to ensure pump stops within seconds.
4. Watch for smooth transition with no delay.
Repeat this process two to three times to confirm consistency.
Schedule Preventive Maintenance
Extend float switch life with routine checks and cleaning schedules.
* Monthly: Visually inspect float movement and cable tension.
* Quarterly: Clean float and check for wear or cracks.
* Annually: Test continuity, verify seal condition, and inspect wiring.
Double the frequency in harsh environments with high grease or solids.
Document Adjustments and Settings
Keep a log of all changes made to your system configuration.
* Record counterweight position in centimeters from anchor.
* Note cable length and date of last test.
* Track any wiring changes or part replacements.
This helps speed up future troubleshooting and ensures consistent performance.
Frequently Asked Questions About Float Switch Repair
Why does my pump run continuously without stopping?
This usually means the switch is wired as Normally Open instead of Normally Closed. Check your wiring connections and ensure the blue and black wires are configured for NC mode. Debris stopping the float from rising can also cause this issue.
How do I adjust the water level where the pump turns off?
Move the counterweight on the cable to change the shutoff point. Moving it up lowers the water level, while moving it down allows the tank to fill higher. Adjust in small increments and test until you reach the desired level.
Can I use a MAC3 float switch for wastewater?
No, you should avoid MAC3 models in sewage or high-solid applications. Use a MAC5 switch instead, as it features a built-in counterweight and design that resists jamming from grease and solids.
What causes water to leak around the float switch wire?
A displaced internal black plastic flap or mismatched wire gauge often causes gland leaks. Inspect the flap, apply sealant if needed, and ensure the wire diameter matches the gland specification tightly.
How often should I test my float switch system?
Perform a visual inspection monthly and a full operational test annually. Harsh environments with grease or solids require quarterly checks to prevent unexpected failures and flooding.
Key Takeaways for Fixing Your Water Tank Float Switch
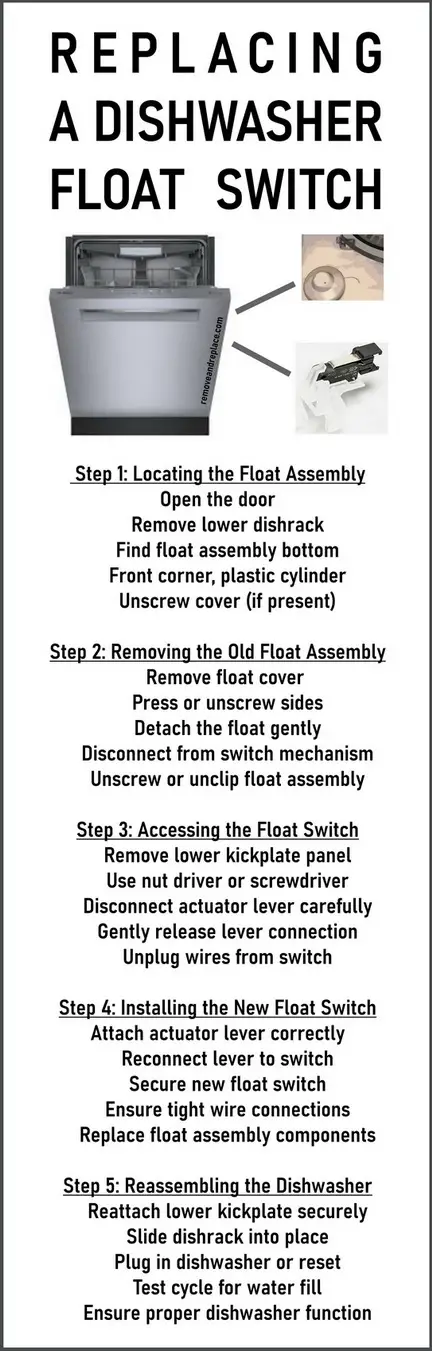
Fixing a float switch requires diagnosing the failure mode, adjusting settings, and ensuring proper sealing. You now know how to test continuity, position counterweights accurately, and wire your system for safe fill control.
Regular maintenance prevents costly water damage and pump failure. Start by inspecting your float movement today and schedule your next quarterly cleaning to keep your system running smoothly.