If your water tank overflows continuously or the fill pipe hisses loudly, you likely need to change a ball valve in a water tank. This issue often stems from a worn float valve inside residential loft tanks or a failing shut-off valve on industrial outlets. Ignoring these signs leads to significant water waste and potential property damage.
This guide explains exactly how to identify your specific valve type and replace it safely. You will learn the precise steps for both residential float valves and industrial ball valves to ensure a leak-free repair.
Identify Your Valve Type Before Starting
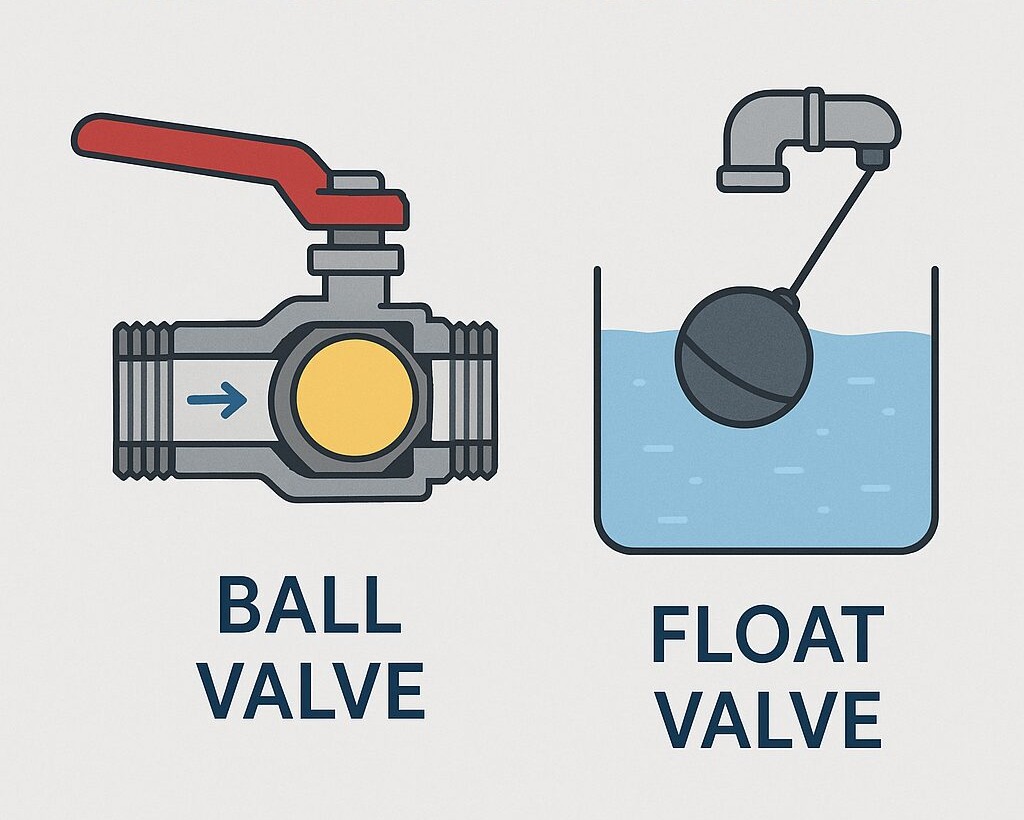
Correctly identifying your valve prevents buying the wrong parts and ensures you follow the right safety steps. The term “ball valve” often causes confusion between internal level controls and external flow controllers.
Residential Float Valve (Ballcock)
These units sit inside cold water storage tanks, typically in lofts. They use a floating arm to stop water flow when the tank is full.
* Common signs: Overflow pipe dripping, hissing noises, or water levels rising too high.
* Standard models: Pegler Part 2 is common in many UK homes.
Industrial Shut-Off Ball Valve
These are quarter-turn valves located on outlet pipes outside the tank. They isolate flow for maintenance and handle higher pressures.
* Common types: Flanged connections for large tanks or threaded ends for smaller setups.
* Materials: Often made from stainless steel, carbon steel, or PVC.
Shut Off Water Supply Safely
Safety is your top priority when working with water systems. You must isolate the water source completely before touching any components.
Isolate Residential Supply
- Locate the stopcock: Find the main cold water valve, usually under the kitchen sink.
- Close the valve: Turn the handle clockwise until it stops completely.
- Verify isolation: Press the float arm down inside the tank. No water should enter.
- Remove the lid: Lift the tank cover carefully to access the valve.
Pro Tip: Use a head torch in dark attics. Dropping a tool can crack the plastic tank.
Lockout Industrial Systems
- Implement LOTO: Lock out and tag all inlet valves to prevent accidental restart.
- Depressurize the line: Open a downstream drain to release system pressure.
- Drain below valve: Lower the water level at least 6 inches below the valve location.
- Confirm zero energy: Check gauges to ensure no pressure remains in the pipe.
⚠️ Warning: Never work on a pressurized industrial line. High-pressure water can cause severe injury.
Remove the Old Valve Components

Removing the old unit requires care to avoid damaging the tank or surrounding pipes. Use the correct technique for your specific connection type.
Extract a Residential Float Valve
- Steady the body: Hold the valve inside the tank with slip joint pliers.
- Loosen the back nut: Turn the outer nut counter-clockwise with an adjustable spanner.
- Unscrew the unit: Twist the valve out by hand once the nut is loose.
- Inspect the nut: Reuse the back nut only if it shows no cracks or stripping.
✅ Visual cue: Check for corrosion or a warped washer inside the old valve body.
Disconnect an Industrial Ball Valve
- Threaded valves: Use two pipe wrenches. Hold the tank nozzle steady with one wrench while turning the valve with the other.
- Flanged valves: Loosen bolts in a star pattern to prevent gasket warping. Remove bolts and the old gasket.
🛠️ Pro Tip: Take a photo before disassembly. This helps you remember bolt patterns and orientations.
Install the New Valve Correctly

Proper installation prevents future leaks and ensures the valve operates smoothly. Follow these steps to fit your new component securely.
Fit a New Float Valve
- Insert the valve: Push the new unit through the inlet hole from inside the tank.
- Hand-tighten first: Screw it in by hand to avoid cross-threading the plastic.
- Secure with back nut: Tighten with a spanner just past hand-tight.
- Do not overtighten: Excessive force cracks plastic bodies.
- Attach the arm: Connect the float arm and clip the float onto the end.
🔧 Adjustment note: If the overflow attachment is bulky, install it after securing the main valve body.
Install an Industrial Ball Valve
- Threaded connection: Clean threads with a wire brush. Wrap 6 full turns of PTFE tape clockwise on male threads. Hand-thread the valve, then tighten with two wrenches.
- Flanged connection: Place a new gasket matching your fluid type. Align flanges and insert bolts hand-tight. Torque bolts in a star pattern.
✅ Flow tip: Open the valve slightly before final tightening to equalize pressure in high-flow systems.
Set Float Level and Test System
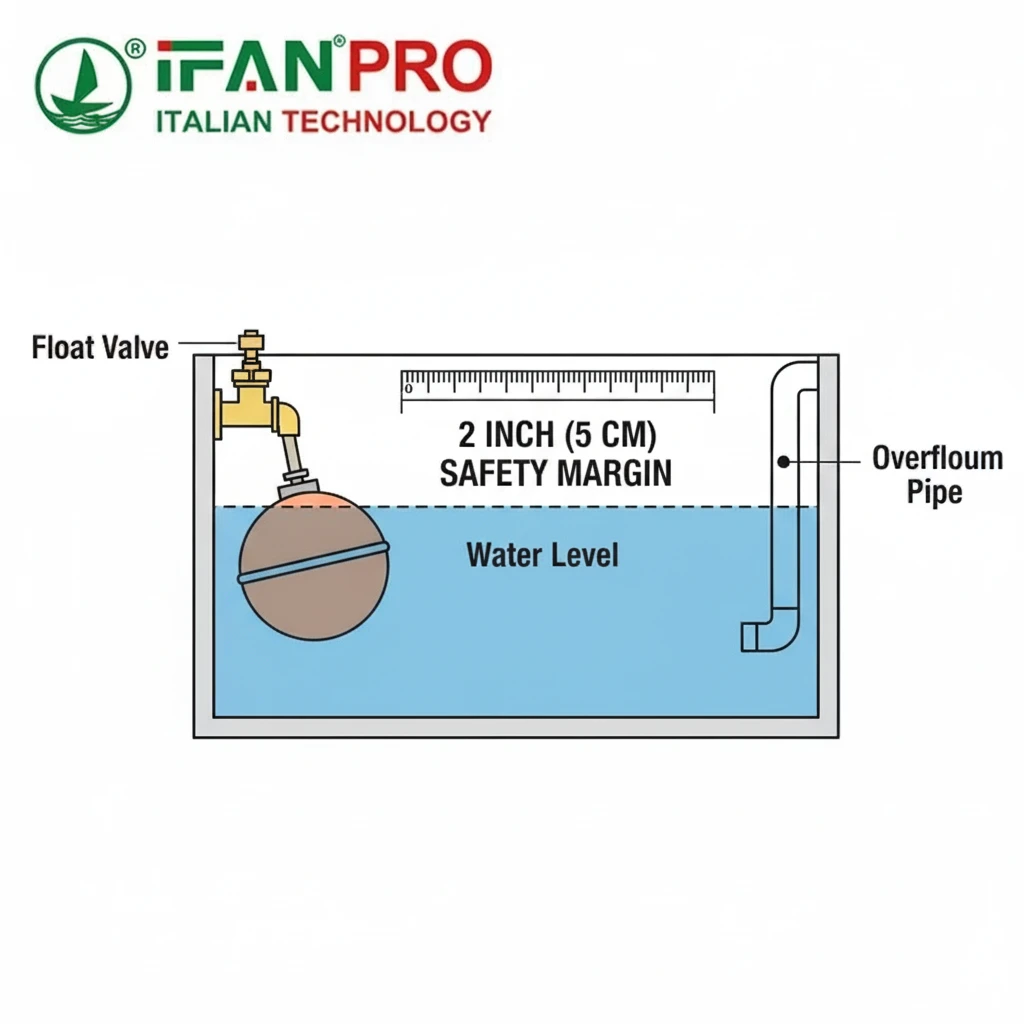
Testing confirms your repair was successful. You must adjust the water level to prevent overflow while ensuring adequate capacity.
Adjust Water Height
- Set the gap: Aim for a 50mm (2 inches) gap between water and the overflow pipe.
- Adjust the arm:
- Plastic arm: Turn the adjustment screw to raise or lower the level.
- Brass arm: Gently bend the arm down to lower the level or up to raise it.
- Check movement: Ensure the float does not rub against tank walls.
🚫 Common mistake: Setting the float too high causes constant overflow and water waste.
Test the Repair
- Restore supply: Slowly open the main stopcock or inlet valve.
- Watch the cycle: Water should rise smoothly and stop exactly at your set level.
- Check for leaks: Inspect the valve base and overflow pipe for any dripping.
- Fine-tune: Lower the float slightly if the valve fails to shut off promptly.
🕒 Time estimate: A beginner can replace a float valve in 20 to 40 minutes.
Prevent Future Valve Failures
Choosing the right materials and avoiding common errors extends the life of your repair. Proper selection matches the valve to your specific water conditions.
Choose the Right Replacement
- Residential: Match the model exactly, such as Pegler Part 2. Brass arms offer durability.
- Industrial: Use 316 stainless steel for potable water. Select flanged connections for tanks over 2 inches.
- Avoid: PVC in high-pressure or outdoor UV-exposed areas.
Avoid Costly Mistakes
- ❌ Do not reuse old gaskets: They are the primary cause of new leaks.
- ❌ Do not overtighten plastic: Hand-tight plus a slight turn is sufficient.
- ❌ Do not skip PTFE tape: Even “self-sealing” threads need tape for a perfect seal.
- ❌ Do not ignore support: Heavy valves need pipe hangers to prevent nozzle stress.
🔩 Pro insight: Misalignment and lack of support cause most industrial valve failures.
Troubleshoot Common Installation Issues

Even careful installers face issues. These solutions address the most frequent problems encountered after replacement.
Valve Won’t Shut Off
- Cause: Float set too high or waterlogged float.
- Fix: Lower the float arm or replace the float if it sloshes when shaken.
Dripping Overflow
- Cause: Worn washer or debris in the valve seat.
- Fix: Flush the valve or replace the unit entirely if it is a cheap residential model.
Leaking Threads
- Cause: Insufficient or misapplied PTFE tape.
- Fix: Disassemble, clean threads, reapply 6 turns of tape, and retighten.
Noisy Filling
- Cause: High water pressure or worn internal parts.
- Fix: Install a pressure-reducing valve if pressure exceeds 50 psi.
📊 Performance benchmark: A well-installed valve shuts off instantly and operates silently.
Maintain Valve Longevity
Regular maintenance keeps your water system efficient. Simple checks prevent minor issues from becoming major failures.
Regular Checks
- Monthly: Inspect residential floats for waterlogging.
- Quarterly: Cycle industrial valves to prevent seizing.
- Annually: Check carbon steel units for corrosion signs.
When to Call a Pro
- Flanged valves on high-pressure industrial systems.
- Corroded or cracked tank nozzles.
- Custom requirements for high temperature or chemical media.
- Pneumatic or electric actuated valves.
💡 Expert note: Use eccentric ball valves for sediment-heavy water to reduce cavitation.
Frequently Asked Questions About Changing Ball Valves
How do I know if I need to change the ball valve or just adjust it?
If adjusting the float arm does not stop the overflow or if the valve body itself is leaking, you must change the ball valve in the water tank. Minor noise might only need adjustment, but physical leaks require replacement.
Can I use PTFE tape on plastic threaded valves?
Yes, you should use PTFE tape on plastic threads to ensure a watertight seal. Apply 6 turns clockwise to the male threads before assembly to prevent leaks without cracking the plastic.
What is the correct water level in a residential tank?
The water level should stop approximately 50mm (2 inches) below the top of the overflow pipe. This gap prevents waste while ensuring the tank fills adequately.
Why does my new industrial valve leak at the threads?
This usually happens due to insufficient PTFE tape or uneven tightening. Disassemble the connection, clean the threads, apply fresh tape, and tighten using two wrenches to avoid misalignment.
How often should I replace a residential float valve?
You do not need to replace them on a schedule. Replace the unit only when it fails to shut off, makes excessive noise, or shows visible wear like a waterlogged float.
Key Takeaways for Changing Your Ball Valve
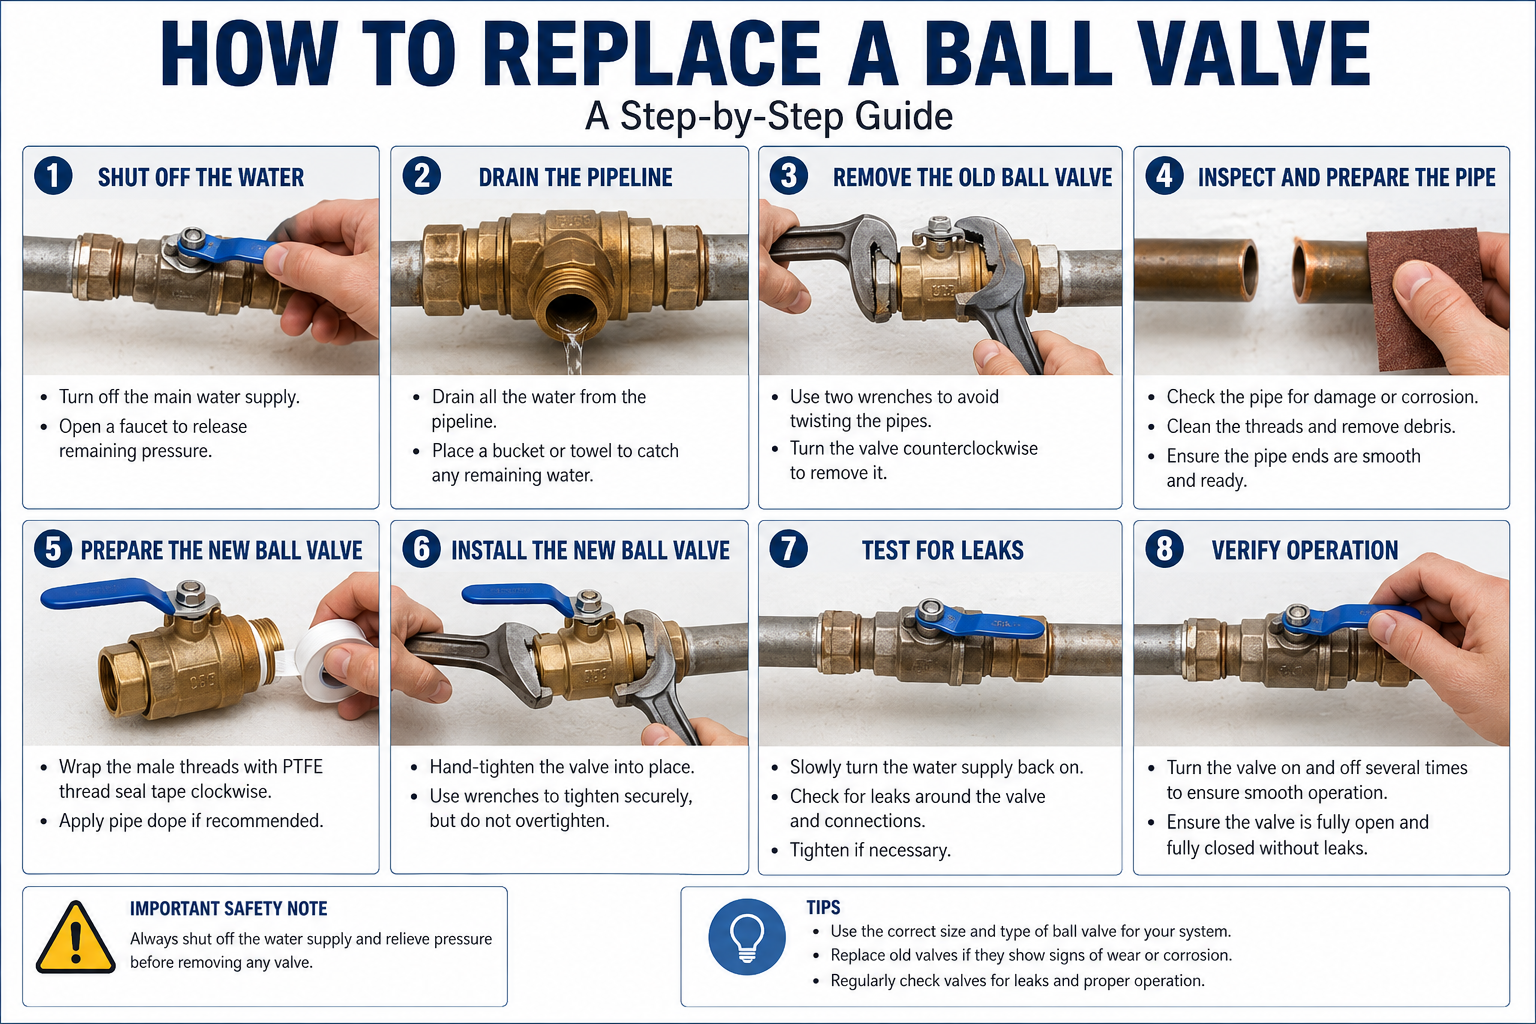
Successfully learning how to change a ball valve in a water tank saves water and prevents damage. Always identify whether you have a residential float valve or an industrial shut-off valve before starting. Follow strict safety protocols like locking out industrial systems and verifying water isolation.
Remember to use two wrenches on threaded connections and avoid overtightening plastic parts. With the right preparation and careful adjustment, your new valve will provide reliable service for years. Gather your tools and start your repair today to stop water waste immediately.