You turn on the faucet, but nothing comes out. Power is on, the breaker has not tripped, yet no water flows. If your well pump is not starting or shuts off unpredictably, the water pump pressure switch not working is likely the culprit. This small component controls when your pump turns on and off based on system pressure, and when it fails, your entire water supply halts.
A faulty pressure switch can cause your pump to run nonstop, short cycle every few minutes, or not start at all. These issues mimic other problems like a failed pump or waterlogged tank, making diagnosis tricky. But with the right steps, you can pinpoint and fix the issue in under an hour without calling a plumber. This guide walks you through how to diagnose, test, and replace a failed pressure switch using proven methods from real-world repairs.
Diagnose Power and Pump Response

Before replacing any parts, confirm where the failure lies. A quick electrical check separates switch problems from deeper issues like pump motor failure or broken well wiring.
Test Voltage at the Switch
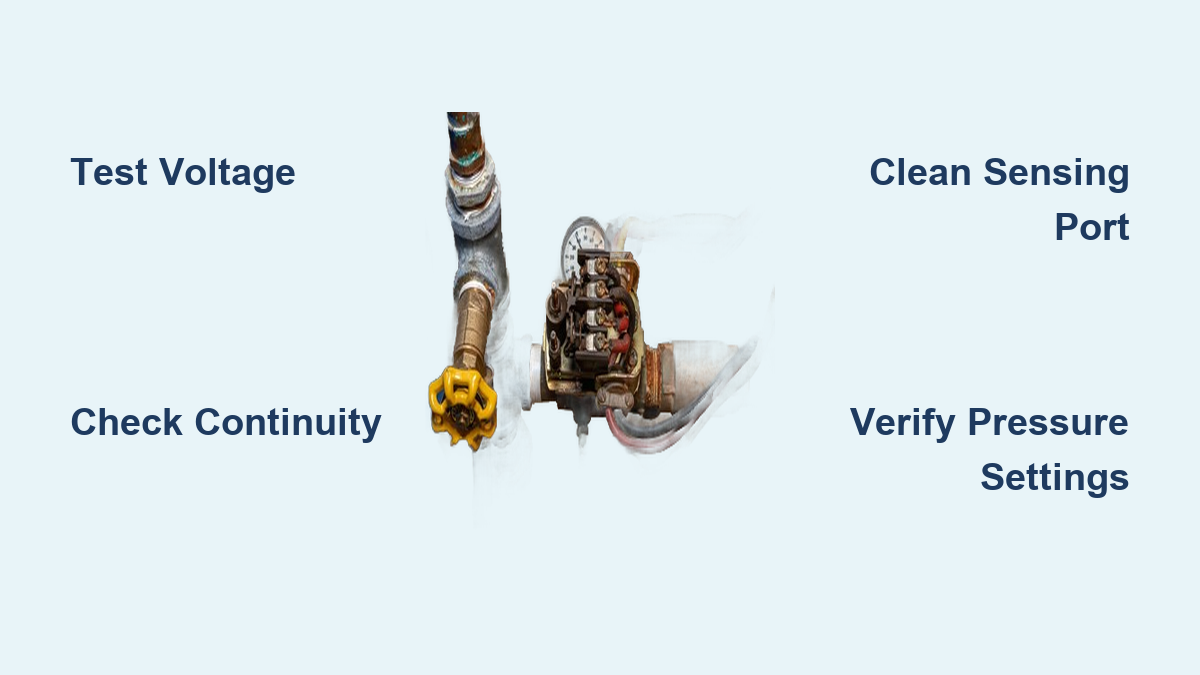
Turn off power at the breaker. Remove the pressure switch cover and inspect for burnt wires or corrosion. Use a multimeter to test voltage across the two main terminals. In a 240V system, each leg should read 120V to ground. If one reads 0 to 80V, a broken wire in the well line may be the real issue. Restore power and recheck. No voltage means the problem is upstream, so check the breaker, fuse, or disconnect first.
Measure Amperage with Clamp Meter
Use a clamp ammeter on one hot lead while the system tries to start. A half-horsepower pump draws approximately 6.2A running and up to 20A surge at startup. Zero amps with voltage present means the switch is not closing, the motor is not receiving power, or the pump itself is dead. This test confirms whether the switch is sending the start signal to the pump motor.
Bypass the Pressure Switch
Disconnect power. Label and remove wires from the switch. Connect the pump leads directly to the power source using wire nuts or a junction box. If the pump runs, the pressure switch is faulty. If it does not run, the problem lies with the pump, wiring, or power supply. This bypass test definitively isolates the switch as the root cause.
Identify Failure Symptoms

Pressure switch issues show specific behavioral patterns. Matching your symptoms to these patterns helps narrow down the exact cause and determine whether replacement is necessary.
Pump Will Not Start
No sound, no vibration. Power is on, but nothing happens when pressure drops. Likely causes include burnt contacts, an open circuit, or a clogged sensing port. Check continuity below cut-in pressure. The switch should show a closed circuit when pressure is low.
Continuous Pump Running
The pump never shuts off, even after water flow stops. The cut-out pressure is not being reached due to welded-shut contacts, a faulty diaphragm, or a failed check valve letting water back into the well. Even after switch replacement, persistent running points to check valve failure or pump damage, not the switch itself.
Rapid Short Cycling
The pump turns on and off every 30 to 90 seconds. This is a classic sign of low air charge or a waterlogged tank. However, a clogged pressure port or failed switch diaphragm can also trigger erratic switching. Do not assume the tank is the problem. Test the switch first before replacing tank components.
Intermittent Operation
The system works sometimes but fails under load. It runs fine with sink use but trips when a toilet flushes. This points to failing contacts or air intrusion in the system. This behavior is common with defective new manual-reset switches. One user replaced a brand-new switch twice before reverting to a standard automatic model, and the problem was solved.
Frequent Manual Reset Needed
A protected switch trips daily and requires holding the lever to restart. This is not always a bad switch. It is often caused by air in the line, minor leaks, or low well yield. Small air bubbles create instantaneous pressure drops that trip safety switches. Fix the leak or consider switching back to a non-protected switch if the issue persists.
Test the Pressure Switch
Once power and pump function are confirmed, test the switch is ability to respond to pressure changes. These tests determine whether the switch is functioning electrically or if internal components have failed.
Check Sensing Port for Blockage
Remove the switch and inspect the brass nipple or sensing tube connecting it to the water line. Use a small wire or screwdriver to clear debris. Mineral buildup here prevents accurate pressure detection. Clean the nipple before installing a new switch. Many failed switches are replaced unnecessarily due to clogged ports.
Test Continuity with Multimeter
Set the multimeter to continuity mode. Disconnect power and remove wires. Below cut-in pressure, such as 30 PSI, the switch should show continuity, meaning a closed circuit. Above cut-out pressure, such as 50 PSI, it should show no continuity, meaning an open circuit. No response indicates internal contacts are damaged, so replace the switch.
Verify Cut-In and Cut-Out Pressures
Attach a mechanical pressure gauge to a hose bib or tank drain. Open a faucet and let pressure drop. Watch when the pump starts, which is cut-in, and when it stops, which is cut-out. Compare readings to expected values like 30/50 or 40/60. Mismatched pressures indicate a misadjusted or failing switch that needs replacement.
Replace the Pressure Switch
If testing confirms failure, replacement is straightforward with basic tools. Follow these steps to ensure safe and correct installation.
Choose the Right Switch
Match the new switch to your system. Standard types include 20/40, 30/50, and 40/60 PSI. Decide between a standard automatic switch without a reset lever or a low-pressure cut-off protected switch with a manual reset. Use a protected switch only if you have reliable water levels and no air leaks. Warning: Installing a 40/60 switch on a 30/50 system increases stress on pipes and may cause premature failures.
Shut Off Power and Drain Pressure
Turn off power at the breaker. Open a faucet to bleed system pressure to 0 PSI. Confirm no voltage with a multimeter before touching wires. This step is critical for safety during the replacement process.
Document and Remove Old Wiring
Take a photo of the current wiring setup. Label wires if colors are not clear. Terminals typically have two black hot wires on the same side and two white neutral wires on the opposite side. Critical rule: Keep same-color wires together per side. Never put both black wires on the same terminal post, as this causes a short circuit.
Install the New Switch
Hand-tighten the new switch onto the cleaned nipple. Finish with a wrench, but do not over-tighten. Wrap threads with Teflon tape only if leaking occurs. Reconnect wires per your photo. Polarity does not matter as long as same-color wires are grouped on each side.
Set Tank Air Pressure Correctly
A poorly charged tank mimics switch failure. Always verify and adjust tank pressure before final testing to avoid misdiagnosing the problem.
Drain and Test the Tank
Turn off power. Open a faucet until water stops flowing, and leave it open. Use a tire pressure gauge on the tank Schrader valve to check air charge. Target pre-charge is 28 PSI for a 30/50 switch, 38 PSI for a 40/60 switch, and 18 PSI for a 20/40 switch. Add air with a portable compressor if needed. Never add air to a pressurized tank, as this gives false readings.
Check for Waterlogged Bladder
Tap the tank with a wooden handle. A hollow ring indicates a good bladder. A dull thud indicates the bladder is waterlogged. Tilt the tank slightly. A sloshing sound means the bladder has failed. Replace the tank if waterlogged, as no amount of air charging will fix it.
Prevent Future Failures
Even a new switch can fail early without proper maintenance. These practices extend the life of your pressure switch and prevent premature failure.
Avoid Dry Running
Running the pump without water generates extreme heat. Most switches burn out within an hour under dry conditions. Install a low-water shutoff or use a protected switch to prevent motor damage. Dry running is one of the most common causes of premature switch failure.
Reduce Short Cycling
Frequent on/off cycles wear out contacts quickly. Causes include low air charge, incorrect tank size, or an oversized pump. Fix root causes to extend switch life. Short cycling stresses both the switch and the pump motor.
Clean Contacts Periodically
Every 2 to 3 years, remove the switch cover and inspect contacts. Lightly sand pitted or corroded surfaces with fine emery cloth. Replace the switch if contacts are heavily burned or welded shut. Regular contact maintenance prevents arcing and extends operational life.
Replace Proactively
Average switch lifespan is 8 to 10 years. Beyond that, risk of failure rises sharply. Replace switches every decade, even if they appear to be working properly. Proactive replacement prevents unexpected failures and costly emergency repairs.
Fix Common Misdiagnoses
Many switch problems stem from other components. Avoiding these pitfalls saves time and money on unnecessary part replacements.
Wrong Tank Pressure Setting
Setting tank pressure equal to or above cut-in pressure causes water to deplete too fast. Pressure drops to zero before the pump starts, and protected switches trip repeatedly. Always set air charge 2 to 4 PSI below cut-in pressure. This is the most common misdiagnosis that leads to unnecessary switch replacements.
Air in the System
Sucking or gulping sounds before shutdown indicate air entering the line. Causes include a leaky suction pipe, loose pump seal, or foot valve failure. Air pockets cause sudden pressure drops that trip safety switches. Fix the leak, or switch back to a standard automatic switch if the leak is minor.
Defective New Switches
Some manual-reset switches fail under load despite being brand new. Symptoms include working alone but failing with dual fixture use and tripping during normal operation. Solution: Replace with a known-good unit or revert to a standard automatic switch. One DIYer swapped a new manual switch for a refurbished automatic, and the problem was gone.
Restore and Test System
After replacement, verify everything works under real conditions. Proper testing confirms the repair was successful and the system is operating correctly.
Power Up and Monitor Startup
Restore power at the breaker. Watch the ammeter. Initial surge should be approximately 20A, and running current should be approximately 6.2A for a half-horsepower pump. Let the pump cycle 6 to 7 times, which takes about 15 minutes, to stabilize.
Confirm Cut-In and Cut-Out
Use the mechanical gauge to verify the pump starts at correct cut-in pressure, such as 40 PSI, and stops at correct cut-out pressure, such as 60 PSI. Check for no chattering or hesitation during cycling. If everything checks out, the system is healthy.
Flush Initial Water
First water may be discolored from stirred-up sediment. Flush through a bathtub or hose. Avoid flushing through toilets and appliances until water runs clear.
Key Takeaways for Fixing Your Water Pump Pressure Switch
A properly functioning pressure switch is the heartbeat of your well water system. Most no-water issues trace back to the pressure switch or incorrect tank air charge. With basic tools and this guide, you can diagnose and fix the problem yourself in under an hour for less than $100. Always test power and amperage before replacing the switch. Check tank air pressure, which should be 2 to 4 PSI below cut-in pressure. Clean the sensing port before installing a new switch. Bypass the switch definitively to isolate the root cause. Invest in a $16 clamp ammeter, as it pays for itself in accurate diagnostics. Keep a spare switch on hand for emergencies.
Frequently Asked Questions About Water Pump Pressure Switch Not Working
Why does my water pump pressure switch keep tripping?
Frequent tripping is often caused by air in the system, minor leaks, or low well yield. Small air bubbles create instantaneous pressure drops that trip protected switches. Check for leaks in the suction line or foot valve, and consider switching to a standard automatic switch if the protected switch trips frequently.
How do I know if my pressure switch or pump is bad?
Bypass the pressure switch by connecting the pump directly to power. If the pump runs, the pressure switch is faulty. If it does not run, the problem is the pump, wiring, or power supply. This test definitively isolates the component causing the failure.
Can I replace a pressure switch myself?
Yes, replacement is straightforward with basic tools. Turn off power, document the wiring with a photo, remove the old switch, install the new one, and reconnect wires correctly. The process takes 30 minutes to an hour for most DIYers.
What causes a pressure switch to fail?
Common causes include electrical contact pitting from arcing, burnout due to dry running without water, repeated cycling stress, clogged pressure sensing ports, moisture and corrosion, improper wiring, and defective new switches. Regular maintenance extends switch life.
How often should I replace my water pump pressure switch?
Average lifespan is 8 to 10 years. Replace proactively every decade, even if the switch appears to be working. Annual tank pressure checks and periodic contact cleaning can extend this lifespan significantly.