You turn on the tap, and only a trickle comes out. Your shower feels more like a drizzle. The washing machine takes forever. If your water booster pump isn’t working, daily life grinds to a halt. Whether you’re in a high-rise apartment, a remote rural home, or managing an irrigation system, low or no water pressure due to a failed booster pump is more than an annoyance.
This guide walks you through proven diagnostic steps, pinpoint root causes, and deliver actionable fixes. You’ll learn how to diagnose electrical faults in minutes, identify hidden leaks that fool pressure sensors, clear airlocks and restore prime, replace failed components like capacitors and pressure switches, and decide when to repair versus replace.
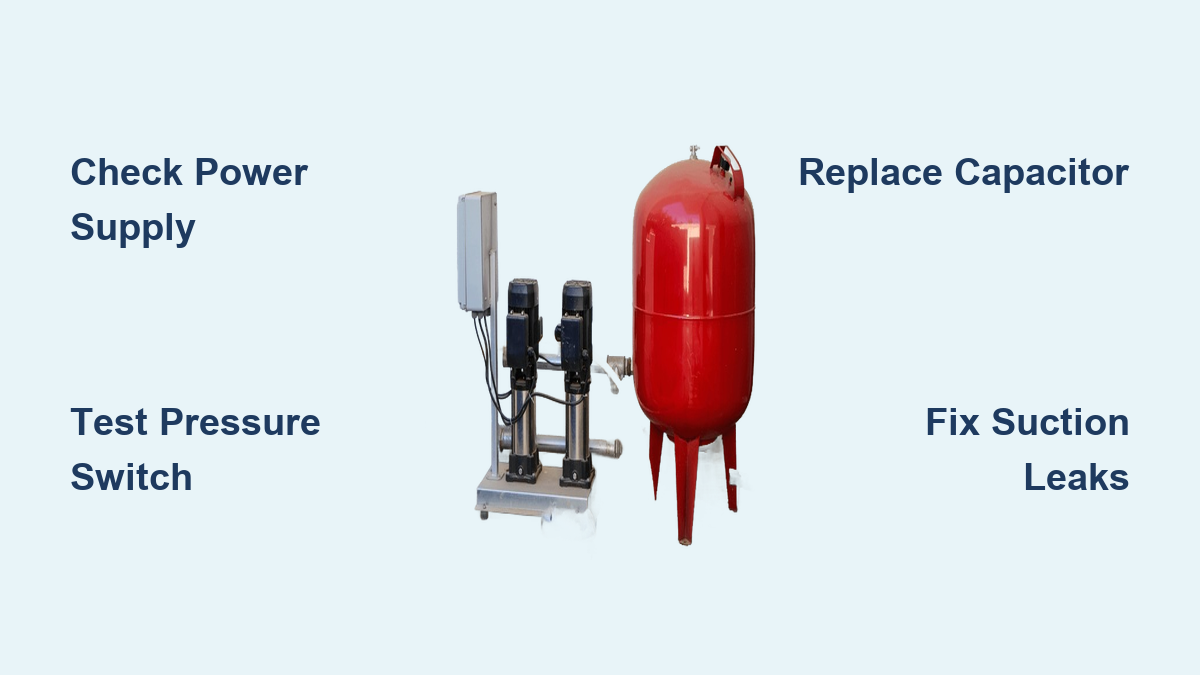
Check Power Supply First
Test Voltage at Controller and Motor
If your booster pump isn’t starting, verify power delivery before touching any mechanical parts. A tripped breaker or lost leg of voltage is the most common culprit.
Steps to test voltage:
- Turn off power at the breaker
- Open the electrical panel or controller housing
- Set your multimeter to AC voltage
- Test input terminals to confirm line voltage
- Test output terminals when pressure drops
- Test direct motor leads to rule out wiring faults
No power in? Reset breaker or replace fuse. Check for corroded connections.
Power in but none out? Faulty pressure switch or controller is the issue.
Diagnose Pressure Switch Failure
Listen for Relay Click on Demand
The pressure switch is the brain of your system. When water flows and pressure drops below 30 to 40 psi, it should activate the pump. If it doesn’t, the pump stays silent.
Signs of failure include no audible click when taps open, pump doesn’t respond despite correct pressure drop, and replacing the controller didn’t fix the issue.
Bypass the Switch Temporarily
To test the switch:
- Shut off power
- Disconnect wires from the pressure switch
- Jumper the two main terminals
- Restore power
Pump starts means the switch is bad and needs replacement. No response means the problem lies elsewhere.
Fix Humming But Not Starting

Test the Start Capacitor
A loud hum with no rotation means the motor is trying to start but can’t overcome inertia. The number one cause is a failed start capacitor.
How to check the capacitor:
- Turn off power and discharge the capacitor with an insulated screwdriver
- Remove wires and take it out
- Use a multimeter with capacitance setting
- Compare reading to label
If the reading is off by more than 10 percent, replace the capacitor. Visual clues include bulging top, leaking oil residue, and burn marks.
Clear Mechanical Binding
Manually Rotate the Shaft
If the motor doesn’t hum and the shaft won’t turn, internal binding is likely.
Steps to check:
- Shut off power
- Remove coupling or motor cover
- Try to rotate the shaft by hand
Spins freely indicates motor or electrical issue. Stuck or stiff means seized bearing, impeller jam, or corrosion.
Inspect and Clean the Impeller
Debris like sand, scale, or plastic fragments can lock the impeller.
To clean:
- Isolate pump from system
- Drain water
- Disassemble pump housing
- Remove impeller and flush with vinegar if mineral-coated
- Reassemble with new gaskets
Restore Prime and Seal Suction Leaks
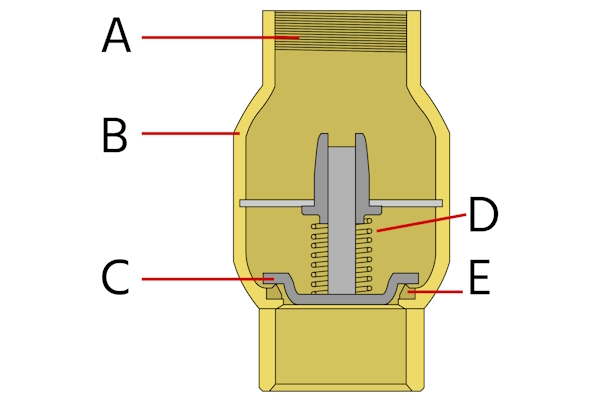
Install or Replace the Foot Valve
If water drains back to the source after shutdown, your pump loses prime. Without a foot valve on the suction side, the system empties and the pump cannot build pressure.
Symptoms of lost prime include pump runs but no water output, slow pressure buildup, and air in lines.
Fix:
- Ensure a foot valve is installed at the end of the suction line
- Replace if old or leaking
- Apply Teflon tape to all threaded joints
- Tighten hose clamps and inspect for cracks
Bleed Air from the System
Open High-Point Air Release Valves
Trapped air compresses under pressure, tricking the switch into thinking the system is pressurized when it’s not. This causes false cycling or failure to start.
Where to bleed air:
- Top of pump casing
- Highest points in plumbing or irrigation lines
- Pressure tank air vent
Procedure:
- Shut off power
- Open bleed valve slowly
- Let air escape until water flows steadily
- Close valve and restore power
Detect Hidden Drip Leaks
Monitor Pressure with All Fixtures Closed
A slow leak can prevent the system from stabilizing, making the pump think water is always being drawn even when it’s not.
Test:
- Close the main isolation valve downstream
- Pressurize the system
- Watch pressure gauge for 15 to 30 minutes
Pressure drops indicates a leak exists. Common culprits include toilet flapper not sealing, dripping faucet, washing machine inlet valve seepage, and irrigation zone valve weep.
Inspect and Clean Non-Return Valves
Remove Sediment from Check Valves
Dirt or scale between sealing surfaces lets water seep backward, preventing pressure buildup. This mimics a leak and stops the pump from reaching cut-out pressure.
Valves to clean include foot valve on suction side, discharge check valve right after pump, and internal valves in Presscontrol or BRIO units.
Cleaning steps:
- Shut off system and relieve pressure
- Disassemble valve
- Flush with clean water
- Use a soft brush for stubborn deposits
- Reinstall and test
Evaluate Pressure Tank Condition
Test for Waterlogged Bladder
A waterlogged tank cannot absorb pressure surges, causing short cycling. But it can also prevent shutdown if the system never stabilizes.
Test pre-charge:
- Shut off power and drain tank
- Remove air valve cap
- Use a tire pressure gauge
- Pre-charge should be 2 psi below cut-in pressure
No air means the bladder is ruptured and the tank needs replacement.
Diagnose Irrigation System Failures
Confirm Pump Start Relay or Pressure Activation
In irrigation setups, the controller doesn’t directly run the pump unless it has a pump start relay.
If no water reaches sprinklers:
- Check if booster pump activates when zone valve opens
- If not, verify pressure switch is functional
- Verify minimum 30 psi baseline pressure exists
- Verify pump start relay is wired correctly
Without a relay or sufficient pressure, solenoid valves may not open.
Decide: Repair or Replace
Use the Five-Year Rule and Cost Benchmark
Not every failed pump needs replacement, but aging units often aren’t worth fixing.
Repair recommended when:
- Pump is less than 5 years old
- Repair cost is less than 40 percent of new unit price
- Performance stabilizes after fix
Replace recommended when:
- Pump is more than 10 years old
- Repair cost exceeds 60 percent of new unit price
- Performance declining over time
- Efficiency doesn’t match current needs
Upgrade to a variable speed drive pump if you’re replacing an old unit, pressure fluctuates often, or energy costs are rising. VSD pumps adjust speed to demand, saving up to 30 percent energy and reducing wear.
Prevent Future Failures
Follow the Annual Maintenance Checklist
Prevention beats emergency repair every time.
Monthly tasks:
- Inspect wiring and connections for corrosion or looseness
Quarterly tasks:
- Test start and stop function by simulating pressure drop
Every 6 months:
- Clean inlet strainer to prevent debris entry
Annual tasks:
- Inspect and clean non-return and foot valves
- Check pressure tank pre-charge
- Inspect capacitor and pressure switch
When to Call a Professional
Recognize Critical Warning Signs
Some issues demand expert help.
Call a licensed plumber or technician if you see:
- Burnt wiring or smoke
- Persistent leaks or flooding
- Repeated tripping of thermal overload
- Three-phase motor failure
- Commercial or multi-unit system involvement
Electrical faults and pressurized systems pose fire, shock, and flood risks.
Frequently Asked Questions About Water Booster Pump Not Working
Why does my booster pump hum but not start?
A hum without rotation typically indicates a failed start capacitor. The motor is receiving power but cannot overcome inertia to start turning. Check the capacitor for bulging, leaking, or out-of-tolerance readings. Replace if necessary.
How do I know if my pressure switch is bad?
If your pump doesn’t start when taps are opened and you hear no relay click, the pressure switch may be faulty. You can bypass it temporarily to test. If the pump starts with the bypass, replace the switch.
Can a leaking toilet cause pump failure?
Yes. A slow drip leak from a toilet flapper can prevent the system from stabilizing, making the pump think water is constantly being drawn. This causes continuous operation or failure to reach cut-out pressure.
What pressure should my booster pump cut in at?
Most residential booster pumps cut in at 30 to 40 psi. Check your manufacturer’s specifications. If set too low, the pump may not engage during normal use.
How often should I maintain my water booster pump?
Perform visual inspections monthly, test start/stop quarterly, clean the inlet strainer every 6 months, and inspect valves and pressure tank annually. Regular maintenance extends pump life to 10 to 15 years.
Should I repair or replace my water booster pump?
Consider replacement if the pump is over 10 years old, repair costs exceed 60 percent of a new unit, or efficiency is declining. Modern VSD pumps offer better efficiency and pressure control for long-term savings.
Key Takeaways for Fixing Your Water Booster Pump
A water booster pump not working is a solvable problem, but only if you diagnose it systematically. Start by checking power at the controller input and output to rule out electrical supply issues. Then verify the pressure switch clicks on pressure drop and test the capacitor for bulging or out-of-spec readings. Check that the foot valve is intact and inspect for suction leaks. Finally, monitor pressure with all fixtures closed to detect hidden drip leaks.
Most failures trace back to electrical faults, airlocks, or hidden leaks, not the pump itself. Prevent recurrence by cleaning valves and strainers regularly, checking the capacitor and pressure tank annually, and upgrading to a VSD model for efficiency and longevity. A well-maintained booster pump lasts 10 to 15 years. Neglect cuts that in half.