Installing a water pump to your tank is essential for rainwater harvesting, garden irrigation, or creating a reliable off-grid water supply. A properly connected pump delivers consistent water pressure, operates efficiently, and lasts for years without frequent repairs. Whether you choose a surface pump mounted outside the tank or a submersible pump that sits inside, getting the plumbing and electrical connections right from the start prevents leaks, airlocks, and premature equipment failure. This guide walks you through selecting the right pump type, gathering the necessary tools, installing both surface and submersible models correctly, and maintaining your system for long-term reliability.
Select the Right Pump Type for Your Tank Setup
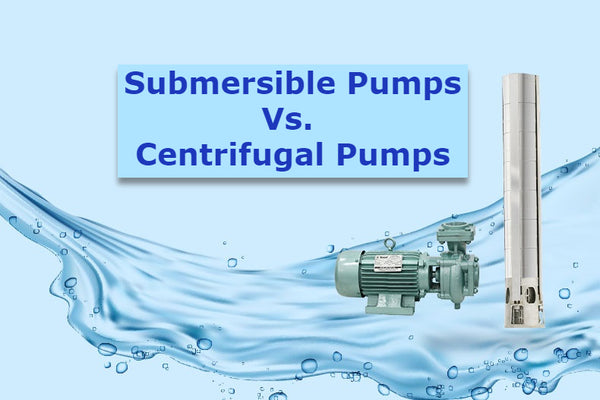
Surface vs Submersible Pumps: Key Differences
Surface pumps mount outside the tank and draw water through a suction line. They work best when the tank sits close to where you need the water, and water levels stay relatively stable. These pumps are easier to access for maintenance and repairs, but they require priming before use and tend to generate more noise during operation.
Submersible pumps operate while fully submerged inside the tank. They run quieter because the water dampens the sound, they self-prime automatically, and they handle deep or narrow tanks more effectively. The trade-off involves more complex installation for waterproof cable entries and harder access when maintenance is needed.
Matching Pump Specifications to Your Needs
Check the flow rate measured in liters per minute, the pressure output in kPa or psi, and the power consumption in watts. For typical household applications, a pump between 750 and 1,100 watts with 30 to 50 psi pressure handles most needs. Garden irrigation systems may work fine with lower pressure, while whole-house supply demands higher specifications.
Gather Essential Tools and Materials for Installation

Tools Required for the Job
You will need adjustable spanners or wrenches for tightening fittings, a pipe cutter or hacksaw for cutting hose and pipe to length, a rubber mallet for tapping fittings into place, a power drill if you need to modify the tank, an RCD tester for electrical safety verification, and various screwdrivers for mounting and electrical work.
Components to Purchase Before Starting
Buy a flexible suction hose such as 25mm Magflex in 1 to 2 meter length. Get a 1-inch brass ball valve for isolating the tank outlet. Purchase brass male and female nipples to extend connections where needed. Add nut and tail fittings with rubber washers for attaching hose to barbed ends. Include M 1″ NPT by 1″ barb adapters to connect hose to threaded ports. A Y-strainer or pre-filter traps debris before it reaches the pump. A check valve prevents backflow when the pump stops. Consider a foot valve if the pump sits above water level to keep the suction line primed. A pressure tank reduces cycling and stabilizes pressure. A bulkhead fitting creates a watertight seal where pipe or cable passes through the tank wall. Use stainless steel hose clamps for secure connections. Keep Teflon plumber’s tape on hand for sealing threaded joints.
Purchase quality fittings from irrigation suppliers rather than general hardware stores. Products from rural supply specialists offer superior durability for permanent water installations.
Install a Surface Pump: Complete Step-by-Step Guide
Position the Pump Correctly for Optimal Performance
Place the pump as close to the tank as possible, ideally within 1 to 2 meters. Shorter suction lines mean better performance and less risk of losing prime. Mount the pump on a level, solid base such as concrete or pavers to reduce vibration and noise transmission. Avoid soft ground, wooden platforms, or areas that amplify operational sounds.
Ensure adequate space exists around the pump for future maintenance and airflow. Keep the unit sheltered from direct weather exposure but never enclose it completely without ventilation, as overheating causes permanent damage.
Connect the Suction Line Without Causing Leaks
Never attach rigid PVC pipe directly to the pump inlet. Vibration from the pump operation cracks these joints over time, causing leaks and air entry. Instead, use a flexible hose section to absorb movement and protect the seals.
Cut a 1 to 2 meter length of flexible Magflex hose. Slide stainless steel hose clamps onto both ends of the hose. Attach nut and tail fittings to each end of the hose. Push the hose fully onto the barbed ends of the fittings and tighten the clamps securely. This flexible section absorbs vibration and prevents joint failure.
Link the Tank to the Pump Using Proper Fittings
Close the tank outlet valve and drain any water if necessary. Remove any existing plug or fitting from the tank outlet, expecting minor water spillage during this step. Screw in the 1-inch brass ball valve by wrapping 3 to 4 layers of Teflon tape clockwise on the male threads. Install the valve in the open position to make alignment easier during tightening. Secure the valve with spanners but avoid over-tightening.
Add brass nipples to both ends of the ball valve if needed to extend the connection reach. Connect one end of the flexible hose assembly to the ball valve. Attach the other end to the pump inlet by applying Teflon tape to the pump’s male thread, hand-tightening first, then giving a final “nip” with a wrench. Do not over-tighten.
Install Critical Accessories for System Protection
Fit the Y-strainer between the tank valve and pump inlet to catch leaves, grit, and tank coating particles. Clean the strainer quarterly or more frequently if the tank contains significant debris.
Install a check valve on the suction line to stop water draining back into the tank when the pump stops. This maintains prime and prevents dry starts that damage seals. If the pump sits above water level, add a foot valve inside the tank at the suction point to act as a one-way gate keeping the line full.
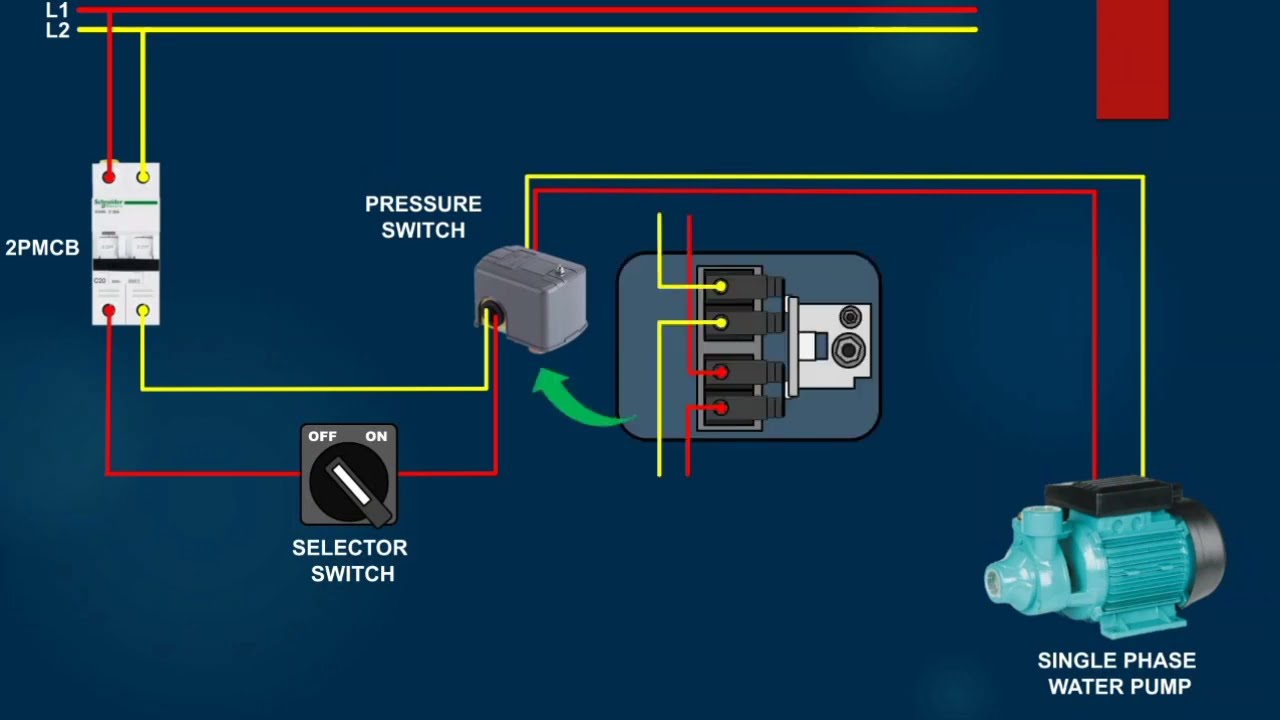
Connect a pressure tank to the pump’s discharge side to store pressurized water. This reduces pump cycling, stabilizes pressure during use, and provides water during brief power outages. Pair the tank with a pressure switch typically set at 30/50 psi to automate pump operation.
Prime and Test the Pump Before First Use
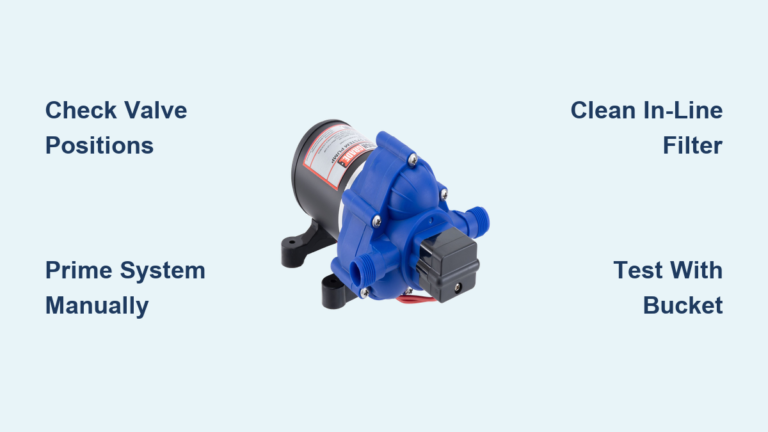
Fill the pump casing with water via the bleed screw if accessible. Open the bleed screw on the pump controller and let air escape until water flows out steadily. Close the screw once water appears. Open the tank ball valve fully.
Plug the pump into an RCD-protected outlet. Turn on the power and listen for smooth startup with no unusual noises. Check all joints for leaks. Open a tap or flush a toilet to verify flow and pressure meet expectations.
If the pump hums but fails to start, press the reset button on the controller. If it still fails, check the power supply using another device to confirm the outlet works.
Install a Submersible Pump in Your Water Tank
Drill and Seal Tank Entries Properly
For polyethylene or fibreglass tanks, drill a hole for the discharge pipe or power cable using an appropriate hole saw. Never leave holes open, as mosquitoes and debris enter the tank and contaminate the water supply.
Use a bulkhead fitting to create a watertight seal where pipe or cable passes through the tank wall. These fittings compress a rubber washer between inner and outer nuts when tightened, ensuring a complete seal.
Warning applies to galvanized steel tanks: avoid letting metal swarf enter the tank during drilling. Metal shavings cause corrosion and void warranties. Use a vacuum during drilling or plug the inside to catch debris.
Lower and Position the Pump Correctly
Place the submersible pump 5 to 10 centimeters above the tank bottom to avoid sucking up sediment that collects over time. Use a support bracket or float cage if provided with the pump.
Ensure any float switch equipped on the pump moves freely without touching walls, baffles, or the pump itself. The switch should activate when water rises and deactivate when levels drop.
Route Power Cable Safely Through the Tank
Never run the power cable through the inlet strainer. This weakens the strainer structure and allows debris to enter the pump. Instead, use a dedicated waterproof cable gland or bulkhead entry point specifically designed for electrical connections.
Secure the cable along the tank wall with clips to prevent tension on the connection. Leave a small loop of slack at the bottom to accommodate movement without pulling the connection tight.
All electrical connections must connect to an RCD-protected circuit. If hardwiring is required, hire a licensed electrician to ensure compliance with safety regulations.
Attach Discharge Pipe and Test Operation
Connect the discharge pipe to the bulkhead fitting using pressure-grade fittings designed for the application. Install a check valve on the pump outlet or discharge line to maintain pressure and prevent backflow.
Plug in and power on the pump. Listen for normal operation without grinding or cavitation sounds. Check all joints for leaks. Verify water flows properly at the outlet point.
Electrical Safety Requirements for Water Pump Installation
Always Use RCD Protection
All water pumps, whether surface or submersible models, must run on an RCD (Residual Current Device) circuit. This safety device cuts power within milliseconds if it detects any leakage, preventing electrocution risk in wet environments.
Test the RCD monthly using the test button built into the device. If the RCD fails to trip when tested, replace it immediately.
Protect Equipment Against Weather and Overheating
Install a weatherproof enclosure for outdoor pump installations. This protection shields the equipment from rain, dust, and UV radiation that degrades materials over time. In some regions, enclosures are required by regulation to reduce noise pollution.
The enclosure must have ventilation slots to prevent heat buildup during operation. Use IP66-rated junction boxes for any outdoor electrical splices or connections. Never use tape, zip ties, or improvised solutions for electrical connections.
Prevent Leaks: Proper Piping Techniques for Water Pumps
Size Pipes and Fittings Correctly for Flow
Use minimum 25mm (1-inch) pipe for suction lines. Smaller pipes restrict flow and cause cavitation, which damages the pump impeller over time. For high-demand systems supplying a whole house, consider 32mm diameter pipe.
Avoid sharp 90-degree bends in the piping. Use sweeping elbows instead to maintain flow efficiency and reduce pressure losses through the system.
Seal Threads Without Over-Tightening
Apply Teflon tape only to male NPT threads. Wrap the tape clockwise in 3 to 4 layers as you look at the thread end. This direction matches the tightening direction and prevents unraveling during assembly.
Do not use Teflon tape on compression fittings or O-ring fittings like nut and tail or Rural Joiners. These fittings seal via their rubber components, and tape can interfere with proper sealing. Tighten these fittings only until the seal engages.
Over-tightening cracks fittings and damages washers. Tighten firmly but stop when resistance increases significantly.
Secure Hoses with Proper Clamps
Use stainless steel worm-drive or ear clamps for permanent hose connections. Never use zip ties, which degrade in sunlight and fail over time. Position clamps so they do not interfere with the fitting nuts or create pinch points. Inspect clamps annually and retighten if loose.
Fix Airlocks and Priming Problems in Your Pump System
Recognize Signs of Air in the System
Watch for these symptoms indicating air trapped in the pump or suction line: the pump runs but delivers no water, flow is intermittent or sputtering, or gurgling sounds come from the pipes. These problems often stem from air leaks in the suction line.
Check for loose hose clamps, cracked or porous hose material, improperly sealed joints, or worn washers in nut and tail fittings. Even small air leaks prevent the pump from maintaining prime.
Tighten all connections, replace damaged components, and re-prime the pump to resolve airlock issues.
Maintain Prime with a Foot Valve
If the pump loses prime frequently, install a foot valve inside the tank at the suction end. The foot valve holds water in the suction line when the pump stops, maintaining prime for the next start cycle.
Note that foot valves can clog with debris over time. Clean them annually or consider a self-cleaning design if your tank water contains significant particulate matter.
Upgrade Your Water Pump System for Better Performance
Add a Pressure Tank for Consistent Water Delivery
A pressure tank provides three major benefits for your system. It reduces pump cycling from 10 starts per hour down to 2 or 3, significantly extending motor life. It delivers steady pressure during use without fluctuations as the pump cycles. It provides a limited water supply during power outages.
Install the pressure tank on the discharge side of the pump. Charge the air bladder to 2 psi below the pump’s cut-in pressure. For example, if using a 30/50 psi pressure switch, charge the tank to 28 psi.
Install a Pump Controller for Automated Operation
Modern pump controllers offer automatic on/off based on demand, dry-run protection that shuts off the pump if no water is present, soft start functionality to reduce mechanical stress on the motor, and error alerts for overheat or blockage conditions.
Some controller models integrate with pressure tanks and switches for complete automation of your water system.
Build a Protective Enclosure
Construct a lockable, ventilated enclosure from UV-resistant plastic, galvanized metal, or treated timber. Paint light colors white to reflect heat and reduce internal temperatures. Add insulation in climates with extreme temperatures. Label all valves and electrical points inside the enclosure for easy maintenance reference.
Long-Term Maintenance for Your Water Pump System
Monthly Inspection Tasks
Inspect all joints and clamps for leaks. Test the RCD using the test button. Listen for unusual noises such as grinding, knocking, or excessive vibration. Confirm the pump starts and stops normally based on pressure settings.
Quarterly Maintenance Schedule
Clean the Y-strainer or pre-filter to maintain flow. Tighten hose clamps if they have loosened. Check the tank water level by feeling for temperature difference in steel tanks (cold indicates water) or tapping plastic tanks and listening to distinguish solid from hollow sounds.
Annual Service Requirements
Drain and clean the tank interior to remove sediment buildup. Inspect pump performance by comparing flow and pressure to original specifications. Replace worn seals or valves that show signs of degradation. Check the pressure tank bladder by tapping it; a solid sound indicates proper air charge, while a hollow sound means re-pressurization is needed.
Troubleshoot Common Water Pump Issues
Pump Won’t Start
Possible causes include no power reaching the unit, a tripped RCD safety switch, a blown fuse, or the controller needing a reset. Test the outlet with another device to confirm power is available. Press the reset button on the pump controller. Replace the fuse or reset the circuit breaker if needed.
No Water Output Despite Pump Running
This indicates lost prime, an air leak in the suction line, a clogged Y-strainer, or a blocked pump impeller. Re-prime the pump following the proper procedure. Inspect and reseal all suction line joints. Clean the filter and check valve for obstructions.
Low Water Pressure Symptoms
Undersized pipe diameter, a clogged hose or strainer, a worn impeller, or a leaking check valve all cause reduced pressure. Upgrade to 25mm or larger pipe. Clean the entire system thoroughly. Replace faulty components.
Pump Cycles Too Often
Missing pressure tank, a waterlogged pressure tank bladder, or a leaking check valve cause frequent cycling. Install or replace the pressure tank. Replace the check valve if it fails to seal properly.
Excessive Noise During Operation
Loose mounting allowing vibration, cavitation from air in the line, or debris inside the pump creates unusual sounds. Secure the pump to a solid base. Re-prime and bleed all air from the system. Service or replace the pump if internal damage exists.
When to Hire a Professional for Water Pump Installation
Call a Licensed Plumber or Electrician If
Engage professional help when connecting to the mains water supply, as rain-to-mains systems require legal certification in most areas. Hire an electrician for hardwiring electrical components, as DIY wiring creates fire and electrocution risks. Use professionals for complex automation, multiple irrigation zones, or smart control systems. Seek expert help for large commercial tanks or high-pressure systems. Consult a professional if you are uncertain about local plumbing codes or safety regulations.
DIY installation remains suitable for simple rainwater harvesting setups, garden irrigation, replacing an existing pump with the same configuration, and installing submersible pumps in standalone tanks not connected to mains water.
Cost Breakdown: DIY vs Professional Water Pump Installation
DIY Material Costs
A basic surface pump setup costs approximately $167 AUD for materials including the 25mm Magflex hose at $20, brass ball valve at $25, nut and tail fittings at $35, Y-strainer at $40, check valve at $30, hose clamps at $12, and Teflon tape at $5. Adding a pressure tank and controller increases costs by $200 to $400.
Professional Installation Costs
Basic pump connection by a licensed tradesperson costs $200 to $400. A full system including tank, enclosure, and RCD protection runs $600 to $1,200. A mains-integrated rainwater system requiring certification costs $800 to $2,000 or more depending on complexity.
Key Takeaways for Successfully Hooking Up a Water Pump
Matching your pump type to your specific needs forms the foundation of a reliable system. Surface pumps work well for shallow installations with easy access requirements, while submersible pumps suit deep tanks where quiet operation matters. Always use RCD protection for electrical safety regardless of pump type.
Invest in quality fittings from irrigation suppliers rather than cheaper hardware store alternatives. Use flexible hose between the tank and pump to absorb vibration. Install a Y-strainer, check valve, and pressure tank for system protection and stable performance.
Maintain your system through regular checks: monthly leak inspections and RCD testing, quarterly filter cleaning, and annual tank servicing. Address problems promptly to prevent small issues from becoming major repairs.
Frequently Asked Questions About Hooking Up a Water Pump to a Water Tank
What is the best distance between the tank and the pump?
Position the pump within 1 to 2 meters of the tank for optimal suction performance. Longer distances increase suction lift, reduce water pressure, and raise the risk of losing prime during operation.
Can I use PVC pipe for the suction line?
Avoid using rigid PVC pipe directly on the pump inlet. Vibration from the pump operation causes joints to crack over time, leading to leaks and air entry. Use flexible Magflex hose for the connection between tank and pump.
How do I prevent my pump from losing prime?
Install a check valve on the suction line to prevent backflow when the pump stops. If the pump sits above water level, add a foot valve inside the tank at the suction point. Check all connections for air leaks regularly.
Do I need a pressure tank for my water pump system?
A pressure tank is not mandatory but highly recommended. It reduces pump cycling, extends motor life, provides consistent water pressure, and supplies limited water during power outages. Most household systems benefit from including one.
How often should I clean the Y-strainer?
Clean the Y-strainer quarterly under normal conditions. Clean it more frequently if your tank water contains significant debris, leaves, or sediment. A clogged strainer reduces flow and causes the pump to work harder.
When should I call a professional instead of doing it myself?
Hire a licensed professional when connecting to the mains water supply, hardwiring electrical components, installing complex automation systems, working with large commercial tanks, or when local regulations require certified installations.