Your pool pump isn’t running, and the water’s starting to look cloudy. You’re not alone, thousands of pool owners face this issue every season. A pool pump not working can stem from simple power issues to mechanical failure, but most problems can be diagnosed and fixed in under an hour. Whether your pump is silent, humming, or losing prime, this guide walks you through every step to get your circulation system back online. You’ll learn how to check power, test components, clear blockages, and know when to repair or replace, saving time, money, and avoiding unnecessary service calls.
Check Power Source First
No power means no pump operation, so start here before disassembling anything. Electrical issues are the most common cause of a pump failing to start, and they’re also the easiest to verify.
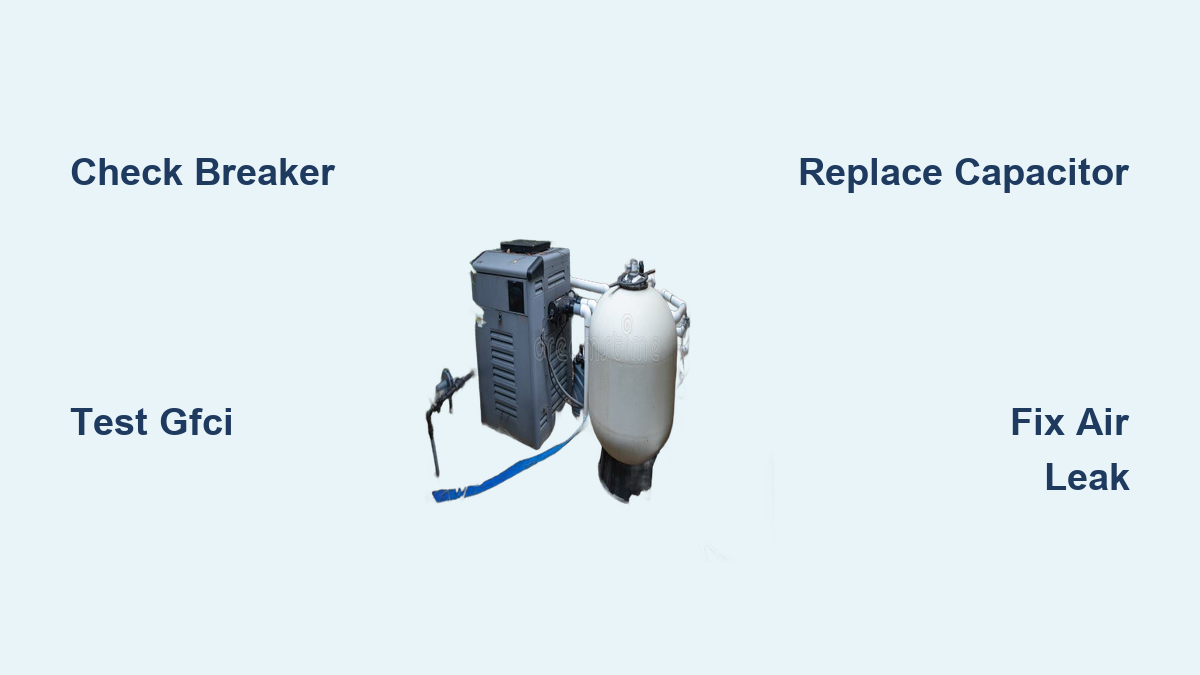
Reset Tripped Circuit Breaker
A tripped circuit breaker is the number one cause of a dead pump. Even if the switch looks “on,” it may have partially tripped.
• Go to your electrical panel
• Locate the dual-pole 220V breaker for the pool pump
• Flip it fully off, then back on
Warning: If it trips again immediately, do not keep resetting. This signals a short, ground fault, or failing motor.
Pro Tip: Some breakers fail internally on one leg. The pump won’t run, but lights or low-draw devices may still work. Don’t assume power is fine just because other equipment operates.
Test GFCI and Outlet
Ground Fault Circuit Interrupter protection is required for pool circuits and often trips due to moisture.
• Check for a GFCI outlet near the pump or in an outdoor junction box
• Press “Reset” if the button is popped out
• Test quarterly using the “Test” button to ensure functionality
Verify outlet power: Plug in a lamp or voltage tester. No power? Check upstream breakers and wiring. Use a non-contact voltage tester at the outlet and pump terminals to confirm live wires safely and quickly.
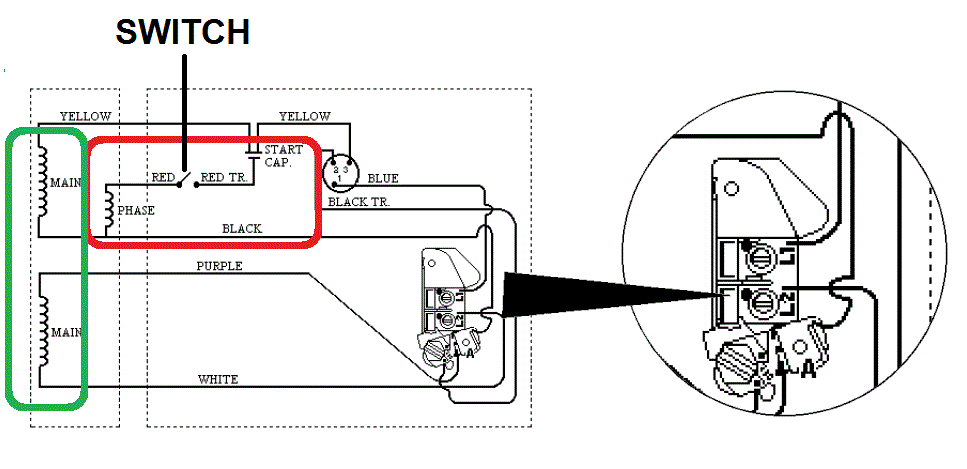
Diagnose Timer and Switch Failures
Even with power, a faulty timer or switch can stop the pump. These control components are often overlooked but can fail without warning.
Bypass a Faulty Timer
If the breaker is on but the pump doesn’t start, the timer may be the culprit.
• Use a multimeter to check voltage on the line side (input): should read 220-240V
• Check voltage on the load side (output to pump): should match input when timer is on
• No power on load side? The timer is faulty
User fix: Some owners bypassed a failed built-in timer by rewiring the pump with a standard plug, enabling manual control until a new timer is installed. Replace or bypass only if qualified, otherwise call an electrician.
Inspect Wall Switch and Connections
Outdoor toggle switches corrode or fail over time.
• Turn off power at the breaker
• Open the switch box
• Look for loose wires, burn marks, moisture, or oxidation
• Test continuity with the switch on: check for voltage on the output side
• No reading? Replace the switch
Hidden control point: Some pumps have a built-in on/off switch on the motor base. Make sure it’s turned on before diagnosing further.
Fix Humming But Not Starting
A loud hum means power is reaching the motor, but it can’t start spinning. This is a common symptom with a few specific causes.
Replace Failed Capacitor
The capacitor gives the motor the initial jolt to start. When it fails, the pump hums then shuts off.
Signs of failure:
• Bulging or leaking top
• Burn marks
• Motor won’t start even after a manual spin
Replacement specs: 30μF, 370VAC successfully replaced with 50μF, 370VAC within safe range.
Replacement steps:
1. Turn off power
2. Discharge capacitor by touching both terminals with an insulated screwdriver
3. Disconnect wires and remove mounting strap
4. Install new capacitor with same voltage, similar capacitance
5. Reconnect and test
Expert note: Always keep a spare capacitor. It’s one of the most common failure points.
Clear Jammed Impeller
If the capacitor is good but the motor still won’t spin, the impeller may be jammed.
Test it: Turn off power, remove pump housing, and manually rotate the impeller via the motor shaft. If it won’t turn, something is blocking it.
Common blockages:
• Hair
• Leaves
• Sticks
• Sand buildup
Disassemble, remove debris, and reassemble. A seized impeller can burn out the motor if ignored.
Check Thermal Overload Protection
Motors have internal thermal protection that cuts power when overheated.
Causes:
• Dry running
• Blocked ventilation
• Clogged system
Fix: Let the motor cool for 30-60 minutes, then restore power. If it trips again fast, find the root cause. Don’t just keep resetting.
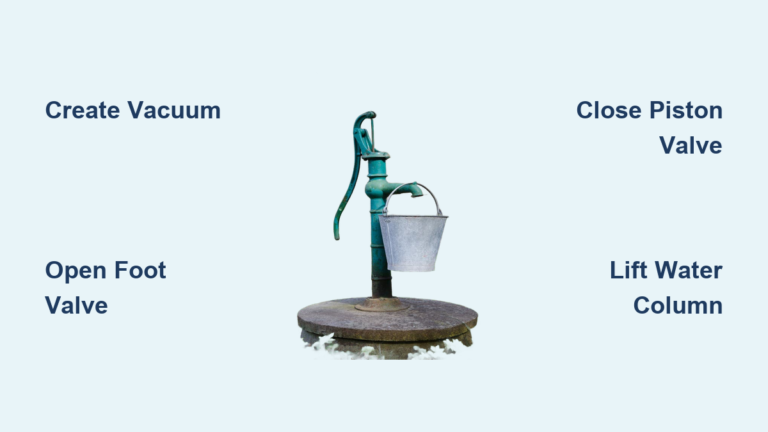
Restore Lost Prime and Water Flow
Pump runs but no water? You’ve lost prime. This is one of the most frequent service calls, and it’s usually simple to fix.
Prime the Pump Correctly
Steps to re-prime:
1. Turn off the pump
2. Remove the pump lid
3. Fill the strainer housing completely with water
4. Check O-ring: clean, lubricated, seated properly
5. Reinstall and tighten the lid
6. Open the air relief valve on the filter
7. Restart pump; air will escape until water sprays out
8. Close the valve once steady flow begins
Quick fix: One user reported, “I unscrewed the top and let the pressure out. Worked fine ever since.” This suggests an airlock was preventing startup.
Find Air Leaks
Air entering the suction side breaks prime. Use the shaving cream test.
Test procedure:
• Apply shaving cream or soapy water to pump lid, unions, valves, and pipe joints
• Watch for bubbles being sucked in; that’s your leak
Common leak points:
• Dry or cracked O-ring
• Loose strainer cover
• Failed shaft seal
• Cracked housing
Replace O-rings annually with silicone-based lubricant, never petroleum, which degrades rubber.
Clear Blockages in System

Even a running pump can fail to circulate if lines are clogged. Regular cleaning prevents most of these issues.
Clean Skimmer and Pump Baskets
Weekly task:
• Turn off pump
• Remove skimmer basket, empty and rinse
• Do the same for pump strainer basket
• Check for cracks or warping that prevent a tight seal
A full basket blocks flow and can cause cavitation.
Flush Clogged Hoses and Pipes
Soak hoses in bleach solution:
• Mix 1 part bleach to 4 parts water
• Submerge hose for 20 minutes
• Flush inside and out with a garden hose
• Use a cleaning snake for stubborn clogs
Prevent future clogs: Install skimmer socks or pre-filters, and cover pool during heavy leaf fall.
Inspect Impeller and Filter
Even if the motor spins, a clogged or damaged impeller reduces flow.
• Disassemble pump
• Check impeller for debris or cracks
• Spin by hand; should move freely
Filter issues: Replace cartridge every 2-4 weeks, or when folds stay dark after rinsing, material is torn or brittle, or flow remains low.
Diagnose Strange Noises
Unusual sounds mean mechanical trouble. Identifying the noise type points to the specific problem.
Grinding or Screeching? Replace Bearings
Grinding noise indicates failed motor bearings. Bearings can’t be repaired. Continued use destroys the shaft and housing. Replace the motor or entire pump.
Rattling or Slurping? Check for Cavitation
Cavitation happens when air bubbles form and collapse in the pump.
Causes:
• Low water level
• Air leaks
• Clogged suction line
Check for air in the pump basket or return jets.
Know When to Repair vs. Replace
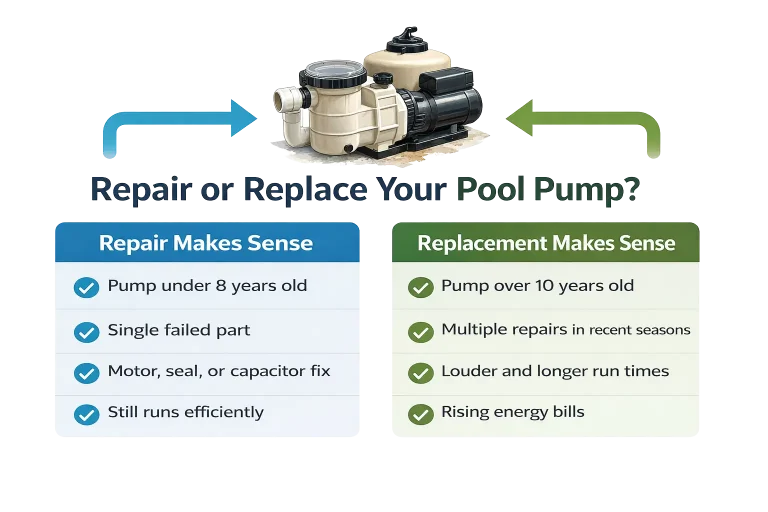
Repair If:
• Problem is a capacitor, O-ring, or clogged impeller
• Motor is under 7 years old
• No burnt smell or bearing noise
Cost-effective fixes:
• Capacitor: $15-$30
• O-ring: $5-$10
• Timer: $20-$50
Replace If:
• Screeching noise (bearing failure)
• Water leaking from motor shaft (failed shaft seal)
• Burnt smell or discolored windings
• Pump is over 10 years old
• Repeated electrical trips
Upgrade tip: Modern variable-speed pumps use up to 80% less energy and run quieter. Pay more upfront, save for years.
Prevent Future Failures
Avoid downtime with simple maintenance. Most pool pump failures are preventable with regular care.
Monthly: Check for Leaks
Inspect pump lid seal, unions, hose connections, and shaft seal. Look for drips. Fix leaks early. Water near electrical parts is dangerous.
Quarterly: Inspect Hoses
• Disconnect and flush
• Look for cracks, kinks, or algae buildup
• Replace every 3-5 years
Annually: Service Key Components
• Lubricate O-rings with silicone grease
• Test capacitor with multimeter or visual inspection
• Clean motor vents; dust causes overheating
• Re-tighten electrical connections in junction box
Replace capacitor every 3-5 years, even if it seems fine.
When to Call a Pro
Get professional help if you’re uncomfortable with electrical work, voltage tests show low or inconsistent power, air leaks can’t be found, motor windings are damaged, or water has entered the motor or control box.
Safety first: Always shut off power before opening any component.
Step-by-Step Troubleshooting Checklist
- Power check: Breaker, GFCI, outlet. All good?
- Listen: Humming? Check capacitor and impeller. Silent? Check power or motor.
- Inspect: Clean skimmer and pump baskets.
- Test: Spin impeller by hand. Replace capacitor if suspect.
- Prime: Fill housing, bleed air, restart.
- Leak test: Use shaving cream on joints.
- Flush: Clean hoses and filter.
- Decide: Repair or replace based on age and damage.
Frequently Asked Questions About Pool Pump Not Working
Why is my pool pump humming but not starting?
A humming pump means power is reaching the motor but it can’t spin. This is usually caused by a failed capacitor or a jammed impeller. Check the capacitor first for bulging or leaks, then manually spin the impeller to see if it’s blocked.
How do I reset a pool pump that won’t start?
Start with the circuit breaker. Flip it fully off then back on. If it trips again, don’t keep resetting. Next check the GFCI outlet and reset if needed. Then verify the timer or wall switch is working properly.
Why does my pool pump lose prime constantly?
Air leaks on the suction side cause lost prime. Common sources are a dry or cracked pump lid O-ring, loose strainer cover, failed shaft seal, or cracked housing. Use the shaving cream test on all joints to find the leak.
Can I replace just the motor on my pool pump?
Yes. If the motor is faulty but the pump housing is intact, you can replace just the motor end. This is often more cost-effective than replacing the entire pump. However, if the pump is over 10 years old or has multiple issues, full replacement may be better.
How often should I replace the pool pump capacitor?
Replace the capacitor preventively every 3-5 years, even if it seems fine. Capacitors are high-failure components, and keeping a spare on hand lets you fix a failing pump in minutes.
Is it worth upgrading to a variable-speed pool pump?
Yes. Variable-speed pumps use up to 80% less energy than single-speed models, run quieter, and last longer. The higher upfront cost pays for itself through energy savings, especially if you run the pump frequently.
Key Takeaways for Fixing Your Pool Pump
Most pool pump not working issues are simple: a tripped breaker, clogged basket, failed capacitor, or air leak. By following this guide, you can diagnose the problem fast and avoid costly service calls. Start with power checks, then move to mechanical components. Keep spare capacitors and O-rings on hand for quick repairs. Stay ahead with weekly basket cleaning and monthly leak inspections. If your pump is over 10 years old or showing multiple failures, consider upgrading to a variable-speed model for long-term savings. Don’t let a silent pump ruin your swim season. Diagnose, fix, and flow again.