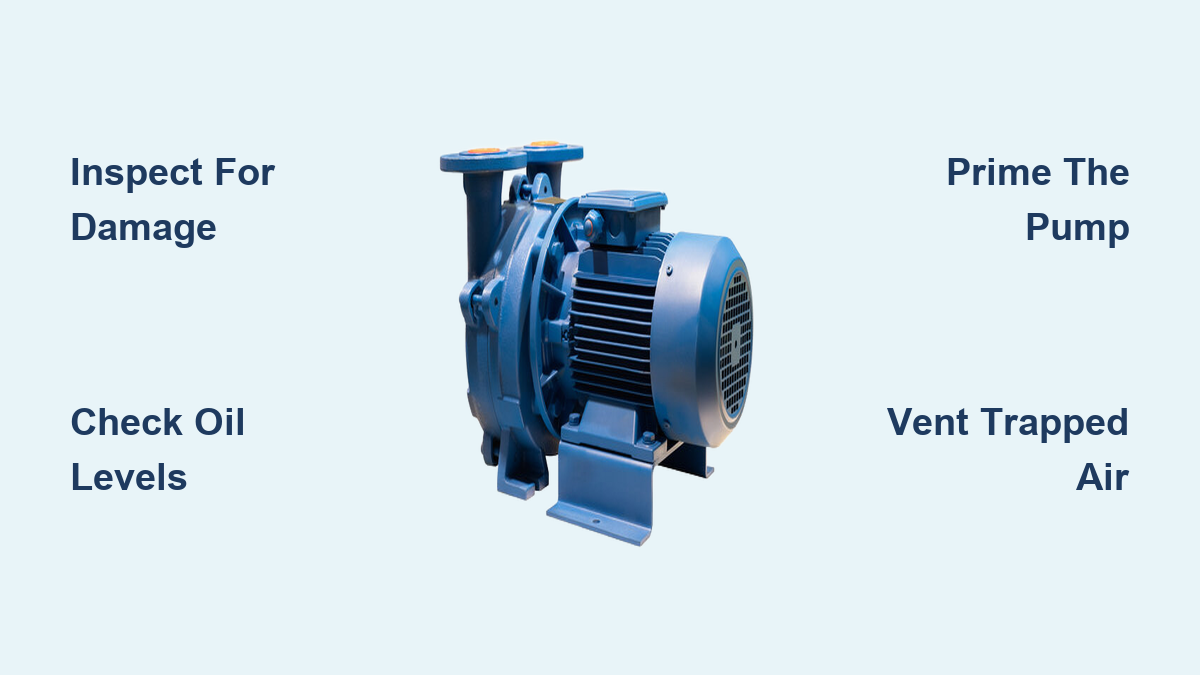
Starting a water pump motor the right way protects your equipment and ensures reliable operation every time. Whether you are working with a gasoline-powered dewatering pump or an electric centrifugal model, skipping critical preparation steps can destroy mechanical seals, void warranties, and lead to costly repairs. This guide walks you through each phase of the startup process, from inspection to post-use care, so you can get your pump running safely and extend its service life.
Pre-Startup Inspection Checklist for Water Pump Motors
Before attempting to start any water pump motor, you must complete a thorough inspection to avoid operational failures and safety hazards. This step takes only a few minutes but prevents expensive downtime.
Inspecting Physical Components for Damage
Examine the pump casing, hoses, fittings, and couplers for cracks, leaks, or structural damage. Units with knockoff designs may arrive with hidden defects like cracked housings or loose fasteners. Verify that all nuts, bolts, drain plugs, and gaskets are securely in place. Check safety guards, belts, and pulleys for proper alignment per manufacturer instructions.
Checking Oil and Lubrication Levels
Locate oil fill points on your pump and check fluid levels before each use. For gasoline-powered models, check engine oil and top off if below the recommended level. On self-priming pumps, verify the mechanical seal chamber is filled with oil if required by design. Many units ship dry from the factory, and failing to fill this chamber voids warranty coverage. For industrial pumps, confirm bearing lubrication and grease presence where applicable.
Verifying Driver Rotation Before Connection

On ANSI-style centrifugal pumps, the coupling is often shipped separately to prevent damage during transport. Before installing the coupling, verify motor or driver rotation direction using a rotation tester or momentary power check. Incorrect rotation causes the impeller to unscrew from the shaft, leading to catastrophic failure of the impeller, casing, bearings, and mechanical seal within minutes.
Connecting Hoses the Right Way for Proper Priming
Proper hose connections create an airtight system essential for successful priming and sustained suction performance. Loose connections or collapsible hoses ruin your ability to prime the pump effectively.
Attaching the Intake Hose with Strainer
Use a rigid, non-collapsible pipe for the suction line. Flexible hoses collapse under vacuum, breaking the prime immediately. Attach a strainer or foot valve at the submerged end to block debris like leaves, branches, and sediment. Ensure the intake remains fully submerged and away from swirling air that causes cavitation.
Installing the Discharge Hose
Connect a discharge hose of appropriate diameter for your application. Avoid kinks and sharp bends that restrict flow. For testing maximum lift capacity, a 150-foot hose provides accurate evaluation. Keep the discharge path clear and unobstructed during operation.
Sealing All Threaded Connections
Wrap all threaded joints with PTFE tape to create an airtight seal. Hand-tighten all couplers and fittings. Never use wrenches, as over-tightening cracks plastic fittings and causes leaks at the worst possible moment.
Priming Your Water Pump: Why It Matters
Priming replaces air in the pump casing and suction line with liquid. Every centrifugal pump must be primed before startup, including self-priming models on their first use. Running dry destroys mechanical seals and voids warranties instantly.
Why Priming Is Non-Negotiable
Air in the system prevents the impeller from creating suction pressure. Without liquid, the pump cannot generate pressure, leading to overheating and seal failure within seconds. The impeller can also suffer permanent damage from running dry.
Manual Priming Procedure
Locate the priming port, typically a removable cap on top of the pump housing. Remove the cap and pour clean water into the chamber until it flows from the discharge nozzle. This confirms the volute is completely full. Reinstall the cap tightly, ensuring the gasket is properly seated. Most 3-inch pumps require 1.2 to 1.5 gallons (4 to 5 liters) of water for proper priming.
Priming Methods for Suction Lift Conditions
When the water source sits below the pump centerline, gravity cannot assist priming. Use a foot valve method with a check valve that holds the prime in the suction line. Alternatively, use vacuum priming with an external pump to draw air from the casing. Some industrial systems employ a priming tank that automatically supplies water to initiate flow.
Venting Trapped Air Before Starting the Motor
Even after priming, air pockets collect at high points like the seal chamber and impeller eye. Venting removes these pockets to prevent damage during startup.
Why Venting Prevents Premature Failure
Air is approximately 800 times lighter than water and collects at the top of the casing. Running with trapped air causes squealing noises, dry-running mechanical seals, and immediate failure. Most pumps do not vent automatically.
Manual Venting Procedure
Locate vent plugs on the pump casing and seal chamber. Open them slowly before starting the engine. Close each vent once water flows steadily from the opening. Never leave vents open during operation.
Pump-Specific Venting Considerations
Horizontal split-case pumps require external vent lines. Vertical pumps have the stuffing box at the highest point, requiring extra care during venting. Centerline discharge pumps may self-vent the casing, but the seal chamber always needs manual venting.
Starting a Gasoline-Powered Water Pump
Follow this specific sequence for reliable ignition and smooth operation of gasoline-powered models. Each step matters for engine longevity.
Preparing the Engine for Startup
Turn the fuel valve ON. Set the choke to closed (ON) for cold starts. Position the throttle at approximately one-third to full open. Turn the power switch ON if equipped.
Starting the Engine
Pull the starter cord firmly in one smooth motion. Multiple attempts may be needed, typically 3 to 5 pulls. Once the engine fires, allow it to run for 2 to 3 minutes at idle. Gradually open the choke (turn OFF) as the engine warms. Adjust throttle for smooth idle operation. Some newer models recommend starting with the choke OFF, so always consult your manual.
Starting an Electric Water Pump Motor
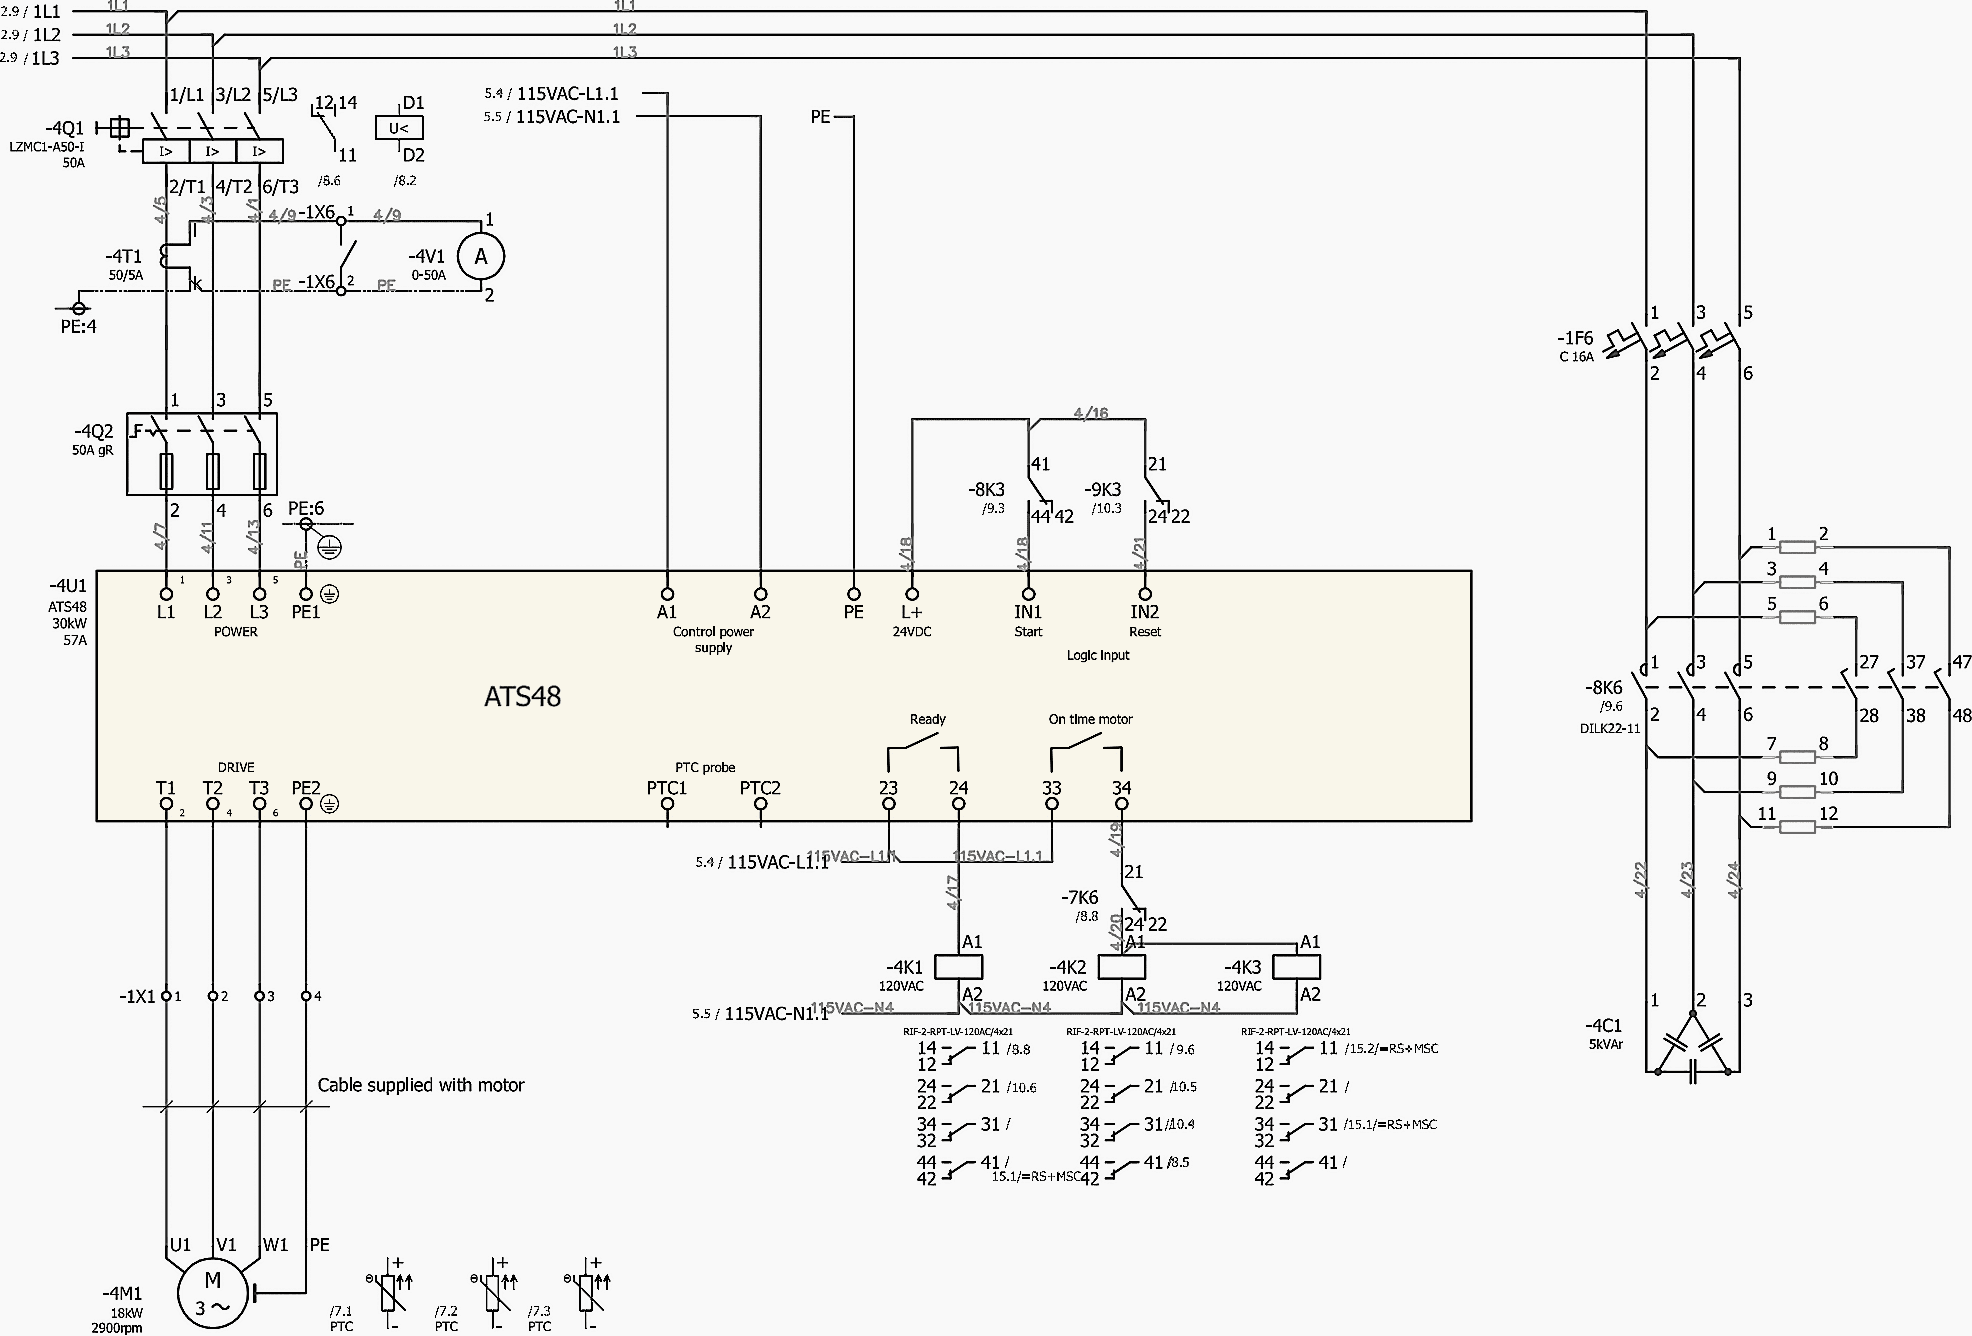
Electric pumps start with a button or switch, but preparation remains just as critical as with gasoline models.
Power and Wiring Verification
Confirm voltage matches the pump rating (120V or 240V). Ensure frequency is correct (60Hz in North America). Verify phase configuration for industrial applications. Follow Lockout/Tagout procedures in commercial settings before startup.
Starting Procedure
Turn power ON at the source. Press the start button or engage the motor starter. Monitor amperage draw, which should rise and stabilize within the normal range. Listen for unusual noises like grinding or knocking that indicate misalignment or cavitation. Use a soft starter or VFD for large motors to reduce inrush current and mechanical stress.
Post-Startup Monitoring and Performance Checks
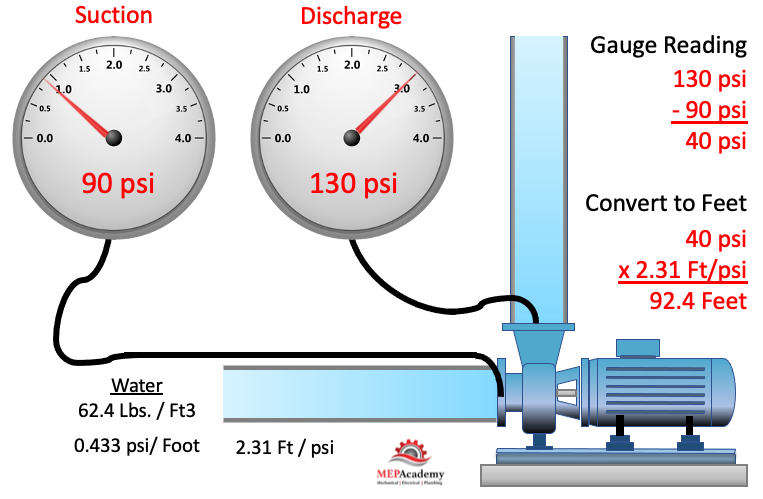
Once running, verify performance and adjust for efficient operation. This monitoring phase catches problems before they cause damage.
Checking Flow and Pressure
Watch the discharge gauge. Pressure should rise steadily to the expected level. Confirm flow visually or with a meter. Lack of pressure indicates air lock or failed priming.
Monitoring Noise and Vibration
Excessive vibration suggests misalignment, cavitation due to low NPSH, or impeller imbalance. Squealing noises indicate trapped air. Address any abnormalities immediately to prevent bearing or seal damage.
Adjusting the Discharge Valve
If started with the discharge valve closed, open it gradually to prevent water hammer. Bring the pump to its Best Efficiency Point (BEP) for optimal performance and longevity.
Proper Shutdown and Storage Procedures
Proper shutdown protects your pump and ensures readiness for the next use. Follow these steps immediately after operation.
Flushing and Draining After Use
If pumping dirty or abrasive water, flush the system with clean water for 2 to 3 minutes. Open the bottom drain plug and allow all water to escape. Residual sludge causes corrosion and clogs internal components.
Preparing for Storage
Drain the fuel tank completely to prevent gum buildup in the carburetor. Run fresh fuel through the carburetor briefly to coat internal parts. Change engine oil if due. Dry the exterior thoroughly and store in a clean, dry place above freezing. Remove the spark plug on gasoline models and add a few drops of oil to prevent cylinder rust.
Common Mistakes That Damage Water Pump Motors
Understanding these common errors helps you avoid costly repairs and premature equipment failure.
Starting a dry pump destroys seals and impellers while voiding your warranty. Skipping venting causes air lock and seal damage. Wrong driver rotation unscrews the impeller catastrophically. Old fuel clogs carburetors and causes hard starting. Over-tightening fittings cracks couplers and creates leaks. Ignoring foot valve failure results in complete loss of prime.
Maintenance Tips for Long-Term Reliability
A few minutes of regular care prevents hours of downtime and extends your pump’s service life significantly.
Daily and Pre-Use Checks
Check engine oil level before every use. Inspect the air filter and clean or replace if dirty. Examine spark plug condition on gasoline models. Verify hose integrity and all connections are secure.
Monthly and Seasonal Tasks
Inspect impeller clearance and adjust if worn. Check the mechanical seal for leaks. Test foot valve operation. Lubricate all grease points. Keep a maintenance log recording oil changes, flow and pressure readings, vibration levels, and all repairs performed.
Frequently Asked Questions About Starting Water Pump Motors
How do I prime a water pump before starting it?
Remove the priming cap from the top of the pump housing and pour clean water into the chamber until water flows from the discharge nozzle. This fills the volute completely. Reinstall the cap tightly with a properly seated gasket. Most pumps require 1.2 to 1.5 gallons (4 to 5 liters) of water.
Can I start my water pump without priming it?
No. Starting a centrifugal pump without priming destroys the mechanical seal and voids your warranty. The pump runs dry within seconds, overheating and permanently damaging the seal and impeller. Always prime before starting.
Why does my water pump make squealing noises when starting?
Squealing noises indicate trapped air in the system. Air collects at high points like the seal chamber and impeller eye. Vent the casing and seal chamber manually before startup to remove this air.
How do I check if my pump rotation is correct?
On industrial pumps, use a rotation tester or perform a momentary power check (for electric motors only) before installing the coupling. Incorrect rotation unscrews the impeller from the shaft, causing catastrophic failure within minutes.
What happens if I run my water pump with the discharge valve closed?
Running with a closed discharge valve causes overheating and pressure buildup. Open the discharge valve gradually after startup to prevent water hammer and bring the pump to its Best Efficiency Point.
How often should I change the oil in my water pump?
Check engine oil before every use and change it according to manufacturer recommendations, typically after the first 20 hours of operation and then every 50 to 100 hours thereafter. Change oil more frequently in dusty or dirty conditions.
Key Takeaways for Starting Your Water Pump Motor Safely
Starting a water pump motor correctly requires preparation, precision, and attention to detail. Always complete a pre-start inspection checking for damage, verifying oil levels, and confirming driver rotation. Connect hoses properly using rigid intake pipes with strainers, and seal all threaded joints with PTFE tape. Prime every centrifugal pump before starting, and vent trapped air from both the casing and seal chamber. Follow the specific startup sequence for your pump type, whether gasoline or electric. Monitor performance after starting, and always follow proper shutdown and storage procedures to extend equipment life. By following these steps consistently, your pump will deliver years of reliable service while avoiding the costly repairs that result from skipped preparation and improper operation.