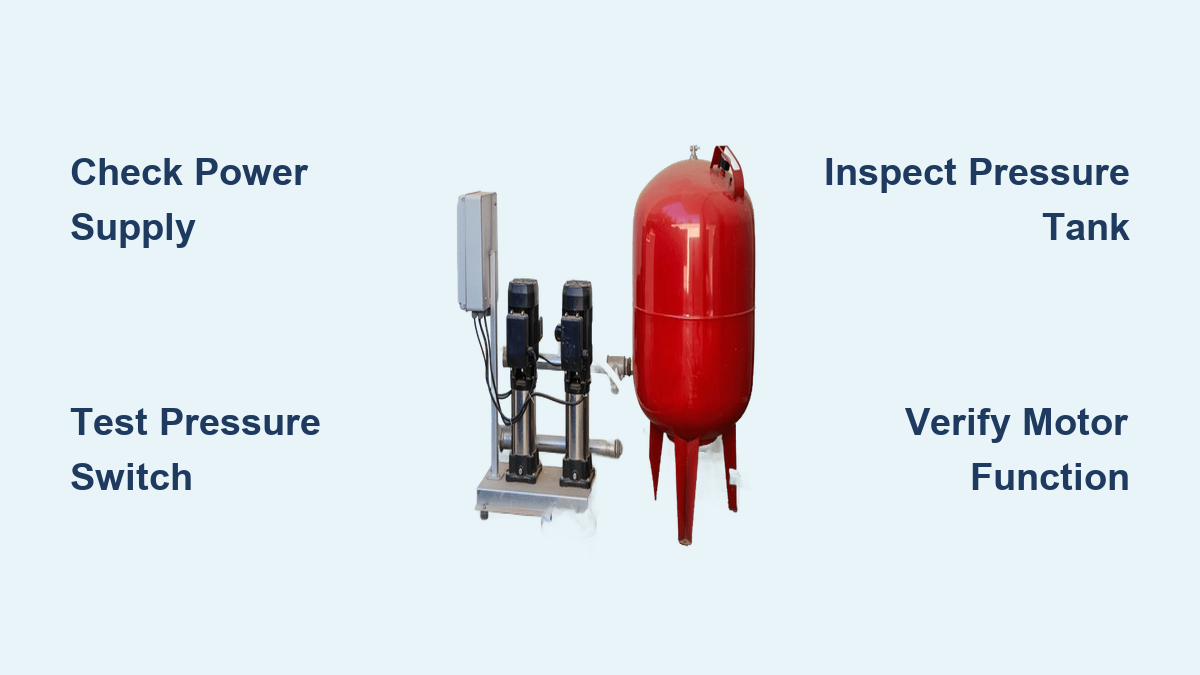
If your water pressure pump isn’t working, you’re likely facing no water flow, zero pressure, or a silent system. This issue disrupts daily life, preventing showers, flushing toilets, and running appliances. The good news? Many causes of a water pressure pump not working are simple to diagnose and fix, often without replacing the entire system. In fact, most pump failures turn out to be faulty switches, waterlogged tanks, or electrical hiccups.
This guide walks you through proven diagnostic steps, common failure points, and immediate fixes so you can restore water fast. You’ll learn how to test each component, recognize telltale signs of failure, and avoid costly replacements when unnecessary. Whether you have a well pump or a booster system, this step-by-step approach saves time, money, and stress.
Check Power Supply First
Before assuming the pump is dead, confirm it’s getting power. Most systems run on 120V or 230V, and a tripped breaker or loose wire can mimic total failure.
No Power at the Breaker
Go to your electrical panel and check if the pump’s circuit breaker is tripped. Reset it if needed, then listen for a click from the pressure switch. If it trips again immediately, there’s a short circuit. Do not keep resetting a tripped breaker.
Test Voltage at Key Points

Use a multimeter to check voltage at the breaker terminals. For 230V systems, you should read approximately 240V. For 120V systems, expect approximately 120V. At the pressure switch, remove the cover (power off first), then test across the two hot wires. Normal readings show 220 to 240V. Low readings between 5 and 50V indicate failing breaker or damaged wiring. Zero voltage means an open circuit, so check the disconnect switch and all connections.
Diagnose the Pressure Switch
The pressure switch turns the pump on and off based on system pressure. If it fails, the pump won’t start even when power is present.
Inspect for Burned Contacts
Turn off power and remove the switch cover. Look for pitted or blackened contacts, corrosion or insect debris, and melted plastic or burnt smell. Clean contacts gently with 220-grit sandpaper or electrical contact cleaner. Replace the switch if damaged, as these switches typically cost $20 to $60.
Use the Manual Lever
Many switches have a manual override lever on the back. Turn power on, then slowly lift the lever up. If the pump starts, the motor and wiring are good, and the switch is likely the problem. This simple test can save you from unnecessary part replacements.
Test the Pressure Tank
A failed pressure tank can cause zero pressure, rapid cycling, or prevent the pump from restarting entirely.
Check Air Charge
Shut off power and open a faucet to drain the tank. Use a tire pressure gauge on the Schrader valve at the top of the tank. Target 2 to 4 PSI below the cut-in pressure. For a 30/50 switch, aim for 28 PSI. For a 40/60 switch, aim for 38 PSI. Recharge with an air compressor if low. If air escapes as water, the bladder is ruptured and the tank needs replacement.
Knock Test for Waterlogging
Tap the side of the tank with your knuckles. A hollow ring indicates a good air charge. A dull thud means the tank is waterlogged, which occurs when the bladder has failed. A waterlogged tank forces the pump to cycle constantly, leading to premature burnout.
Examine the Control Box and Capacitor
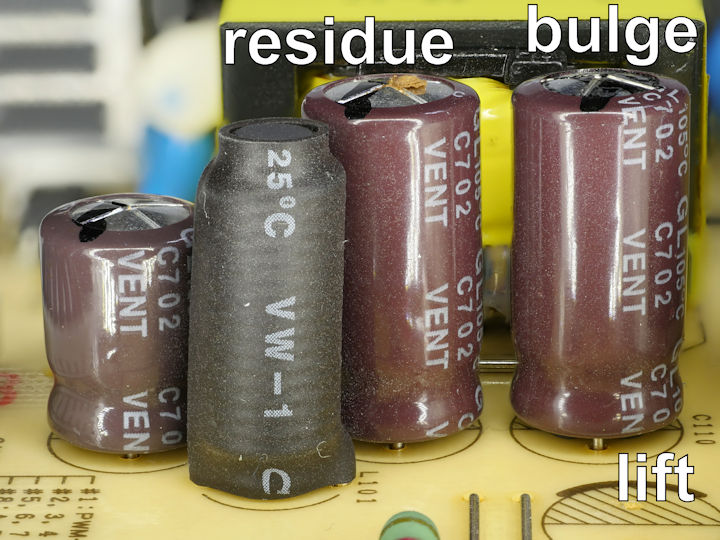
For 3-wire submersible pumps, the control box provides startup power. A failed capacitor is a top cause of humming sounds without the pump actually running.
Signs of Capacitor Failure
Look for bulging, leaking, or cracked casing on the capacitor. Check for burn marks or a strong odor. If the pump hums but won’t start, the capacitor is likely the culprit. Replace the capacitor ($10 to $30) if any of these signs appear. Always discharge the capacitor first using an insulated screwdriver before handling it.
Test with a Known-Good Control Box
If you have access to a working unit, swap it in temporarily. If the pump runs but overheats or draws high current, the motor is failing, not the control box. Running a damaged pump can destroy a new control box, so diagnose the motor first.
Verify Pump Motor Function
If power reaches the pump but it doesn’t run, test the motor itself to determine if replacement is necessary.
Listen for Humming
A humming sound means power is reaching the motor but it can’t start. This likely indicates a failed capacitor, seized bearings, or a worn impeller. No sound at all suggests the motor may be completely dead.
Test Motor Windings
Use a multimeter on the ohms setting. Disconnect wires at the well head, then test resistance between leads. For a half-horsepower 230V pump, black to yellow should read approximately 4.6 to 5.2 ohms. Red to yellow should read approximately 16.7 to 20.5 ohms. Infinite resistance indicates an open winding, meaning a dead motor. Zero resistance indicates a short circuit. Large imbalance between readings suggests internal damage.
Measure Pump Current Draw
A clamp ammeter reveals hidden issues that voltage testing alone cannot detect.
Normal Readings
Expect a startup surge of approximately 20A for a half-horsepower pump. Running current should be approximately 6.2A steady. These readings confirm the motor is functioning properly under load.
Abnormal Signs
Readings of 3 to 4A indicate a worn impeller or stripped splines. Zero current means an open circuit or broken wire. Excessive current points to a ground fault or winding damage. Low current often means mechanical wear rather than electrical failure.
Rule Out Hidden Plumbing Issues
Many pump problems are actually plumbing leaks or blockages that mimic pump failure.
Isolate the House System
Close the isolation valve between the tank and house. Turn the pump on and watch the pressure gauge. If pressure builds to 60 PSI, the pump and tank are working correctly. If pressure drops fast, there’s a hidden leak somewhere in the house plumbing.
Find Silent Toilet Leaks
Add dye tablets or food coloring to the toilet tank. Wait 15 to 30 minutes. If color appears in the bowl, the flapper is failing. A running toilet can cause constant water draw, making it appear as though the pump isn’t working when no pump repair is actually needed.
Check for Frozen or Blocked Pipes
Even in mild climates, shallow lines can freeze and block water flow completely.
Symptoms to Watch For
The pump runs but produces no water. Voltage and pressure in the tank appear normal. No flow comes from any faucets. These signs point to a frozen or blocked pipe rather than a pump issue.
Thaw the Line Safely
Use heat tape or a hair dryer on exposed sections. Focus on above-ground pipes and areas near exterior walls. One user had a freeze just below ground level, and thawing restored full pressure immediately.
Inspect Jet Pump Priming and Suction Lines
Jet pumps rely on a water seal to create prime. Air leaks break this seal, preventing water from being drawn into the system.
Signs of Air Leak
The pump runs but produces no water. You hear gurgling or sputtering sounds. The pump frequently loses prime. These indicate air is entering the suction line.
Fix the Issue
Check all suction line fittings for tightness. Replace cracked pipes or gaskets. Re-prime the pump using a garden hose. Never run a jet pump dry, as it can overheat and fail within minutes.
Address Booster Pump Specific Issues
Booster pumps in apartments or commercial systems face unique challenges that require specialized attention.
Over-Cycling Due to Air Lock
The pump turns on and off rapidly after water use. This is caused by trapped air in the pump or piping. Open the bleed screw on the pump and pour water in to re-prime. Vent high points manually to release trapped air.
Reduce Operating Noise
High noise often comes from poor mounting. Use rubber mats or spring hangers to reduce vibration transmission. This simple upgrade improves comfort and extends component life.
Consider Variable Speed Drive Upgrades
Older fixed-speed pumps waste energy. Variable speed drive models adjust output to demand, cutting energy use by 30 to 50%. Modern Grundfos booster pumps include self-diagnostics and built-in VSD efficiency.
Prevent Future Failures
Most pump issues are preventable with simple annual maintenance.
Annual Checklist
Test tank air pressure and adjust to 2 to 4 PSI below cut-in. Inspect the pressure switch and clean contacts and sensing nipple. Check motor resistance and capacitor condition yearly. These quick checks catch problems before they become emergencies.
Key Upgrades to Consider
Install a surge protector on the pump circuit. Add a pressure gauge if the system lacks one. Insulate exposed pipes to prevent freezing. These investments pay for themselves by preventing costly repairs.
When to Call a Pro
DIY fixes work for switches, tanks, and basic electrical checks. But call a licensed plumber or pump technician when the submersible pump needs pulling from the well. You should also call when detecting motor burnout or ground fault, when voltage issues persist after troubleshooting, or when the system involves VSDs, multiple pumps, or complex controls.
Key Takeaways for Fixing Your Water Pressure Pump
Most water pressure pump failures are not actually pump failures. The pressure switch, pressure tank, and electrical connections cause the majority of issues. A $20 switch or 10-minute air recharge can save a $2,000 pump replacement. Always diagnose before replacing any component. Hidden plumbing issues like running toilets can mimic pump failure. Regular maintenance prevents approximately 80% of common issues. Stay safe, use the right tools, and remember that understanding your system is the best way to keep it running for years.
Frequently Asked Questions About Water Pressure Pump Not Working
Why does my water pressure pump turn on but produce no water?
This usually indicates a frozen pipe, blocked intake screen, or air lock in the system. Check for frozen lines first, even in mild weather. For jet pumps, the loss of prime is a common cause. Inspect suction lines for leaks and re-prime the pump if needed.
How do I know if my pressure tank is bad?
A bad pressure tank shows specific signs. It may cause rapid cycling, meaning the pump turns on and off frequently. You might hear sloshing sounds inside. The knock test produces a dull thud instead of a hollow ring. Water spurting from the Schrader valve indicates a ruptured bladder. Low air pressure that drops immediately after charging also signals tank failure.
Can a pressure switch be repaired, or does it need replacement?
Pressure switches can sometimes be repaired by cleaning burned contacts with fine sandpaper. However, replacement is usually the better choice. Switches are inexpensive ($20 to $60), and repairs are rarely permanent. Keep a spare switch on hand since these components fail every 5 to 10 years on average.
What causes a pump to hum but not start?
A humming pump with no rotation typically points to capacitor failure. The capacitor provides the initial torque needed to start the motor. Without it, the motor receives power but cannot overcome the starting load. Other possibilities include seized bearings or a worn impeller preventing rotation.
How long do water pressure pumps last?
Most well pumps last 8 to 15 years with proper maintenance. Some systems exceed 20 years. Lifespan depends on usage frequency, water quality, and maintenance history. Pumps over 15 years old are more prone to failure, especially if they’ve experienced frequent cycling or running dry.
Should I replace just the pump or the whole system?
If only one component fails, replace just that part. A failed pressure switch or capacitor costs far less than a new pump. However, if the pump is old (over 15 years), the motor is burned out, or the tank bladder is ruptured, consider replacing the entire system. This avoids repeated repair costs on an aging setup.