
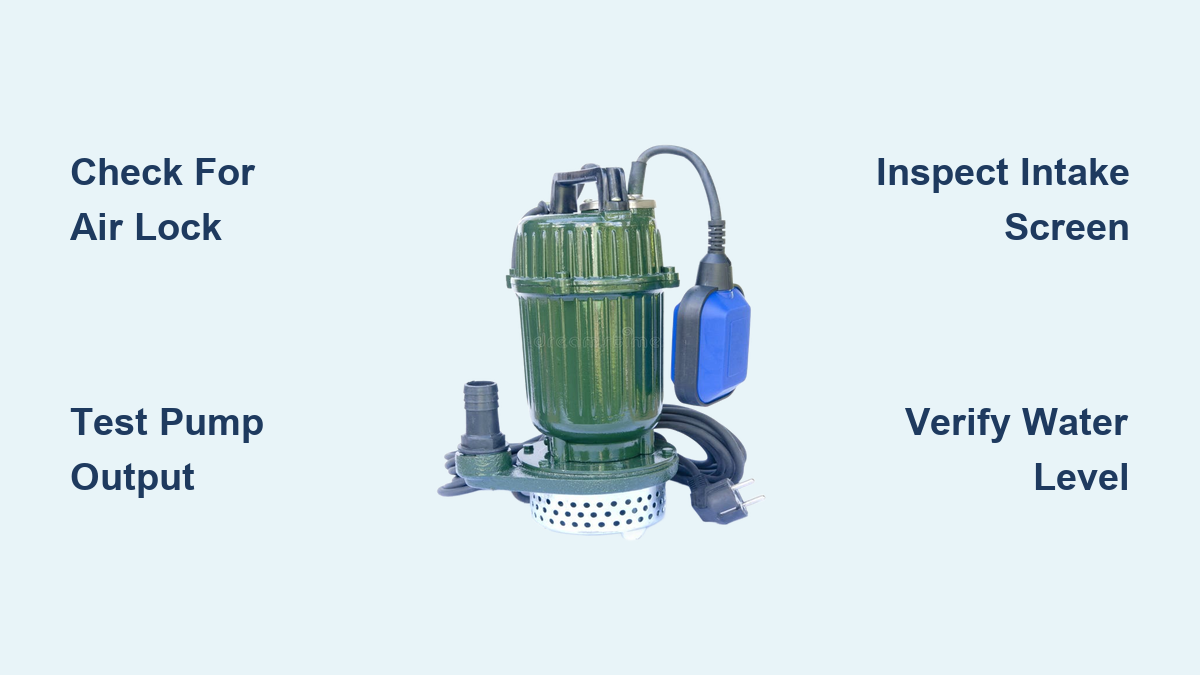
You turn on the tap, but nothing comes out. The pressure tank stays silent. Yet when you check the well, you hear the hum of the motor. Your submersible pump is running, but no water flows. This frustrating issue is more common than you think, and while it might seem like a total system failure, most causes are diagnosable and fixable, often without replacing the entire pump.
This guide walks you through every possible cause of a submersible pump running but delivering no water. You will learn how to diagnose the issue step-by-step, perform immediate fixes, and prevent recurrence. Whether you are a homeowner, maintenance technician, or well system operator, this actionable plan will get your water flowing again and keep it flowing.
Check for Air in the System
Air trapped inside the pump or piping prevents water from being drawn and pressurized. Even a small pocket can break the siphon effect needed for flow.
Foamy Water or Gurgling Sounds
If faucets spit air or produce foamy, carbonated-looking water, air is entering the system. This often happens when the foot valve or check valve fails, letting the water column drain back into the well.
Quick fixes include:
• Shut off the pump immediately to avoid dry-running damage
• Re-prime the system by pouring 1 to 5 gallons of water into the wellhead or access point, depending on pipe size
• Restart the pump while ensuring it remains fully submerged
Bleed Air from High Points
Open the highest faucet in your home and let it run during startup. This helps vent air pockets that accumulate at elevated sections of plumbing. For permanent solutions, install automatic air release valves at system high points and double-check all joints below water level for leaks that could introduce air.
Test Pump Output Directly
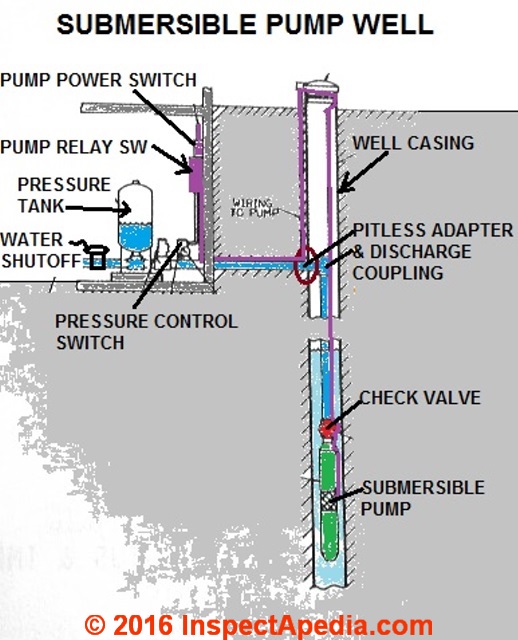
Before tearing apart pipes or pulling the pump, confirm whether the issue is pump-side or plumbing-side.
Disconnect the Discharge Line
- Turn off power at the breaker
- Locate the discharge pipe near the wellhead or pressure tank
- Disconnect the line carefully, expecting residual pressure
- Place the open end into a bucket or drain
- Briefly power on the pump for 5 to 10 seconds maximum
Results indicate the problem location. If water sprays out, the problem is downstream, meaning a blocked tank, valve, or pipe. If no water comes out, the issue is with the pump, intake, or well level. Never run the pump dry for more than a few seconds, as lack of water causes rapid overheating.
Inspect for Intake Blockages
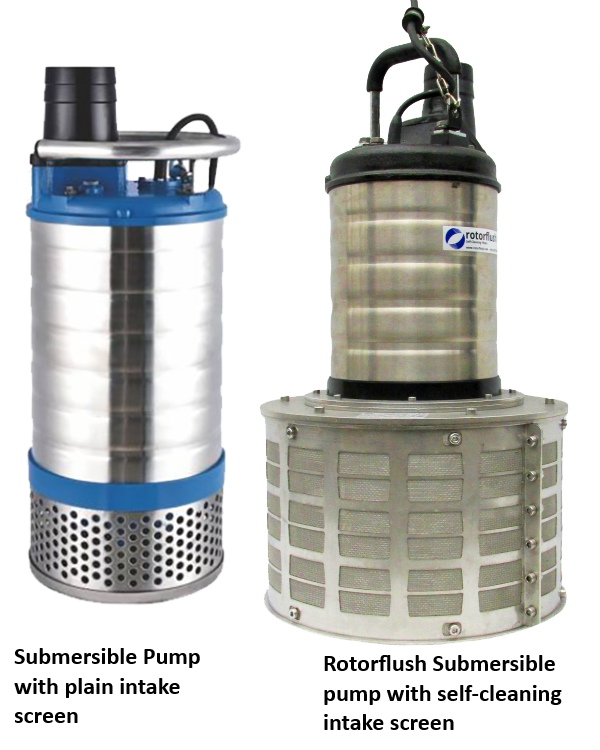
A clogged screen or impeller stops water from entering the pump, even if the motor spins normally.
Pull the Pump for Visual Check
If direct output testing shows no flow, retrieve the submersible pump using the drop rope or lift tape. Inspect the intake screen for clogs from sand, algae, silt, or plant matter. Check impeller vanes for jamming by stringy debris or mineral scale. Examine the foot valve flap for being stuck closed by sediment.
Clean or Flush Components
Use a soft brush and clean water to flush the intake grille, impeller housing, and discharge port. For stubborn scale, soak metal parts in vinegar while avoiding damage to seals. In sandy or organic-heavy environments, install a pre-filter or use a vortex impeller pump that handles solids up to 7 millimeters.
Verify Well Water Level
Your pump may be running, but if the water table has dropped below the intake, it is pumping air, not water.
Perform a String Test
Tie a small weight to a long string, such as a bolt. Lower it slowly into the well until you hear a splash. Mark the wet point, which is the current water level. Compare this to your pump is installation depth. The pump should sit 10 to 20 feet below the dynamic water level. If water is within 1 to 2 feet of the intake, the well is likely dry.
Use an Electronic Dip Meter
For accuracy, invest in a water level meter. These probes beep or light up when they contact water, measuring depth to within plus or minus 0.01 feet. Common causes of low water include drought or seasonal drawdown, especially in late summer and fall, over-pumping, and aquifer depletion.
Diagnose Check and Foot Valve Failure
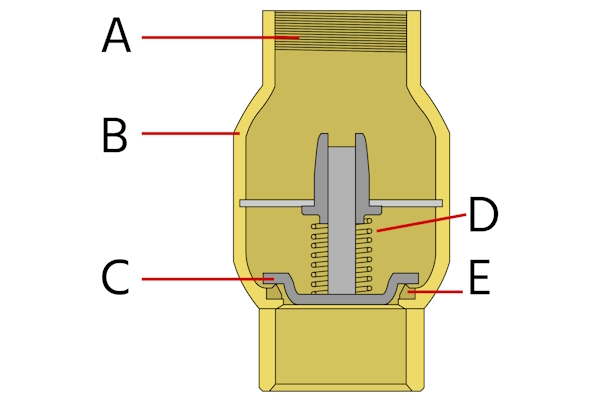
These one-way valves keep the water column primed. If they fail, water drains back into the well, forcing the pump to re-prime each cycle or fail to prime at all.
Listen for Gurgling After Shutdown
A gurgle or sucking sound means water is flowing backward. Your foot valve is likely failed open.
Test Valve Manually
After pulling the pump, remove the foot valve and shake it. Does the flap move freely? Blow through it. Air should only pass one way. Replace the valve if the flap is cracked or stuck, debris prevents sealing, or corrosion affects the hinge.
Install redundant check valves 10 to 20 feet above the pump. This creates a safety net if the foot valve fails and reduces strain on the motor. Replace check valves every 3 to 5 years in hard water areas.
Look for Leaks in Pipes and Fittings
Leaks can cause air ingestion in suction lines or water loss in discharge lines, both leading to no output.
Check Above-Ground Connections
Inspect hose clamps, threaded joints, pressure tank inlet, and control box seals. Tighten loose fittings. Use thread sealant on NPT threads. Upgrade to stainless steel clamps and double-clamp all hoses.
Find Buried Line Leaks
Signs of underground leaks include soft, eroded soil between well and house, unexpectedly lush grass in one area, and rapid pressure drop after shutdown. To perform a pressure hold test, turn off power, drain the system slightly to relieve pressure, close the main valve, and monitor the pressure gauge for 30 minutes. Steady pressure means no leak. Dropping pressure indicates a leak in the system.
Examine Pressure Tank and Switch
Even if the pump works, a faulty tank or switch can prevent water delivery or mimic a no-flow condition.
Tap the Pressure Tank
A hollow ring indicates the air cushion is intact. A dull thud means the bladder has failed and the tank is waterlogged. A waterlogged tank causes rapid pump cycling and poor pressure.
Test Air Charge
- Drain the tank completely
- Use a tire gauge on the Schrader valve at the top of the tank
- Pre-charge to 2 psi below cut-in pressure, which is 38 psi for a 40/60 switch or 28 psi for a 30/50 switch
If air escapes with water, the bladder is ruptured and the tank must be replaced.
Clear Blocked Pressure Switch Nipple
Mineral buildup or rust can block pressure transmission. Turn off power, remove the switch from the mounting nipple, inspect the small orifice, and clean it with a small screwdriver or drill bit. Flush with vinegar if corroded. Prevent galvanic corrosion by installing a plastic nipple between the tank and switch.
Investigate Electrical and Motor Issues
Even if the pump hums, electrical faults can reduce performance or mask deeper problems.
Measure Voltage at Pump Leads
Low voltage below 208V on a 230V system causes weak operation. Check the wire gauge for being undersized on long runs. Look for loose or corroded splices and GFCI or breaker tripping. Use a multimeter at the control box and splice point.
Test Amp Draw with Clamp Meter
Compare running current to the pump is nameplate rating. Lower than rated indicates no load from dry running or a failed impeller. Higher than rated indicates mechanical binding, a clog, or seal failure. High amps with no flow may indicate internal motor damage or bearing failure.
Inspect for Insect Infestation
Ants and spiders can enter the pressure switch housing, preventing contact closure. Symptoms include the pump not starting and flickering the switch restoring function temporarily. Replace the switch and seal openings with silicone.
Assess Impeller Condition
The impeller is the heart of the pump. If it is damaged, detached, or worn, the motor spins uselessly.
Common Failure Signs
These include the pump running but no pressure rise, warm discharge water from internal recirculation, and low amp draw.
Confirm with Output Test
As previously described, disconnect the discharge line. No water means the impeller is likely faulty. In sealed submersible pumps, impellers are not user-replaceable. Full pump replacement is usually required.
Choose Durable Impeller Types
For debris-prone environments, consider vortex impellers that handle solids and resist clogging, open impellers that are less prone to jamming than closed designs, and stainless steel that resists erosion in sandy water.
Avoid Installation and Design Flaws
Even a new pump can fail if installed incorrectly.
Pump Installed Too High
If the pump sits near or above the water table, it runs dry during low levels. Lower the pump deeper within the safe range according to manufacturer specs.
Undersized Drop Pipe
Too narrow a pipe increases friction loss, reducing effective head. Use the correct diameter, typically 1 inch or 1.25 inch, and schedule 80 PVC or galvanized steel.
No Check Valve Equals Repeated Priming
Without a foot valve, the water column drains back, forcing the pump to re-prime every cycle and eventually leading to failure. Always install a foot valve on the intake end.
Use Advanced Diagnostic Tools
For recurring or complex issues, professional-grade tools provide clarity. A clamp meter measures real-time amp draw. A multimeter verifies voltage and continuity. A megger detects moisture in windings. A borehole camera inspects well casing, debris, or drop pipe damage. An electronic dip meter precisely measures water level. Keep a log of voltage, amps, and water levels annually to spot trends early.
Follow Preventive Maintenance Schedule
Avoid breakdowns with regular upkeep. Test pump operation and check pressure monthly. Inspect and clean the intake screen quarterly. Measure well water level annually. Drain and repressurize the tank annually. Pull and inspect the pump every 3 to 5 years. Replace the pressure tank every 5 to 10 years. Replace the pump every 8 to 15 years, depending on use.
Add protection systems such as a dry-run sensor that shuts off the pump if no flow is detected, a surge protector that guards against voltage spikes, an in-line sediment filter that reduces wear on the impeller and seals, and dielectric unions that prevent galvanic corrosion between dissimilar metals.
Consider Alternative Pump Designs
Standard submersibles have many failure points. Newer designs reduce risk.
GATOR Pumps: Above-Water Operation
The motor stays above water level, eliminating submersion corrosion. The open impeller handles air without damage. No suction lines or foot valves are needed. This is ideal for ponds, flood control, and unreliable wells.
Tomahawk TDP400: Heavy-Duty Submersible
This pump features a vortex impeller for solids handling, double mechanical seals, thermal overload protection, and continuous-duty rating. It is perfect for harsh environments where standard pumps fail quickly.
Fast-Track Troubleshooting Checklist
When your submersible pump runs but no water comes out, follow this order:
- Cut power to prevent dry-run damage
- Check for foamy water or gurgling to test for air lock
- Disconnect discharge line to verify pump output
- Tap pressure tank to check for waterlogging
- Test pressure switch by cleaning the nipple and inspecting for corrosion
- Measure water level with a string test or dip meter
- Inspect for leaks in fittings and buried lines
- Pull pump to check impeller, strainer, and foot valve
- Test electrically for voltage, amps, and insulation
- Install fixes or replace based on findings
Act Fast, Prevent Damage
A running submersible pump with no water is an emergency. Dry operation destroys motors and seals in minutes. Always shut off power immediately when flow stops.
Most issues are fixable, often with simple checks like re-priming, cleaning a screen, or replacing a valve. But ignoring the problem leads to costly replacements. By following this guide, you will diagnose faster, fix smarter, and keep your water system reliable for years.
Frequently Asked Questions About Submersible Pump Running But No Water
Why does my submersible pump run but not deliver water?
This happens when there is hydraulic discontinuity. The pump motor runs, but water is not moving. Common causes include air locks, clogged intakes, dry wells, failed valves, or internal damage like a broken impeller.
How do I know if air is trapped in my system?
Foamy or carbonated-looking water from faucets, gurgling sounds, and intermittent sputtering indicate air in the system. This typically points to a failed foot valve or check valve that allows water to drain back into the well.
Can a dry well cause this problem?
Yes. If the water table drops below the pump intake, the pump draws air instead of water. Perform a string test or use an electronic dip meter to check the water level. The pump should sit 10 to 20 feet below the dynamic water level.
Is it safe to run the pump briefly to test for output?
Yes, but only for 5 to 10 seconds maximum. Disconnect the discharge line first and place the open end in a bucket. Never run the pump dry for extended periods, as overheating can destroy the motor and seals within minutes.
How often should I replace check valves?
Replace check valves every 3 to 5 years in hard water areas. They are critical for maintaining the water column and preventing the pump from re-priming on every cycle.
Key Takeaways for Fixing Your Submersible Pump
A submersible pump running but no water is usually caused by air in the system, a clogged intake, a failed check valve, or low water levels. Start by testing pump output directly, then work through each subsystem systematically. Always cut power immediately when no water flows to prevent permanent motor damage. Regular maintenance, including annual water level checks and valve replacements, prevents most failures. Consider upgrading to clog-resistant pumps like the Tomahawk TDP400 or above-water designs like GATOR pumps if you experience recurring issues.
