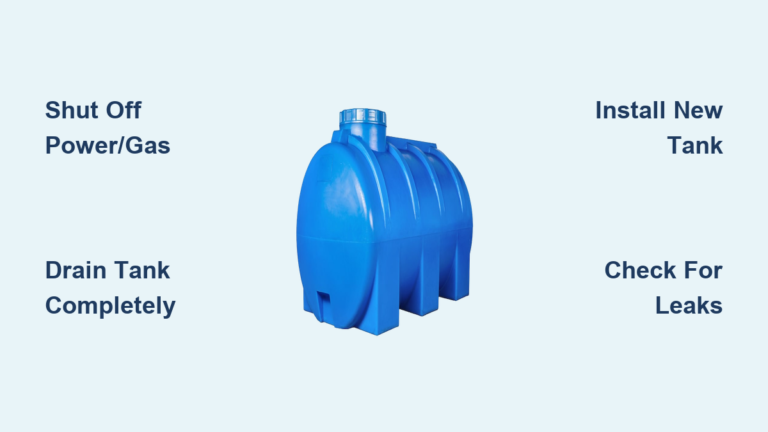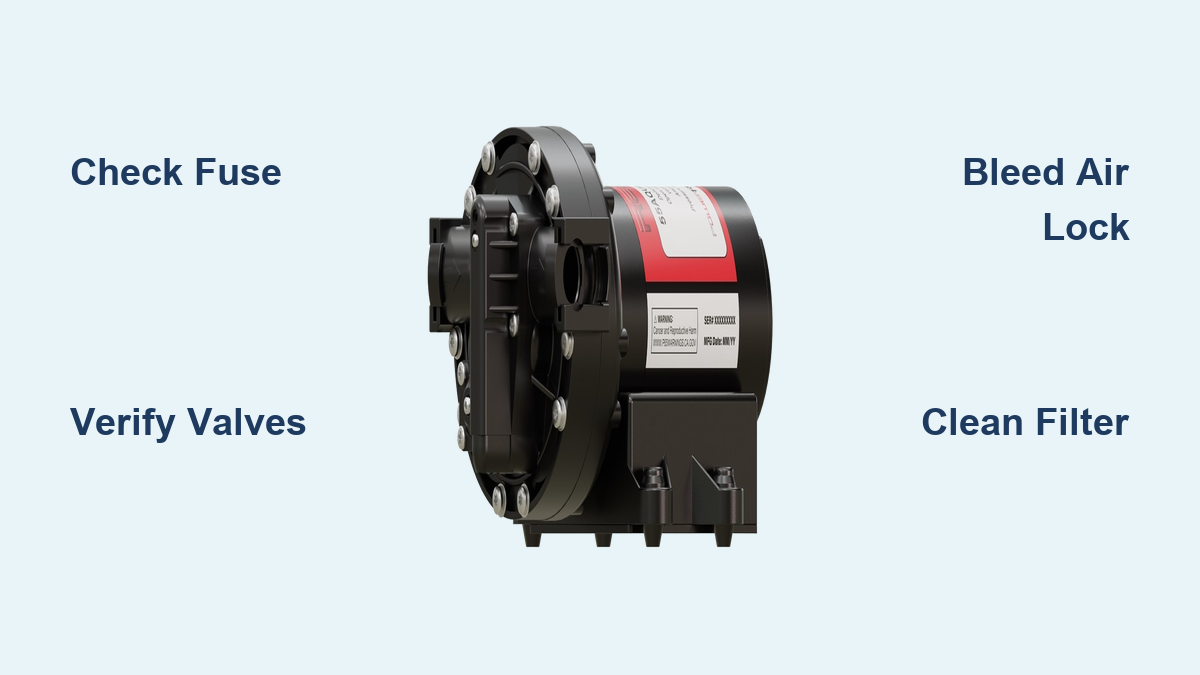
You’re ready to hit the road, but when you turn on the faucet, nothing happens. No sound, no water. Your RV water pump not working can ruin a trip fast. Whether you’re boondocking or prepping for departure, a failed pump means no showers, no sink use, and no toilet flushing. The good news? Most issues aren’t the pump itself. Over 80% of failures stem from electrical problems, air locks, or valve mistakes, not a dead motor. This guide walks you through step-by-step diagnostics, real-world fixes, and long-term prevention so you can restore water fast without replacing parts unnecessarily.
Check Power Supply First
Before tearing into hoses or disassembling the pump, verify power is reaching it. Most dead pump cases are actually blown fuses, bad grounds, or miswired switches.
Test the Fuse and Switch
Locate your 12V fuse panel, usually near the electrical compartment or converter. Find the water pump fuse, typically rated 7A, 10A, or 15A, and inspect it carefully. Replace if blown with the same amperage. Never upsize a fuse.
Don’t forget the inline fuse. Many RVs have a fuse on the positive wire within 18 inches of the pump. This is a commonly missed culprit.
Pro Tip: If the pump switch light is off, the issue is upstream (fuse, power source). If the light is on but the pump is silent, test voltage at the pump directly.
Measure Voltage at Pump Terminals
Use a digital multimeter to check for 12.0 to 14.4V DC at the pump’s terminals. No voltage means trace the circuit. Test output at the switch first, then inspect the ground connection. Clean corrosion and tighten if needed. If voltage is present but the pump remains silent, the motor or internal switch has likely failed.
Confirm Battery and Converter Health
If you’re not on shore power, check house battery voltage. Below 12.0V may not activate the pump. If on shore power, verify converter output is 13.6 to 14.4V. A failed converter can mimic a dead pump even with external power connected.
Verify Valve Positions and Plumbing Setup
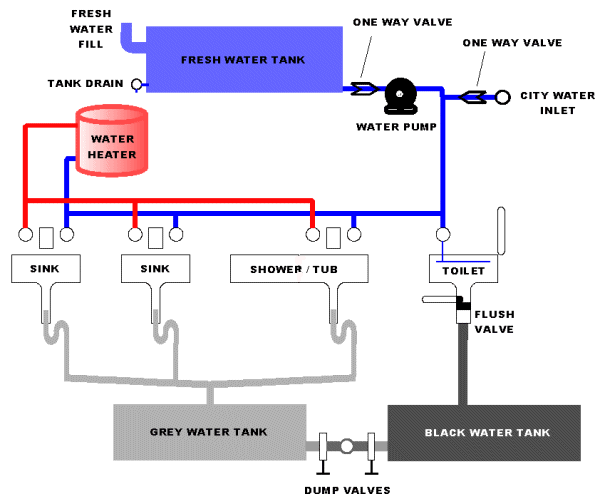
A misconfigured valve is one of the top reasons your pump runs but delivers no water or doesn’t run at all.
Ensure Correct Valve Settings
Check these critical valve positions. The freshwater fill valve must be in the closed position, not the fill position. The winterizing valve should not be in antifreeze mode, which draws from a bottle instead of your tank. The shore water valve must be off because city water pressure can block the pump from activating. Water heater bypass valves should be in normal flow position. If you have a shower saver or recirculating valve, confirm it’s not diverting flow incorrectly.
Common Mistake: After winterizing, users forget to reset valves. The pump runs but sucks air instead of water.
Test Suction Source
Disconnect the inlet hose from the pump and place it in a bucket of water. Turn on the pump. If water flows, the issue is valve setup or tank pickup line. If no flow, the problem lies inside the pump or there’s an upstream blockage.
Fix Air Lock or Loss of Prime
Even self-priming pumps like Shurflo, FloJet, and AquaJet can lose prime after running dry or sitting unused.
Confirm Pump Is Self-Priming
Most modern RV pumps are self-priming but may need help after running dry. Allow up to 10 minutes of continuous run time. Dry operation won’t damage most units.
Bleed Air from the System
Try these proven methods in order.
Open All Faucets
Turn on hot and cold taps at kitchen, bathroom, and outdoor shower. Activate the pump and let it run until water flows steadily without sputtering. Close faucets one by one.
Pulse the Tank Drain Valve
With the pump running, open and close the freshwater tank drain several times. This creates pressure waves that dislodge air pockets trapped in the lines.
Loosen Pump Outlet Fitting
Slightly unscrew the outlet hose at the pump. Let air escape until water spurts out, then retighten. Expect minor leakage during this process.
Use City Water to Prime
Connect to city water and run all faucets for 30 seconds. Disconnect, close all taps, then activate the onboard pump. The lines are now full, and the pump should start immediately.
User Report: One Bay Star owner took over 40 minutes of cycling valves and faucets to fully re-prime after draining the tank.
Inspect and Clean Key Components

Many failed pumps are just clogged or restricted. Clean these parts before considering replacement.
Check Freshwater Tank Level
The pump requires at least one-third tank full to prime properly. Low water causes vortexing, drawing in air instead of water. Refill to half or more before troubleshooting.
Remove and Clean Inlet Filter
The inlet filter is located on the pump’s inlet side with a hand-tightened plastic nut. It contains a fine mesh screen often clogged with sediment or biofilm. Remove it, rinse thoroughly, and inspect. Replace if cracked (cost is $2 to $10). Clean every 3 to 6 months, especially with well water or lake water.
Flush Inlet and Outlet Hoses
Disconnect both hoses and blow water through them or use compressed air. Look for kinks, mineral buildup, and plastic shavings from factory tank drilling. Ensure the inlet hose reaches the bottom of the tank.
Diagnose Internal Pump Failures
If power, valves, and plumbing check out, inspect internal components.
Test the Pressure Regulator Valve
This component fails when the pump runs but produces no water output. Disassemble by shutting off power and draining lines. Remove six screws (three top, three bottom) to open the housing.
Inspect the valve. It should allow flow from inlet to outlet but block flow from outlet to inlet. Use a blow test. If air passes both ways, the valve is stuck.
The cause is typically mineral deposits from hard water or stagnation. Fix it by freeing the stuck spring with light pressure. Clean with white vinegar or descaling solution. Reassemble and listen for an audible click when it resets.
Success Case: A stuck regulator valve was freed manually, and water flow returned instantly.
Clean the Check Valve (Non-Return Valve)
The check valve prevents backflow when the pump shuts off. If stuck open, the system loses pressure and causes short cycling. Disassemble the pump housing (6 screws). Look for debris, especially plastic shavings from tank assembly. Remove with tweezers or a soft brush, then flush with clean water.
Keystone Bullet Case: A FloJet pump cycled every 15 seconds. Plastic debris in the check valve was the culprit.
Troubleshoot Fixture-Specific Flow Issues
Even with a working pump, individual fixtures may fail.
Unclog Faucet Aerators
Low flow at the sink despite good shower pressure usually means clogged aerators. Unscrew the aerator (use 11/16″ or 13/16″ wrench). Soak in vinegar or scrub with a toothbrush. Rinse and reinstall. Clean all aerators every 6 months as prevention.
Clear Toilet Supply Line
No water to the toilet while sinks work indicates a clogged toilet supply line. This small-diameter hose has a tiny orifice prone to clogging. Shut off the pump, disconnect the line at the toilet base, and blow through it or flush with water. Use a pipe cleaner or compressed air for stubborn blockages. Access may require removing an access panel or storage drawer.
Test Shower First
Showers often have better flow due to fewer internal restrictions. Use the shower to diagnose system pressure before checking sinks.
Prevent Future Failures
Most RV water pump issues are preventable with simple maintenance.
Run the Pump Monthly
Even on city water, exercise the pump every 2 to 4 weeks. Fill the freshwater tank, turn off city water, and run all faucets for 3 to 5 minutes. This prevents dried seals, mineral buildup, and seized valves.
Install an In-Line Filter
An inline filter blocks sediment, sand, and plastic shavings before they reach the pump. Place it between the freshwater tank and pump inlet. Replace the filter every 6 to 12 months.
Pro Move: One owner prevented repeated FloJet failures by adding an inline filter after plastic debris ruined two pumps.
Add an Accumulator Tank
An accumulator tank eliminates pulsing water, reduces pump cycling, and mimics home-like water pressure. Install it on the pump outlet with a T-fitting and shutoff valve. Pre-charge to 30 psi.
User Review: An accumulator was a one-time cost with subtle but transformative benefits.
Winterize and Store Properly
After winterizing, return all valves to normal position. Confirm the antifreeze valve is closed and the tank suction is open. Before first use, flush the system with clean water and perform a full prime cycle. Warning: Residual antifreeze can damage pump seals.
Repair vs. Replace: When to Decide
Repair If
Clean or replace a clogged inlet filter. Disassemble and clean a stuck pressure or check valve. Bleed the system for air lock. Tighten loose wiring connections.
Replace If
No operation despite 12V power indicates a burned motor. A cracked housing can’t hold pressure. Worn diaphragm or impeller produces running but no output. The pump is over 5 to 7 years old with frequent use. Repeated failures occur after cleaning.
Replacement Steps
Turn off power and disconnect the battery. Drain lines by opening the lowest faucet. Remove the old pump by disconnecting hoses (plug ends), unplugging wires, and removing mounting screws.
Install the new pump by matching inlet and outlet direction. Use new clamps and confirm polarity (red equals positive). Prime the system by opening all faucets, turning on the pump, and letting it run until steady flow. Check for leaks and proper shutoff.
Pro Tip: Label wires and hoses before removal to save time during reassembly.
Frequently Asked Questions About RV Water Pump Not Working
Why does my RV water pump run but not deliver water?
This typically indicates an air lock, clogged inlet filter, or stuck pressure regulator valve. Start by checking the inlet filter, then try bleeding air from the system by opening all faucets. If that fails, the internal pressure regulator may need cleaning or the check valve could be blocked.
How do I know if my RV water pump fuse is blown?
Locate your 12V fuse panel, usually near the converter or electrical compartment. Find the water pump fuse (commonly 7A, 10A, or 15A) and inspect it. A blown fuse appears broken or darkened. Replace with the exact same amperage. Don’t forget to check for an inline fuse within 18 inches of the pump.
Can I use my RV water pump without water in the tank?
Running the pump dry risks damaging the diaphragm or impeller. Most modern pumps are self-priming but can lose prime after dry running. If the tank is empty, refill it to at least one-third full before activating the pump. Allow 5 to 10 minutes of run time to re-establish prime.
How often should I maintain my RV water pump?
Clean the inlet filter every 3 to 6 months. Exercise the pump every 2 to 4 weeks by running it on the freshwater tank. Flush the system annually if you use hard water. Replace the pump every 5 to 7 years with heavy use.
What causes an RV water pump to cycle constantly?
Frequent cycling (every 15 to 60 seconds) indicates a small leak, failed check valve, or air in the pressurized side. Check for dripping faucets, loose drain caps, and inspect the check valve for debris. Installing an accumulator tank eliminates this problem.
Should I replace or repair my RV water pump?
Repair if the issue is a clogged filter, stuck valve, or air lock. Replace if the motor is burned out (no operation with 12V power), the housing is cracked, or the pump is over 5 to 7 years old with repeated failures.
Key Takeaways for Fixing Your RV Water Pump
Your RV water pump not working is rarely a dead pump. Start with fuses, valves, and air locks because they solve most cases. Check power supply first, then verify valve positions before disassembling anything.
Clean filters regularly and exercise the pump monthly to prevent dried seals and mineral buildup. Consider installing an inline filter and accumulator tank for lasting performance. These upgrades pay for themselves by extending pump life and improving water flow.
When diagnosis is complete, follow the repair versus replace guidelines. Carry a spare pump on long trips and document your model number for quick replacement. With the right steps, you’ll keep water flowing and camping stress-free.