Is your shower suddenly delivering cold water while the dishwasher fails to clean properly? A pilot light that has gone out on your gas water heater is often the culprit behind these frustrating issues. Knowing how to light a gas hot water tank correctly can save you from an expensive service call and restore hot water in under an hour.
This guide walks you through identifying your ignition type, performing critical safety checks, and executing the precise steps to relight your unit. You will learn specific techniques for both spark and manual systems while avoiding common mistakes that lead to failure.
Identify Your Ignition System Type

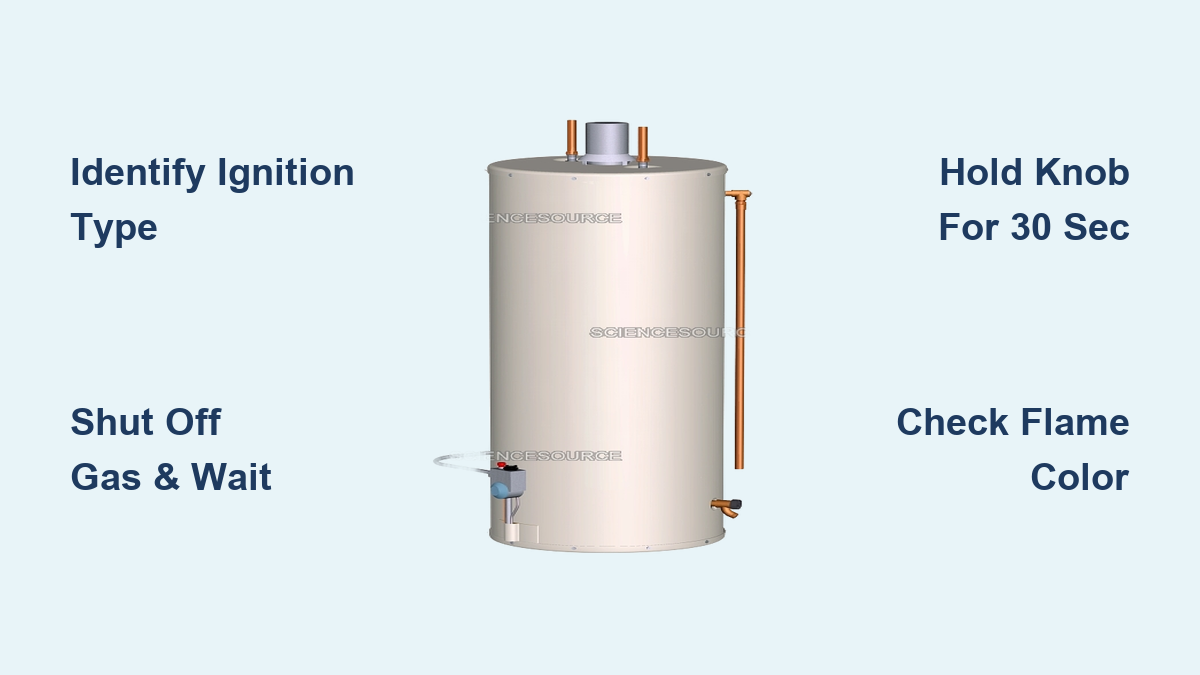
Determining your specific ignition mechanism is the essential first step before touching any controls. Newer models typically use a built-in spark system, while older units require a manual flame source.
Distinguish Between Spark and Manual Units
Most gas water heaters utilize either a built-in spark ignition or a manual ignition method. Units manufactured after the early 2000s often feature a piezo igniter, which is a red or green button located near the gas valve. Pressing this button creates an internal spark, eliminating the need for external flames. Older models lack this feature and strictly require a long-reach lighter or match to ignite the gas.
Locate Critical Control Components
Familiarizing yourself with the key parts ensures you act quickly and safely during the process.
* Gas control knob: Features settings for “Off,” “Pilot,” and “On.”
* Pilot tube opening: The specific spot where gas exits to form the flame.
* Sight glass: A small viewing window to verify the flame without disassembly.
* Thermocouple or thermopile: A safety sensor positioned next to the pilot flame.
* Temperature safety switch: A reset button located near the gas valve assembly.
Perform Essential Safety Checks Before Ignition
Skipping safety protocols can lead to dangerous gas leaks, fires, or carbon monoxide exposure. You must verify the environment is safe before attempting to light the pilot.
Detect and Respond to Gas Leaks
Approach the unit and smell carefully for gas. While a faint odor might be normal near a gas appliance, a strong smell indicates a dangerous leak. If you detect a strong scent, stop immediately and do not touch electrical switches or use phones nearby. Shut off the main gas valve, evacuate the area, and call your gas provider from a safe distance.
Ensure Proper Ventilation and Airflow
Open nearby windows or doors to allow fresh air to circulate around the water heater. This step clears any residual gas from the combustion chamber and supports safe burning. Poor ventilation increases the risk of carbon monoxide buildup, so ensure adequate airflow before proceeding. Check for drafts from vents or fans that could blow out the flame immediately after lighting.
Gather Required Tools and Avoid Hazards
Prepare your tools before starting to ensure a smooth process without interruptions.
* Long-reach lighter: Use a barbecue style or fireplace match for safe distance.
* Flashlight: Essential for seeing labels and components in dim utility spaces.
* Fine sandpaper: Use 150–200 grit for cleaning sensors if troubleshooting is needed.
Never use a cigarette lighter for this task. They are too short and place your hand dangerously close to the ignition point, creating a high risk of burns.
Shut Off Gas Supply and Wait for Dissipation
Properly shutting down the system clears accumulated gas and resets safety mechanisms. This step prevents flash fires caused by igniting trapped gas.
Rotate Control Knob to Off Position
Turn the gas control knob firmly to the “Off” setting. This action cuts the gas supply to both the pilot light and the main burner. Do not skip the waiting period that follows this step, as it is critical for safety.
Wait Five to Ten Minutes
Allow sufficient time for any built-up gas to dissipate completely from the combustion chamber.
* Wait at least 5 minutes for standard models.
* Wait 10 minutes if your unit has a safety lockout feature or if you made multiple failed attempts.
Rushing this step can cause accumulated gas to ignite explosively when you try to light the pilot.
Access Pilot Assembly and Confirm Gas Flow
You must remove barriers to reach the ignition components and verify that gas is available to the unit.
Remove Access Panel and Lower Door
Unscrew or unclip the front access panel and carefully remove the lower door if present. Set these aside safely so you have a clear view of the gas valve, pilot tube, and sight glass. This exposure is necessary for visual confirmation during ignition.
Verify Main Gas Valve Is Open
Check the ball valve on the gas supply line leading to the heater. The handle must be parallel to the pipe to indicate the “open” position. If the handle is perpendicular to the pipe, turn it 90 degrees to open the flow. Without this step, no gas will reach the pilot assembly.
Light Pilot Using Built-In Spark Igniter
Use this specific procedure if your water heater features a dedicated ignition button. This method is common in modern units and eliminates the need for an open flame source.
Set Knob to Pilot and Depress
Turn the gas control knob to the “Pilot” setting, aligning the arrow with the label. Push the knob down firmly to open the gas valve to the pilot line. You should hear a slight hissing sound indicating gas flow. Keep the knob depressed throughout the next step.
Activate Spark Button Repeatedly
While holding the gas knob down, press the ignition button every 5 to 10 seconds. Watch the sight glass closely for a spark and the emergence of a flame. It may take several attempts, typically between 5 and 10 presses, for the pilot to catch.
Hold Knob to Heat Thermocouple
Once the small blue flame appears, continue holding the gas knob down for at least 30 to 60 seconds. This duration allows the thermocouple or thermopile to heat up sufficiently. This component generates the electrical current needed to keep the gas valve open after you release the knob.
Release Knob and Turn System On
Slowly release the gas knob. If the flame remains lit, the safety sensor is working correctly. Turn the knob from “Pilot” to “On”. The main burner will now ignite automatically whenever you demand hot water.
Light Pilot Using Manual Ignition Method

Older water heaters require you to introduce an external flame to ignite the gas. This method demands careful coordination and strict adherence to safety distances.
Position Knob and Release Gas
Turn the gas control knob to “Pilot” and push it down fully. This action releases gas to the pilot tube. Keep the knob depressed while you prepare your flame source.
Apply Flame to Pilot Tube Opening
Light your long-reach lighter and hold the flame directly at the pilot tube opening. Do not hold the flame near the thermocouple itself. Maintain this position until you see the pilot light, which should happen within seconds if gas is flowing.
Maintain Pressure for Thirty Seconds
Keep the gas knob depressed and hold the lighter flame near the pilot for 30 seconds after ignition. This ensures the thermocouple heats up enough to signal the valve to stay open. Removing the flame or releasing the knob too early will cause the pilot to extinguish.
Remove Lighter and Activate Heater
Carefully remove the lighter and slowly release the gas knob. If the flame stays lit, turn the knob to “On”. Your system is now ready to heat water.
Verify Flame Color and System Operation

Confirming the quality of the flame and the functionality of the system ensures safe and efficient operation before you finish.
Inspect Flame Color and Stability
Look through the sight glass to observe the pilot flame. A healthy flame is mostly blue with a small yellow tip. If the flame is mostly yellow or flickers erratically, it indicates incomplete combustion due to dirt or drafts. A yellow flame suggests the burner needs cleaning or adjustment.
Test Hot Water Output and Burner Cycles
Wait 30 to 60 minutes for the tank to heat up. Run a hot water tap and use a thermometer to confirm the output reaches between 120°F and 125°F. Listen for the main burner to ignite with a soft whoosh when hot water is used. If you hear no sound, check your thermostat settings.
Adjust Temperature Settings Safely
Setting the correct temperature balances energy efficiency with safety against scalding.
Locate and Rotate Temperature Knob
Find the large black dial on the side of the unit, which controls the thermostat. Rotate this knob clockwise to increase the temperature or counter-clockwise to decrease it. Most units have a triangle marker indicating the standard 120°F setting.
Allow Time for Temperature Stabilization
After making adjustments, wait 24 to 48 hours for the system to fully stabilize. Large changes in temperature settings require time for the entire tank volume to reach the new target. If water remains cool after this period, check for a temperature limiter on your shower valve.
Troubleshoot Common Pilot Light Issues

Diagning why a pilot light fails to stay lit can save you from unnecessary service calls.
Pilot Lights But Extingishes Immediately
Cause: The thermocouple is not heated enough or is faulty.
Fix: Hold the knob down for 60 seconds instead of 30. If it still fails, gently clean the thermocouple with 150–200 grit sandpaper to remove soot. Replace the component if it appears damaged.
No Spark From Ignition Button
Cause: The igniter module is faulty or wiring is disconnected.
Fix: Inspect for debris blocking the spark. If no spark occurs after cleaning, the module likely requires replacement with an OEM part.
Safety Switch Has Tripped
Cause: The water previously overheated or the thermostat is faulty.
Fix: Press the reset button located near the gas valve. If the switch trips again immediately, call a technician as this indicates a serious underlying issue.
Drafts Extinguish the Flame
Cause: Airflow from nearby vents, doors, or fans.
Fix: Redirect airflow away from the unit or install a draft shield. Persistent drafts may require relocating the water heater to a more sheltered area.
Perform Basic Maintenance for Longevity
Regular upkeep prevents future ignition failures and extends the life of your water heater.
Clean Thermocouple Annually
Turn off the gas supply and gently sand the tip of the thermocouple to remove soot buildup. Reinstall the component and test the system. This simple step prevents false shutdowns caused by poor sensor contact.
Inspect Burner Assembly Components
If you need to remove the burner for deep cleaning, follow these steps:
1. Shut off the main gas valve.
2. Disconnect the pilot and main gas lines.
3. Remove the two mounting screws and extract the assembly.
Check for blockages, damaged insulation, or a missing felt gasket. Replace any compromised parts to prevent air leaks.
Reassemble With Care
Ensure the gasket is seated perfectly and no wires are pinched during reassembly. Misalignment can cause air leaks that lead to poor performance or safety hazards.
Know When to Call a Professional Plumber
Some issues exceed the scope of safe DIY repair and require expert intervention.
Recurring Pilot Failure After Cleaning
If the pilot light refuses to stay lit despite correct procedure and cleaning, the thermopile or gas valve may be failing. A plumber can test voltage levels and replace components safely.
Persistent Gas Odor After Relighting
A gas smell that persists after relighting indicates a leak in the system. Evacuate immediately and call your gas company. Do not attempt to fix a gas leak yourself.
No Hot Water Despite Lit Pilot
If the pilot is lit but the water remains cold, the issue could be a failed thermostat, sediment buildup, or burner malfunction. Professional diagnosis is required to identify the specific mechanical failure.
Uncertainty During the Process
If you feel uncomfortable or unsure at any step, stop immediately. Gas systems involve combustible fuels and require precise handling. A service call is a small price to pay for safety and peace of mind.
Frequently Asked Questions About Lighting Gas Water Heaters
How long should I hold the pilot knob down after lighting?
You must hold the knob down for 30 to 60 seconds after the flame appears. This allows the thermocouple to heat up and generate enough electricity to keep the gas valve open.
What does a yellow pilot flame indicate?
A flame that is mostly yellow indicates incomplete combustion, often caused by dirt, soot, or drafts. A healthy flame should be blue with a small yellow tip. Clean the burner or check for airflow issues if the flame is yellow.
Why does my pilot light go out when I release the knob?
This usually means the thermocouple is not hot enough or is faulty. Try holding the knob for a full 60 seconds or cleaning the sensor with fine sandpaper. If it persists, the part may need replacement.
Can I use a regular cigarette lighter to light my water heater?
No, never use a cigarette lighter. They are too short and place your hand dangerously close to the ignition point. Always use a long-reach barbecue lighter or fireplace matches.
What temperature should I set my gas water heater?
Set your water heater between 120°F and 125°F. This range prevents scalding while maintaining energy efficiency. Temperatures above 130°F significantly increase the risk of burns.
How long does it take for the water to get hot after relighting?
Expect to wait 30 to 60 minutes for the tank to begin producing hot water. If you adjusted the thermostat significantly, allow 24 to 48 hours for the system to fully stabilize at the new temperature.
Key Takeaways for Lighting Your Gas Hot Water Tank
Relighting a gas water heater is a manageable task when you follow safety protocols and understand your specific ignition type. Always wait the full 5 to 10 minutes after turning off the gas to prevent flash fires, and hold the pilot knob for at least 30 seconds to ensure the thermocouple engages. Regular maintenance, such as cleaning the thermocouple and checking for drafts, keeps your system running efficiently for years.
If you encounter persistent gas smells, recurring pilot failures, or feel unsure about any step, do not hesitate to call a licensed professional. Your safety is more important than saving on a service call. With this knowledge, you can confidently restore hot water to your home and avoid cold showers.