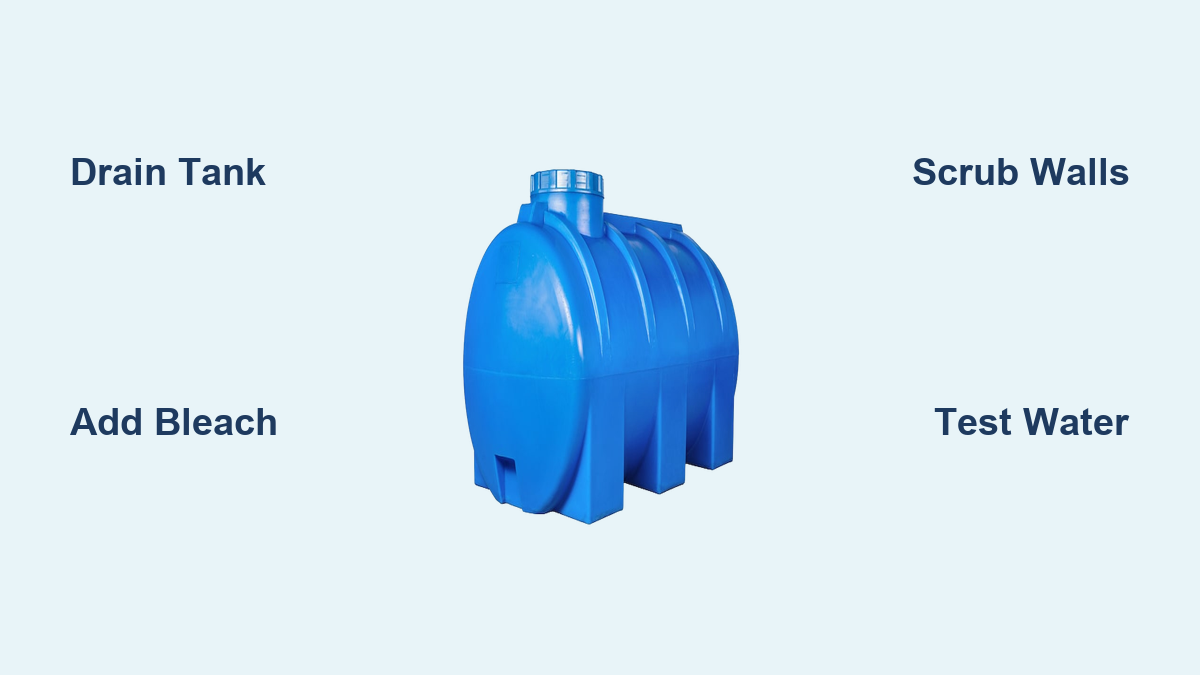
If your water smells strange or the tank hasn’t been cleaned in six months, you need to purify your water tank immediately. Bacteria and algae build up quickly inside storage units, creating health risks and foul tastes that affect your whole home.
This guide explains exactly how to purify water tank systems using safe, proven methods for any size or access level. You will learn specific bleach dosages, scrubbing techniques, and maintenance schedules to keep your supply clean and safe.
Select the Right Disinfection Method for Your Tank
Choosing the correct purification process depends on your tank size and whether you can enter it. Using the wrong method might leave dangerous pathogens behind or damage your plumbing system.
Small Tanks With Interior Access
Use this high-concentration method for tanks under 3,000 gallons where you can open the lid and reach inside. This approach creates less wastewater, making it safer for properties with septic systems.
- Drain water until the level is low or keep it as-is if the tank is full.
- Add 1 to 2 cups of unscented bleach for every 25 gallons of water remaining.
- Turn on all faucets starting from the farthest point in your house.
- Run water until you smell bleach at each tap to ensure full pipe saturation.
- Shut off faucets and let the solution sit for at least 2 hours.
- Mix 1 teaspoon of bleach per quart of water and spray interior walls to kill biofilm.
- Drain the tank completely and refill with fresh water.
- Flush all taps again before resuming normal use.
Pro Tip: Use this method if you plan to scrub the tank manually. The bleach loosens biofilm, making the cleaning process much easier.
Sealed Tanks Without Interior Access
This protocol works for pressurized or buried tanks where you cannot enter the unit. It requires a lower chlorine concentration but needs a longer contact time to work effectively.
- Calculate your total volume and add ½ cup of unscented bleach per 100 gallons.
- Fill the tank completely with clean water to ensure proper dilution.
- Run every faucet until a bleach odor appears at the outlet.
- Attach a hose to a faucet and feed water back into the tank fill line.
- Recirculate water for 15 to 30 minutes to mix chlorine evenly.
- Let the solution sit for 6 to 12 hours before draining.
- Drain water away from vegetation and septic systems to avoid killing plants.
Warning: Never send this large volume of chlorinated water into a septic tank. It will destroy the beneficial microbes needed for waste breakdown.
Large Industrial Tanks Over 3,000 Gallons
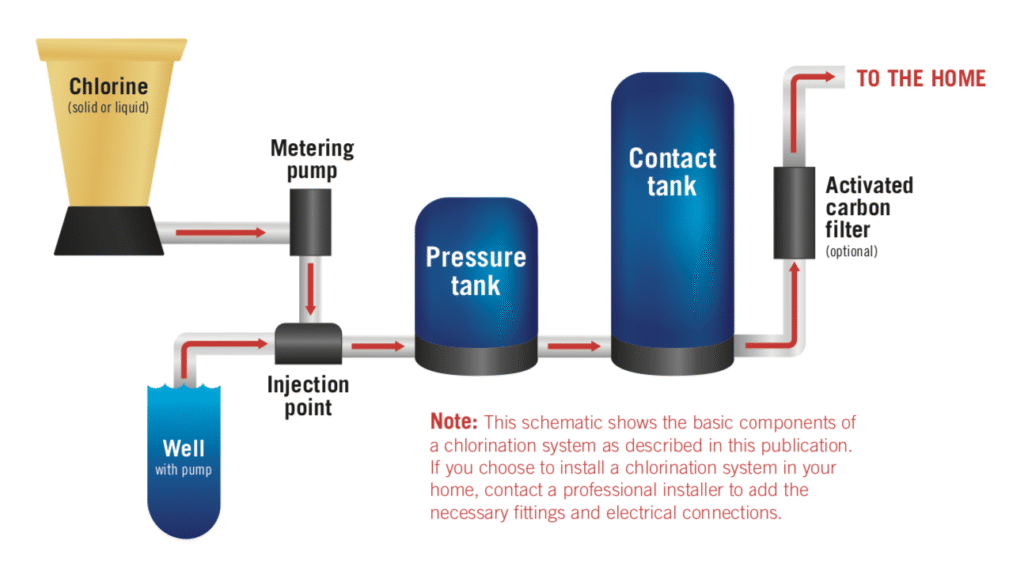
Standard home methods cannot safely disinfect municipal or industrial-sized tanks. These systems require professional-grade treatment to ensure complete pathogen elimination.
- Follow AWWA C652 standards for all disinfection procedures.
- Contact your local environmental authority for specific regulatory guidance.
- Hire a certified water treatment professional for execution.
- Use calibrated dosing pumps and test chlorine residuals with a meter.
Note: DIY bleach mixing is not sufficient for tanks this size. Under-dosing risks incomplete disinfection while over-dosing creates serious safety hazards.
Apply Correct Chemical Dosages for Safety

Not all disinfectants work the same way, and using the wrong product can damage your system. Always verify you are using the right chemical for your specific goal.
Sodium Hypochlorite Bleach Guidelines
Unscented household bleach containing 5–8% sodium hypochlorite is the most reliable option. Never use scented, thickened, or splashless bleach because additives are toxic to humans.
| Purpose | Bleach Amount | Water Volume | Contact Time |
|---|---|---|---|
| Emergency disinfection | 1 tsp | 7 gallons | 30 mins |
| Routine maintenance | 1/8 tsp | 5 gallons | 30 mins |
| Deep clean (500 ppm) | 1/3 cup | 3 gallons | 5 mins |
| Final rinse (10 ppm) | 1 tsp | 10 gallons | Immediate |
Check concentration with chlorine test strips to confirm 500 ppm for cleaning and 10 ppm for rinsing.
Hydrogen Peroxide as an Alternative
Hydrogen peroxide is ideal for those who want to avoid chlorine taste or residue in their water supply. This chemical breaks down into water and oxygen, leaving no harmful byproducts.
- Add 1 tablespoon of 3% hydrogen peroxide per 50 gallons of water.
- Let the solution sit for 30 minutes before using the water.
- Enjoy a method that is safe for septic systems and the environment.
Caution: Do not mix hydrogen peroxide with bleach. Combining them creates toxic fumes that are dangerous to inhale.
Algaecides for Green Growth Control
Use a potable-water-safe algaecide if algae keeps returning to your tank despite regular cleaning. These chemicals specifically target plant life without harming humans.
- Ensure the product is labeled non-toxic and approved for drinking water.
- Avoid copper-based products unless they carry specific drinking water certification.
- Follow label instructions exactly because overuse can be harmful to health.
Better Alternative: Install UV sterilization to stop algae growth at the source without adding chemicals.
Perform Physical Cleaning Before Disinfecting
Chemicals cannot penetrate thick sludge or heavy biofilm layers effectively. You must remove physical debris first to ensure your disinfectant works properly.
Drain and Scrub Every Six Months
Regular physical cleaning removes the sediment that protects bacteria from chemical treatments. This step is crucial for long-term water quality and tank longevity.
- Empty the tank completely to expose all interior surfaces.
- Mix mild detergent with water using no harsh industrial chemicals.
- Use a soft brush to scrub walls, floors, corners, and pipe inlets.
- Focus heavily on the waterline where biofilm builds up fastest.
- Rinse thoroughly until no suds remain in the tank bottom.
- Proceed with your chosen disinfection method only after rinsing.
Never use metal scrapers or abrasive pads. They damage tank liners and create tiny hiding spots for bacteria to grow.
Install UV Sterilization Systems
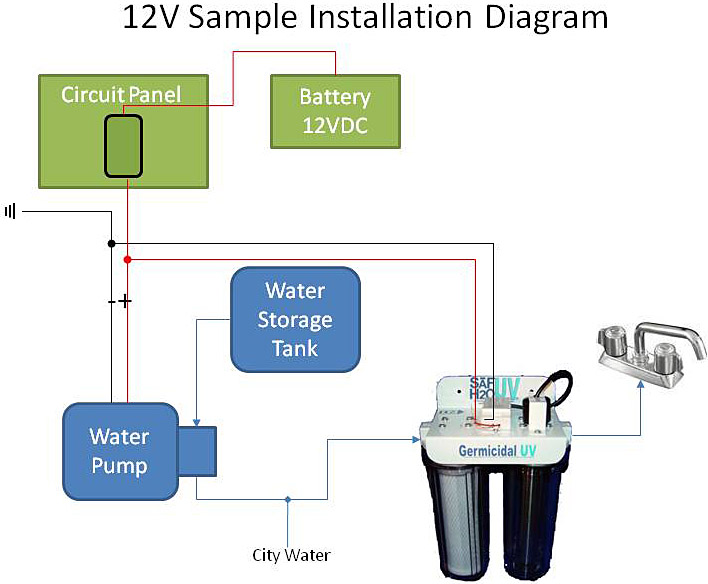
A UV system kills 99.9% of bacteria, viruses, and algae without adding any chemicals to your water. It provides ongoing protection between manual cleanings.
- Install the unit on the pipe before the tank to prevent entry or after to treat output.
- Rely on UV light to zap microorganism DNA and stop reproduction instantly.
- Replace the bulb annually even if it still glows brightly.
Expert Note: UV only works on clear water. Pair it with a sediment filter to prevent shadowing that protects bacteria.
Add Filters to Prevent Recontamination
Stopping contaminants before they enter the tank reduces your cleaning workload significantly. Proper filtration keeps your stored water cleaner for longer periods.
- First-flush diverter: Removes the first dirty runoff from roofs in rainwater systems.
- Sediment filter: Captures dirt, leaves, and organic debris at the outlet.
- Carbon filter: Removes chlorine taste and organic compounds from treated water.
Maintenance: Replace filters every 3–6 months or as the manufacturer specifies for best results.
Prevent Contamination Problems Early
The best purification system is one that prevents contamination in the first place. Structural integrity and proper sealing are your first lines of defense.
Seal the Tank Against Invaders
Open tanks attract mosquitoes, birds, and debris which are major sources of contamination. A secure lid is essential for maintaining water safety.
- Install a tight-fitting, mosquito-proof lid on every access point.
- Add a vent filter that allows airflow but blocks insects and dust.
- Check monthly for cracks or clogs that could compromise your system.
Check monthly. A cracked lid or clogged vent can compromise your entire water storage system quickly.
Choose the Right Tank Material
Not all tanks are safe for drinking water storage, and some materials promote bacterial growth. Selecting the right material reduces maintenance needs.
- Food-grade polyethylene: Most common for rainwater and potable storage needs.
- Epoxy-coated steel: Resists rust and prevents biofilm attachment effectively.
- Concrete with potable liner: Best for large installations requiring durability.
Pro Tip: Apply food-safe epoxy coating to old tanks to seal cracks and prevent rust formation.
Test and Maintain Water Quality Regularly
You cannot trust water that looks clear because invisible bacteria like E. coli can be present without warning. Regular testing confirms your purification efforts are working.
Test Water Quality Every Six Months
Periodic testing detects issues before they become health hazards for your household. You should test immediately after flooding or strange odors.
- Coliform bacteria
- E. coli presence
- pH levels
- Turbidity or cloudiness
Suspect fuel contamination? If you see a sheen or smell gasoline, do not use the water. Contact environmental authorities immediately.
Follow a Strict Maintenance Schedule
Sticking to a routine keeps your tank safe and reduces the frequency of deep cleaning events. Consistency is key to long-term water safety.
| Task | Frequency | Why It Matters |
|---|---|---|
| Full drain and scrub | Every 6–12 months | Removes biofilm and sediment buildup |
| UV bulb replacement | Every 12 months | UV output fades over time regardless of light |
| Filter replacement | Every 3–6 months | Prevents clogs and secondary contamination |
| Visual inspection | Monthly | Catches leaks, algae, or lid damage early |
| Water testing | Every 6–12 months | Confirms safety and detects hidden issues |
Fix Common Water Tank Issues Fast
Even well-maintained tanks can develop problems that require immediate attention. Knowing how to respond saves time and protects your health.
Fuel Smell or Oily Sheen Detected
Do not chlorinate if you suspect fuel contamination because chlorine does not neutralize petroleum products. This situation requires professional remediation.
- Stop using the water immediately for any purpose.
- Do not attempt DIY cleanup or standard disinfection.
- Call your local environmental agency for guidance.
- Get lab testing for petroleum products before reuse.
Cause: Nearby fuel tank leak or contaminated runoff entering your supply.
Green Water or Slimy Walls Present
Algae are thriving due to light penetration or excess nutrients in the tank. You must address the root cause to stop regrowth.
- Ensure the tank is opaque and light-tight at all times.
- Clean or replace the first-flush diverter to reduce nutrients.
- Install a UV sterilizer or use a potable algaecide for control.
Prevention: Keep tanks in shaded areas and off the ground to reduce heat and light.
Water Tastes Like Chlorine
Over-chlorination or a lack of filtration causes strong chemical tastes in your drinking water. Simple fixes can restore good taste quickly.
- Install an activated carbon filter at the tap to remove taste.
- Let water sit in an open container for 24 hours to off-gas.
- Reduce bleach dosage during your next purification cycle.
Can I Drain Into My Septic System?
Only small volumes of diluted chlorinated water are safe for septic systems. Large volumes will kill the beneficial bacteria needed for waste processing.
- Use the interior access method which uses smaller bleach volumes.
- Neutralize with sodium thiosulfate before draining to septic.
- Dilute with 10x volume of non-chlorinated water before release.
Never dump large volumes of chlorinated water into septic tanks. It kills essential bacteria and causes system failure.
Frequently Asked Questions About Water Tank Purification
How often should I purify my water tank?
You should purify and clean your water tank every 6 to 12 months depending on usage. Regular maintenance prevents biofilm buildup and ensures safe drinking water for your household.
Can I use regular scented bleach to clean my tank?
No, you must use unscented household bleach because scented versions contain toxic additives. Only use bleach labeled as 5–8% sodium hypochlorite with no extra fragrances or thickeners.
What do I do if my water smells like fuel?
Stop using the water immediately and contact your local environmental agency. Chlorine cannot fix fuel contamination, and professional testing is required before the water is safe again.
Is hydrogen peroxide safe for drinking water tanks?
Yes, 3% hydrogen peroxide is safe and breaks down into water and oxygen without residue. Use 1 tablespoon per 50 gallons and let it sit for 30 minutes before use.
How do I know if my chlorine concentration is correct?
Use chlorine test strips from a pool supply store to verify parts per million (ppm). Aim for 500 ppm for deep cleaning and 10 ppm for final rinsing cycles.
Can I drain chlorinated water into my septic tank?
Only small volumes from interior access cleaning are safe for septic systems. Large volumes from sealed tank cleaning must be drained onto soil or gravel away from plants.
Key Takeaways for Purifying Your Water Tank
Purifying your water tank requires selecting the right method based on tank size and access level. Always combine physical scrubbing with proper chemical dosing to eliminate biofilm and bacteria effectively.
Start by inspecting your tank condition and choosing between bleach or hydrogen peroxide treatments. Follow the specific dosage charts and maintenance schedules to keep your water safe year-round.