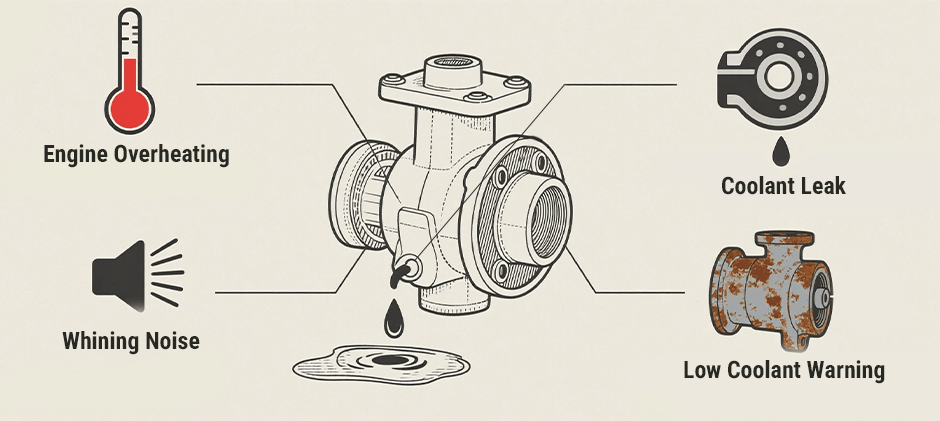
A water pump leak is one of the most common and potentially dangerous cooling system issues drivers face. Left unattended, even a small drip can lead to engine overheating, warped cylinder heads, or blown head gaskets. The good news is that with the right knowledge, you can diagnose and fix the problem before disaster strikes. Whether you are dealing with a steady drip from the weep hole or a mysterious coolant stain under your car, this guide will walk you through every step, from identifying the source to choosing between a chemical fix and a full mechanical replacement.
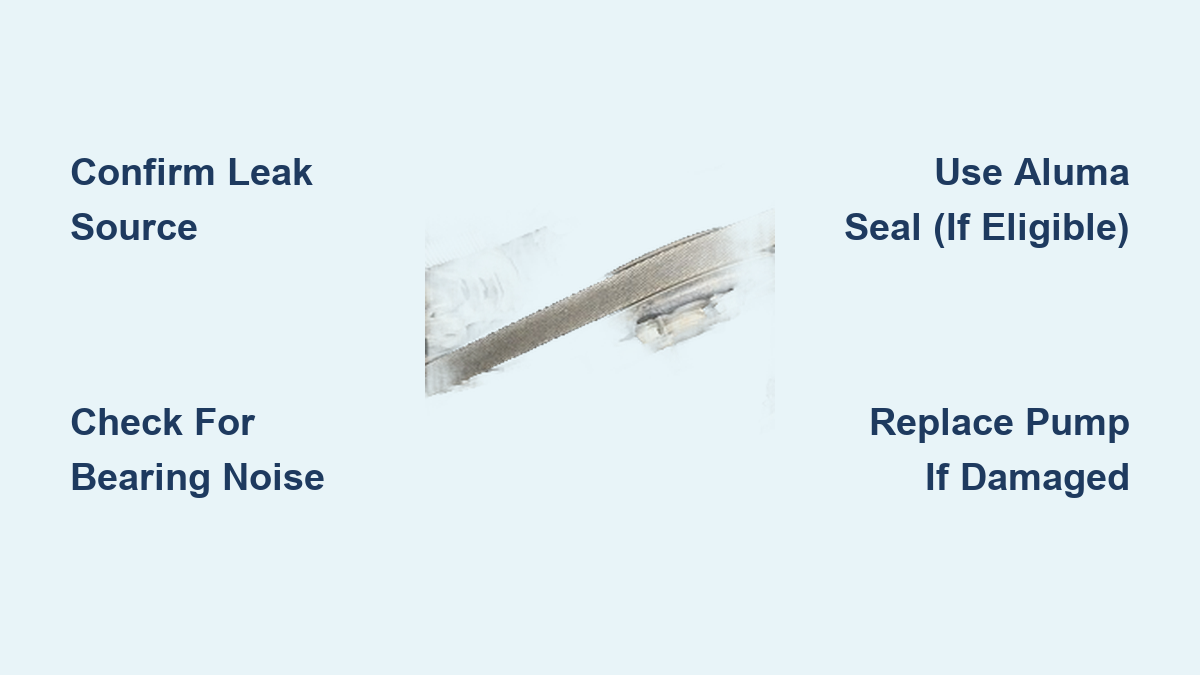
Confirm the Leak Source First
Before replacing parts or adding sealants, you must verify that the water pump is actually the culprit. Many coolant leaks mimic pump failure but originate elsewhere in the cooling system.
Trace the Drip Path Upward
Coolant follows gravity, so stains below the pump do not always mean the pump is leaking. Look for wet trails, dried residue, or crusty buildup leading upward. Common misdiagnoses include heater core inlet pipe leaks mistaken for top-of-pump seepage, thermostat housing gasket failure dripping onto the pump, and radiator hose connections near the pump. Use a flashlight to inspect tight spaces. Shine it at low angles to catch reflective sheen on damp surfaces.
Perform Cold and Hot State Checks
The cold engine inspection reveals dried coolant paths, rust, or mineral deposits indicating chronic minor leaks. The hot engine recheck requires you to run the engine until normal operating temperature, then shut off and inspect immediately. Temperature-sensitive leaks often appear only when hot due to thermal expansion. Leaks that evaporate quickly when hot may leave no puddle but still cause coolant loss over time.
Use a Cooling System Pressure Tester
This tool pressurizes the system without running the engine, simulating real-world conditions safely. Attach the tester to the radiator filler neck. Pump to the cap rated pressure, usually 13 to 18 psi. Monitor for pressure drop or visible leaks. A steady drip from the weep hole under pressure confirms internal seal failure. Cracks in the housing or gasket leaks will also become obvious.
Identify the Leak Type and Location
Not all water pump leaks are the same. The repair path depends on where and how the leak occurs.
Weep Hole Dripping? Replace the Pump
The weep hole is a small drain port at the pump base designed to alert you to shaft seal failure. Any consistent drip here means the internal seal is worn, coolant is entering the bearing area, and bearing failure is imminent. If you see coolant weeping after a recent pump replacement, the seal may have been damaged during installation or the wrong torque was used.
Housing Crack or Pinhole Leak? Try a Sealant
Aluminum pump housings can develop porosity leaks or micro-cracks from corrosion or electrolysis. These slow seeps are ideal for chemical repair if the pump is otherwise functional. Look for rust-colored stains on the casing, tiny bubbles when the engine runs, and dampness only under pressure.
Gasket or O-Ring Leak? Re-Seal Carefully
Leaks at the mounting surface often stem from improper bolt torque, old gasket material left behind, or overuse of RTV silicone. If the pump is new but leaking at the flange, disassemble and reseal using manufacturer-specified procedures.
Diagnose Mechanical Wear Early
Even if the leak is minor, mechanical failure can make any repair temporary. Addressing underlying mechanical issues ensures your fix lasts.
Check for Pulley Wobble
With the engine off and belts removed, grip the water pump pulley and gently push and pull in multiple directions. Any lateral or axial movement indicates worn bearings. A wobbly shaft accelerates seal wear and will eventually seize.
Listen for Bearing Noises
Start the engine and listen near the front of the motor. Whining or squealing could be belt-related, while grinding or groaning is a classic sign of failing water pump bearings. Noise that increases with engine RPM points directly to the pump. If you hear bearing noise or detect wobble, do not use sealants. The pump must be replaced.
Repair Option 1: Use Aluma Seal for Metal Casing Leaks
For pinhole leaks or hairline cracks in aluminum pump housings, Aluma Seal offers a fast, low-cost fix.
Is Your Leak Eligible
Aluma Seal works only on metal components such as aluminum or cast iron, small cracks, porosity leaks, or micro-holes, and systems free of sludge or debris. It does not work on rubber hoses, gaskets, plastic parts, or weep hole leaks.
Apply Aluma Seal Correctly
You will need Aluma Seal powder, a funnel, fresh coolant, and gloves with eye protection.
Set the heater to maximum heat to open heater core valves for full circulation. Ensure the engine is cold to prevent steam burns when opening the radiator cap. Pour the entire bottle into the radiator with no measuring required. Top off coolant if needed using the correct type per your vehicle specs. Replace the cap securely. Run the engine to operating temperature with the heater on full hot for 15 to 20 minutes. Drive for 24 hours to ensure full additive circulation. Let the system cool and recheck the leak site for dryness.
One user stopped a persistent top-center pump leak for $2.99, avoiding a $350 repair. The fix lasted over a year with no recurrence.
Repair Option 2: Replace the Water Pump
When the seal is gone, the bearing is noisy, or the shaft wobbles, replacement is the only safe choice.
Estimate Repair Cost First
A pump alone costs $50 to $200 for DIY or $160 to $400 for professional installation. Pump plus timing belt costs $200 to $300 DIY or $500 to $800 professional. Labor time ranges from 2 to 4 hours for simple jobs to 6 to 10 hours when timing belt work is involved. On timing-belt-driven pumps, replace the belt, tensioner, and thermostat at the same time. Shared labor makes it cost-effective.
Remove the Old Pump
Disconnect the battery negative terminal to prevent electrical shorts. Drain coolant completely using a drain pan under the radiator petcock or lower hose. Remove obstructing parts such as the serpentine or timing belt, fan and shroud, brackets or hoses, and timing cover on interference engines. Unbolt the pump in a crisscross pattern to prevent warping the housing. Gently pry if stuck using a rubber mallet. Never force with a screwdriver.
Prepare the Mounting Surface
Scrape off old gasket material using a plastic or metal scraper while avoiding gouging the block. Clean with degreaser and wire brush to ensure the surface is smooth and residue-free. Check for flatness using a straight edge. Any warp exceeding 0.002 inches requires machining.
Install the New Pump
Compare the new pump to the old one to confirm bolt pattern, port orientation, and impeller design. Use a new gasket or O-ring and never reuse old seals. Apply RTV only if specified by the manufacturer. Most modern pumps use pre-applied sealant or dry gaskets. Torque bolts to specification using a torque wrench, typically 7 to 12 ft-lbs depending on vehicle. Reinstall belts and accessories, adjusting belt tension per manufacturer specs.
Bleed Air and Refill Cooling System
Trapped air causes overheating and false leak symptoms. Follow this procedure carefully.
Close the drain valve and refill coolant, mixing 50/50 coolant and distilled water unless pre-mixed. Start the engine with the radiator cap off and let it warm up until the thermostat opens, indicated by the coolant level dropping. Top off as air escapes and squeeze the upper radiator hose to help purge bubbles. Run until temperature stabilizes, confirmed when the heater blows hot air consistently. Recheck the level after cooldown and top off to the cold mark on the reservoir.
When to Avoid Sealants
Chemical fixes are not magic. Avoid them in certain situations.
Bearing Failure Is Present
No sealant can fix a wobbly pulley, grinding noise, or shaft play. These mean mechanical destruction has begun. Driving risks complete failure and engine damage.
Leak Origin Is Soft Components
Sealants like Aluma Seal and K-Seal only work on metal. They will not fix cracked hoses, failed gaskets, or degraded O-rings. Applying them here wastes money and delays proper repair.
System Is Dirty or Clogged
Old coolant with sludge or rust increases clogging risk. Flush the system first if the coolant is brown or oily, previous overheating occurred, or heater output is weak.
Prevent Future Leaks With Smart Maintenance
Avoid repeat failures with proactive care.
Use Correct Coolant Type
Mixing incompatible coolants such as OAT and IAT causes gel formation and corrosion. Always use what your vehicle requires. Check the owner manual.
Replace Coolant on Schedule
IAT green coolant needs replacement every 30,000 miles or 2 years. OAT orange or red coolant lasts 150,000 miles or 5 years. HOAT yellow or tan coolant requires replacement every 100,000 miles or 5 years. Flush every 2 to 3 years regardless to remove contaminants.
Replace Pump with Timing Belt
On interference engines, replace the water pump during timing belt service. Shared labor saves hundreds of dollars and prevents future failures.
Inspect Regularly
During oil changes, check the water pump pulley for wobble, the weep hole for dampness, and coolant level and color. Early detection saves engines.
Final Decision: Sealant or Replacement
Choose Aluma Seal if the leak is from an aluminum housing, the pump spins freely with no noise, your budget is tight, or the vehicle is older or low-value. The cost is approximately $3, the time is 10 minutes, and the risk is low since it is reversible with a flush.
Choose replacement if the weep hole is leaking, the bearing is noisy or wobbly, the pump is over 100,000 miles, or you want long-term reliability. The cost ranges from $160 to $800, the time is 2 to 10 hours, and the outcome is a guaranteed fix.
Frequently Asked Questions About Fixing a Water Pump Leak in Cars
Can I drive my car with a water pump leak?
Driving with a water pump leak is risky. A small leak may seem manageable, but it can quickly worsen and cause engine overheating. If you notice coolant loss, steam, or rising temperature, address the issue immediately. Limit driving to essential trips until repairs are completed.
How long does Aluma Seal take to work?
Aluma Seal begins working as soon as the engine reaches operating temperature. However, the manufacturer recommends driving for 24 hours for complete circulation and sealing. Check the leak site after this period for best results.
Will sealants fix a weep hole leak?
No. Sealants only work on metal components like pump housings and hard seals. The weep hole indicates internal seal failure, which requires mechanical replacement. Using sealant here wastes money and provides no benefit.
How often should I replace my water pump?
Water pumps typically last 60,000 to 100,000 miles, depending on coolant quality and maintenance. Replace proactively during timing belt service on interference engines to avoid future breakdowns.
Can I replace a water pump myself?
Yes, if you have basic mechanical skills and the proper tools. Externally mounted pumps take 2 to 4 hours. Timing-belt-driven pumps are more complex and require experience. If you lack confidence, seek professional help.
What happens if I ignore a water pump leak?
Ignoring a leak leads to coolant loss, engine overheating, and potential catastrophic damage including warped cylinder heads, blown head gaskets, or a cracked engine block. Repair costs escalate dramatically compared to addressing the issue early.
Key Takeaways for Fixing Your Water Pump Leak
A water pump leak does not have to mean a big repair bill. With accurate diagnosis, you can choose the right fix, whether it is a $3 powder or a full replacement. The key is acting fast, verifying the source, and never ignoring signs of mechanical wear. Always confirm the leak origin before applying any fix, and use chemical sealants only on metal housing leaks. If bearing noise, wobble, or weep hole dripping is present, replacement is your only safe option. By following these steps, you will keep your engine cool, your wallet intact, and your car running reliably for miles to come.