You flip the pump on, but nothing moves. Or fluid slips backward every time the system shuts down. The hidden culprit is often a single overlooked spec: check valve cracking pressure. This value decides whether your valve opens when needed, seals when required, or fails through chattering, leakage, or blockage.
Cracking pressure is the minimum inlet pressure required to start flow through a check valve. It is not the pressure needed for full opening. It is the threshold that breaks the seal between disc and seat. Too high and the valve never opens. Too low and it may not close properly. This guide explains how cracking pressure works, what affects it, how to measure it, and how to avoid costly selection mistakes.
What Check Valve Cracking Pressure Actually Means
The True Definition of Cracking Pressure
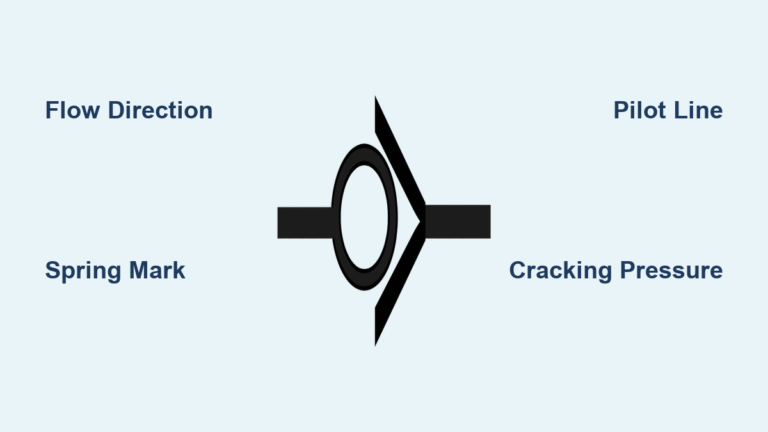
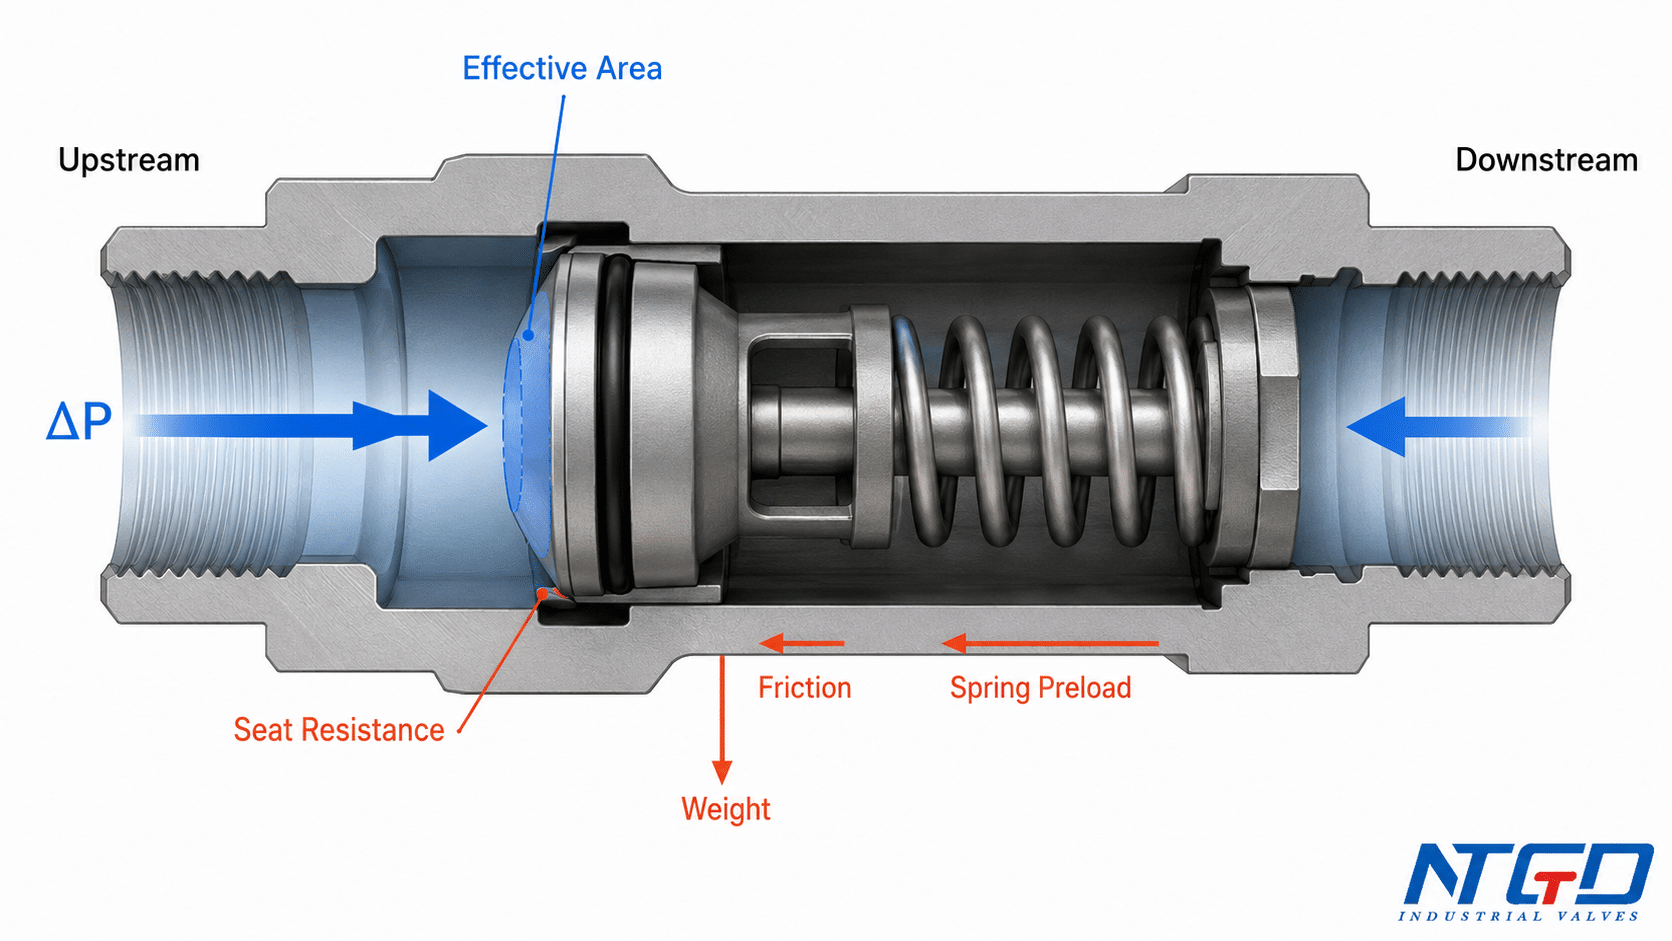
Cracking pressure is the minimum differential pressure between inlet and outlet that causes the first detectable flow through a check valve. Think of it as the starting force needed to lift the disc, ball, or piston off its seat. This force overcomes spring tension, gravity, or adhesive forces holding the valve closed.
Picture pushing a heavy box across a floor. Cracking pressure is the extra shove needed to break static friction and get movement started. Once the box slides, less force keeps it moving. The same principle applies: pressure drop during flow is usually lower than cracking pressure.
Cracking does not mean full opening. At cracking pressure, the valve is barely ajar. Full lift happens only as upstream pressure and flow increase further.
Cracking Pressure vs. Resealing Pressure
Many engineers confuse cracking pressure with resealing pressure. These are two different thresholds.
- Cracking pressure: Upstream pressure needed to open the valve.
- Resealing pressure: Downstream pressure needed to close and seal it.
In many valves, resealing requires back pressure to push the disc tightly against the seat. Some low-cracking designs allow minor leakage because they lack sufficient closing force. This is fine for non-critical lines but dangerous in containment systems.
The gap between opening and closing pressures is called hysteresis. This gap can cause valve flutter when flow fluctuates near the cracking threshold.
Units and Typical Values
Cracking pressure is measured in psi, psig, bar, or kPa. Values vary widely by design:
- Spring-loaded valves: around 0.5 bar (about 7.25 psi)
- Large swing checks: less than 1 psi, often negligible
- Small hydraulic valves (1/4 inch): up to 50 psi
Always verify the specific value from manufacturer specs. Never assume a default.
How Cracking Pressure Works in Practice
The Forces That Determine Cracking
A check valve opens when inlet pressure force exceeds the sum of all resisting forces. For spring-loaded valves, the basic relationship is:
Cracking Pressure = Spring Force ÷ Seat Area
Other factors also influence the threshold:
- Gravity: In swing or tilting-disc valves, disc weight adds resistance, especially in vertical installations.
- Adhesion and surface tension: In low-flow or viscous systems, fluid film can stick the disc to the seat, raising effective cracking pressure.
- Inertia: The mass of the moving component affects dynamic response, especially in fast-cycling systems.
The Static Friction Analogy
Engineers often compare cracking pressure to static friction. Before cracking, no flow exists and resistance is high, like a stationary object. After cracking, flow begins and resistance drops, like kinetic friction during sliding motion.
Once open, fluid momentum helps keep the valve open. This holds true even if differential pressure dips slightly below the original cracking level.
Hydraulic and Aerodynamic Effects
Once flow starts, Bernoulli’s principle takes over. Static pressure drops as velocity increases. The valve stays open due to velocity head and drag forces, not just static pressure alone.
In swing check valves, the pressure drop curve often shows three stages:
- A peak at cracking
- A dip as velocity energy dominates
- A rise again at high flow due to turbulence
This means pressure drop during flow is not the same as cracking pressure.
Key Factors That Affect Cracking Pressure
Valve Type and Design
Different designs produce vastly different cracking pressures.
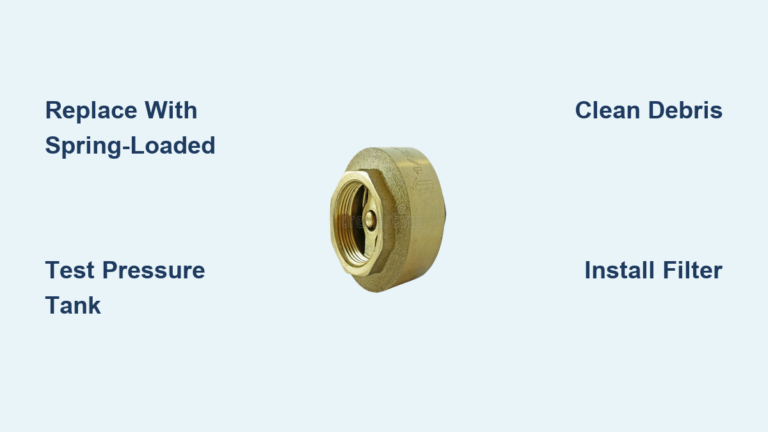
Spring-Loaded Check Valves
Cracking pressure is adjustable via spring preload. These valves are common in high-pressure or precise-control systems. Restrictor checks are a subtype used when a set threshold is needed to relieve minor overpressure.
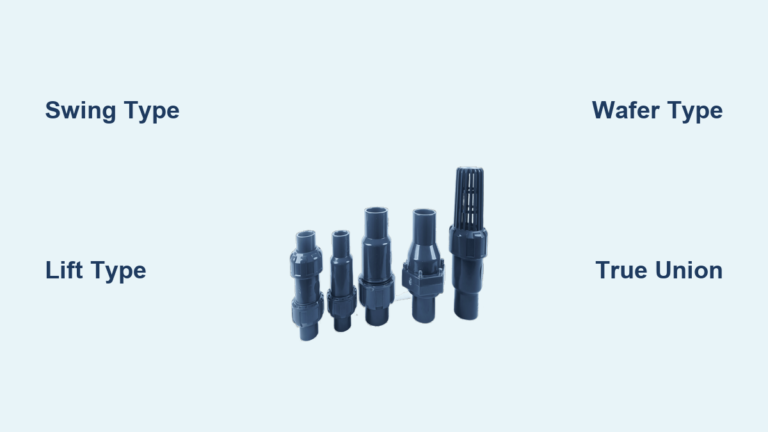
Swing Check Valves
These rely on gravity assistance. Cracking pressure is typically below 1 psi. Most catalogs do not list a specific value because it is assumed negligible in typical pumping systems. Installation orientation strongly affects performance.
Inline and Ball Check Valves
Compact and fast-acting, these use small springs or gravity. They work well in low-flow or low-pressure applications.
Dual-Disc and Wafer Types
These use dual springs for tight sealing. Cracking pressure depends on spring calibration. They are common in space-constrained pipelines.
Size and Scaling Effects
Smaller valves often have higher cracking pressures. A 1/4 inch hydraulic check valve may require 50 psi to crack. A 6 inch swing check might open at just 0.1 psi.
Why the difference? Larger valves have greater seat area, so even small pressure differences generate high opening force. Smaller valves need stiffer springs to control lightweight components.
Installation Orientation
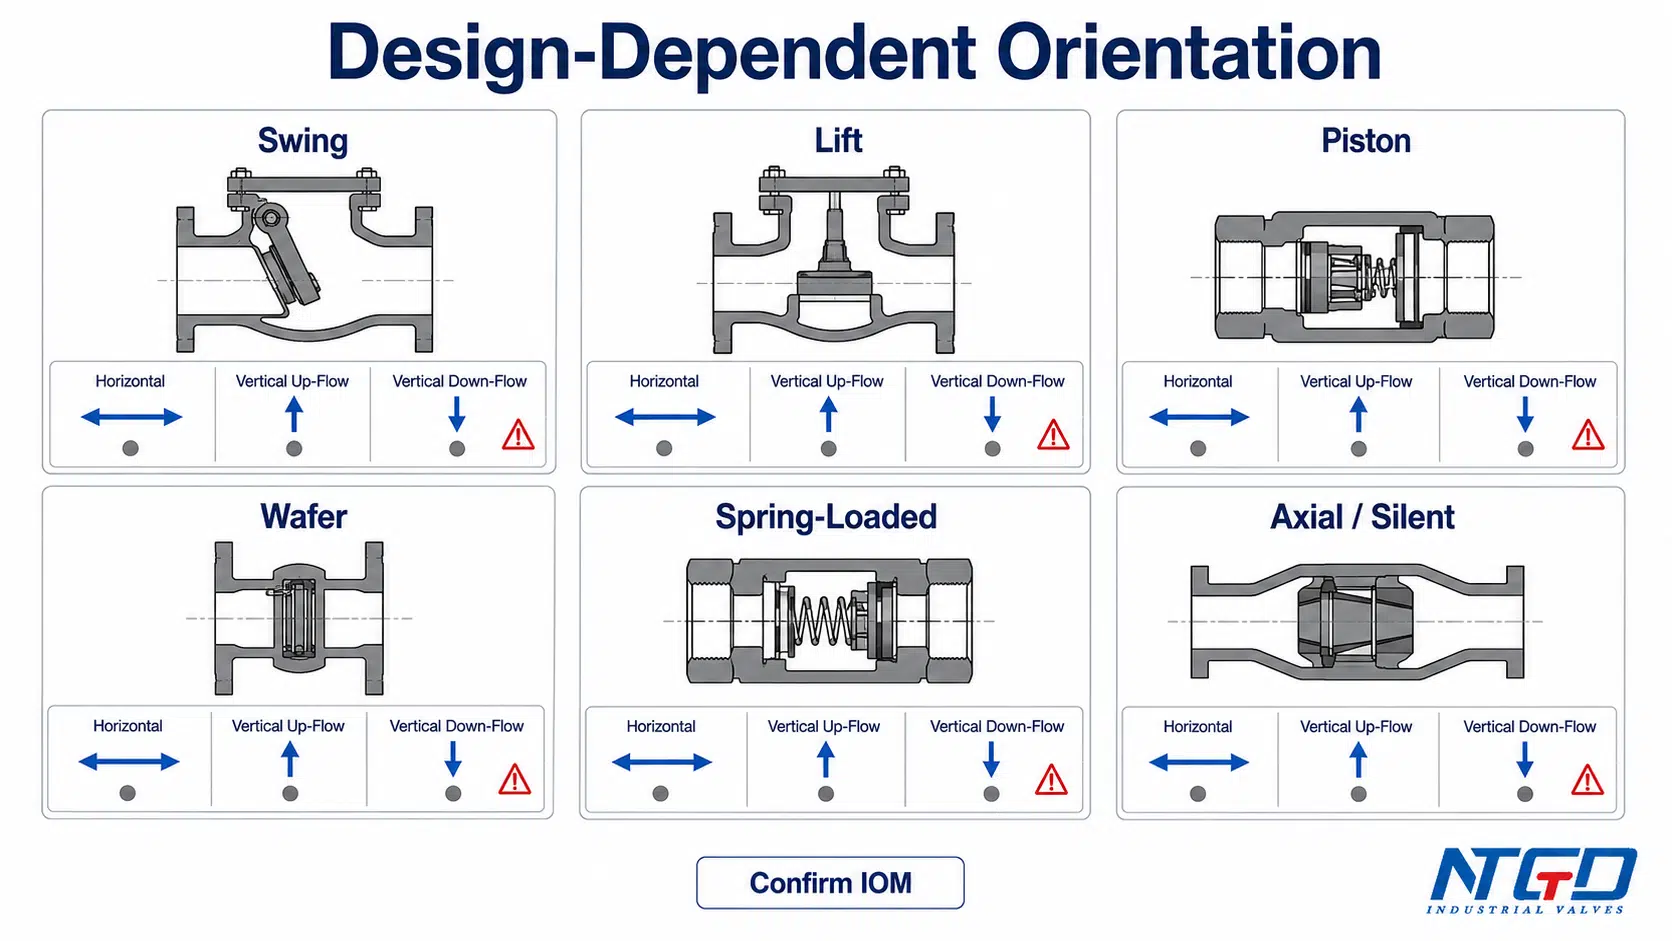
Gravity impacts performance, especially in swing and dual-disc valves.
Horizontal vs. Vertical Flow-Up
In vertical flow-up, gravity helps keep the valve closed. This can increase effective cracking pressure. In horizontal installations, gravity acts sideways and has minimal effect on opening.
Vertical Flow-Down: A Danger Zone
If disc weight exceeds spring force, the valve may fail to close. The result is continuous backflow or no shut-off at all. Always verify both cracking pressure and closing capability for downward flow.
Fluid and Environmental Factors
Viscosity and Temperature
High-viscosity fluids increase resistance and may require higher cracking pressure. Temperature changes affect spring elasticity and material expansion.
Contamination
Dirt or debris in the seat can block opening, which raises cracking pressure. It can also prevent sealing, which allows leakage at zero pressure. Regular filtration and maintenance are essential.
Corrosion and Wear
Spring fatigue lowers cracking pressure over time. Seat erosion or galling alters sealing dynamics. Elastomer degradation in soft-seated valves affects both opening and closing behavior.
Problems Caused by Wrong Cracking Pressure

Too High: The Valve Won’t Open
If system pressure never exceeds cracking pressure, no flow occurs. The valve stays closed. Pump cavitation or overheating may follow. The entire system can fail in low-pressure applications.
A simple example: a 10 psi cracking valve in a system that only reaches 8 psi produces zero flow.
Chattering and Popping
When operating pressure hovers near cracking pressure, the valve rapidly opens and closes. This causes violent vibration, noise, and mechanical stress. Consequences include accelerated wear on seat and disc, spring fatigue or breakage, and potential catastrophic failure.
The fix is to select a valve with lower cracking pressure or ensure system pressure exceeds cracking by a safe margin of 15 to 20 percent.
Too Low: The Valve Won’t Close
Low-cracking valves may not seal properly. You may see leakage in reverse flow, failure to close in vertical down-flow due to disc weight, or contamination risk in potable water or sterile systems.
Some ultra-low cracking valves sacrifice bubble-tight shutoff for sensitivity. This tradeoff is acceptable in some cases but not in others.
Increased Pressure Drop
A valve that does not open fully due to high cracking pressure acts like a restrictor. It creates unnecessary pressure loss, reduces system efficiency, and increases energy costs. Even after cracking, spring-loaded valves maintain higher pressure drop than swing types.
How to Measure and Calculate Cracking Pressure
Field Measurement Techniques
You can test cracking pressure in place with care.
Basic Method
- Isolate the valve downstream.
- Slowly increase upstream pressure.
- Monitor for the first sign of flow using sound, sight, or a flow meter.
- Record pressure at that moment. This is your cracking pressure.
You will need an upstream pressure gauge with high accuracy and a flow indicator such as a drip, sight glass, or sensor.
High-Precision Testing
For gravity or low-cracking valves, use digital test gauges with 0.01 psig resolution. Sample at high frequency (60 Hz or more) to catch micro-changes. Standard gauges may read 0.00 psi drop during flow, masking actual performance.
Differential Pressure and Pitot Tubes
For swing checks, use a differential pressure gauge across the valve. Pair it with a Pitot tube to measure velocity head. This setup helps distinguish static pressure drop, velocity head contribution, and total energy maintaining valve open.
Calculation Methods
Total Pressure Drop Formula
dP total = P_c + SG × (Q ÷ C_v)²
Where:
– P_c = cracking pressure (static component)
– SG = specific gravity of fluid
– Q = flow rate
– C_v = flow coefficient
At low flow, P_c dominates. At high flow, the (Q/C_v)² term takes over.
Sizing Based on Cv
Once the valve is open, C_v determines normal pressure drop. Use manufacturer flow vs. dP curves to extrapolate to zero flow and find cracking pressure. This also confirms full opening at operating flow.
Example data: a 6 inch swing check shows 0.11 psid at 100 GPM and 1.0 psid at 900 GPM. This proves cracking pressure is low and flow dynamics dominate at higher rates.
How to Select the Right Cracking Pressure
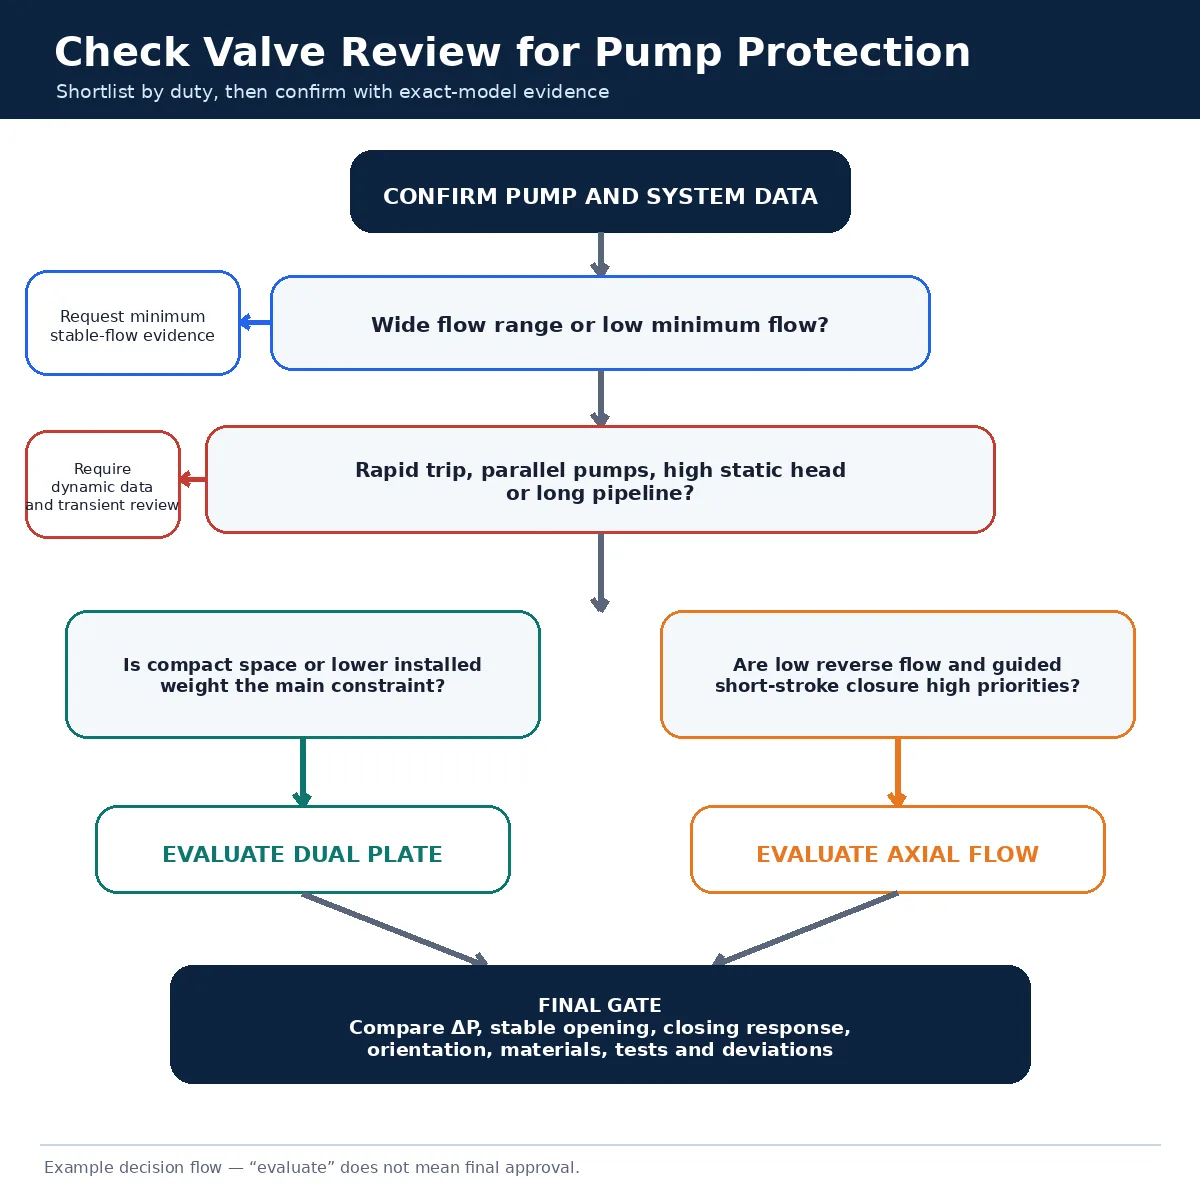
Match to System Requirements
Start by asking key questions:
- What is the minimum system pressure?
- Is flow steady or pulsating?
- Is backflow prevention critical?
- Is leak-tight shutoff required?
Low-Pressure Systems
Use low-cracking inline valves below 1 psi. Verify that low cracking does not compromise seal integrity. Avoid spring-loaded types unless calibrated for low pressure.
High-Pressure or High-Cycle Systems
Use spring-loaded or piston check valves. Ensure the spring is rated for fatigue resistance. Consider restrictor checks for minor pressure relief.
Contamination-Sensitive Applications
Prefer valves with slightly higher cracking pressure to ensure strong seating force. Avoid ultra-low cracking valves if bubble-tight shutoff is needed. This approach prevents backflow in potable water lines.
Restrictor Checks: A Special Case
Restrictor checks are not standard check valves. They open only when pressure exceeds a set threshold, similar to a mini relief valve. Common uses include bleeding off minor pressure spikes and preventing over-pressurization in auxiliary lines.
Important: do not replace safety relief valves (SRVs) with restrictor checks. SRVs handle emergency protection. Restrictor checks are for routine, high-cycle use.
Maintenance and Troubleshooting for Cracking Pressure
Diagnose Cracking-Related Failures
Valve Won’t Open
Check whether upstream pressure exceeds cracking pressure. Inspect for clogged seats, broken springs, or debris. Test with an isolated pressure rise.
Valve Leaks Backward
Possible causes include a worn or damaged seat, spring fatigue that is too weak, low cracking pressure in vertical down-flow, or contamination preventing seal.
Chattering or Popping
Symptoms include noise, vibration, and rapid cycling. Causes include operating near cracking pressure, pulsating flow from reciprocating pumps, or incorrect valve type. Fix by increasing system pressure, dampening pulses, or switching to a lower-cracking valve.
Maintenance Best Practices
Regular Inspection
Look for corrosion, wear, or leakage. Test opening and closing behavior periodically.
Cleaning
Remove particulates from seat and guide. Flush the system if contamination is suspected.
Spring Replacement
In spring-loaded valves, replace springs showing corrosion, deformation, or loss of tension. Use OEM or calibrated replacements.
Professional Evaluation
If you observe unstable operation, inconsistent cracking, or frequent failures, remove and bench-test the valve. Consult the manufacturer when needed.
Long-Term Durability Tips
Prevent Chattering Damage
Chattering is the leading cause of premature check valve failure. To prevent it, ensure operating pressure stays well above cracking pressure. Use pulsation dampeners with reciprocating pumps. Select valves with damping features or weighted discs.
Choose Compatible Materials
Match valve materials to the fluid. Use stainless steel for caustic media and fluorocarbon seals for high temperatures. This prevents elastomer degradation that alters spring force or sealing.
Monitor for Drift
Over time, cracking pressure can change due to spring fatigue, seat wear, or corrosion buildup. Implement predictive maintenance by tracking performance trends and replacing components before failure occurs.
Frequently Asked Questions About Check Valve Cracking Pressure
What is the difference between cracking pressure and working pressure?
Cracking pressure is the minimum pressure needed to start flow through a check valve. Working pressure is the normal operating pressure during system use. A valve can have a cracking pressure of 5 psi but operate at 150 psi during normal flow.
What happens if cracking pressure is too high for my system?
The valve will fail to open and no flow will occur. In pump systems, this can cause cavitation, overheating, and complete system shutdown. Always confirm that system pressure exceeds the valve’s cracking pressure with a safety margin.
How do I measure cracking pressure in the field?
Isolate the valve downstream, then slowly increase upstream pressure while watching for the first sign of flow. Record the pressure at that moment. Use a high-accuracy gauge for low-cracking valves, since standard gauges may not detect small pressure changes.
Do swing check valves have a listed cracking pressure?
Most catalogs do not list cracking pressure for swing check valves because it is typically below 1 psi and considered negligible. However, installation orientation and disc weight can affect actual performance, especially in vertical flow-down applications.
Can a check valve have zero cracking pressure?
Technically yes, but only in gravity-loaded designs where the disc weight is minimal. These valves open at extremely low pressure but may not provide bubble-tight shutoff. They are unsuitable for applications requiring strict backflow prevention.
How often should I check my valve’s cracking pressure?
Perform checks during routine maintenance, typically every 6 to 12 months. In high-cycle or harsh service conditions, inspect more frequently. Replace springs and seats when performance drifts from original specifications.
Key Takeaways for Choosing the Right Check Valve Cracking Pressure
Cracking pressure is the minimum inlet pressure that initiates flow through a check valve. It depends on spring force, gravity, disc mass, and fluid properties. Selecting the wrong value leads to chattering, leakage, or complete system failure.
Match cracking pressure to your minimum system pressure with a 15 to 20 percent safety margin. Consider orientation, fluid type, and cycle frequency. Inspect valves regularly and replace worn springs or seats before performance drifts.
Your next step: review your current check valve specifications against actual operating conditions. If you find a mismatch, consult manufacturer data or conduct a field test to confirm the right cracking pressure for reliable system performance.