Is your shower water dangerously hot or are your faucets blasting steam? If your hot water tank overheating issue is causing temperatures to soar past 120°F, you face scalding hazards and potential plumbing damage. The usual suspects include a shorted heating element or a stuck thermostat that fails to cut power.
You can fix this problem safely using a multimeter and basic hand tools to test critical components. This guide walks you through diagnosing the root cause and restoring safe operation step by step. Always turn off the power at the breaker before starting any work on your water heater.
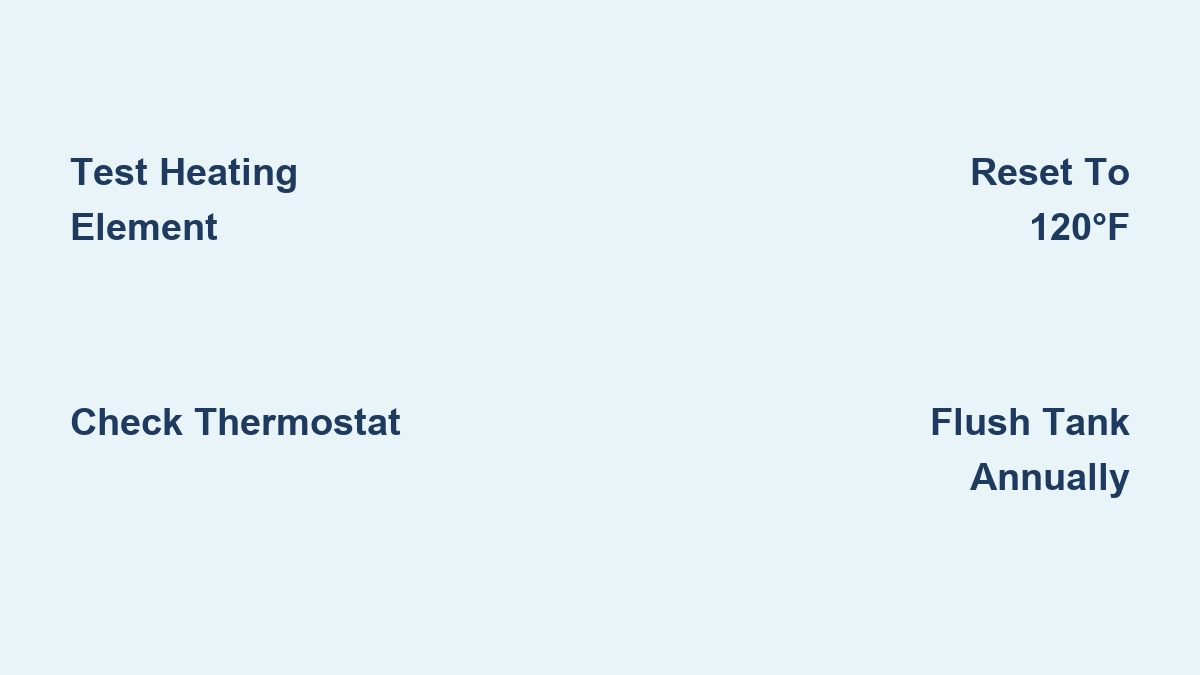
Test for a Shorted Heating Element

A shorted heating element bypasses safety controls and causes the tank to heat continuously. This condition overheats your water and creates a severe shock risk if current leaks into the tank. Testing for a ground fault is quick and essential for your safety.
Check Continuity to Ground
Use a multimeter to detect any electrical path between the heating element and the metal tank. Follow these steps to perform the test safely:
- Shut off power at the circuit breaker and double-check that it is off.
- Remove the access panel and insulation to expose the lower element.
- Set your multimeter to resistance (ohms) mode.
- Touch one probe to a terminal on the element and the other to a clean spot on the tank.
- Look for the reading on your display.
A reading of “1” or “OL” means there is no short and the element is safe. Any numeric value indicates continuity, which means the element is shorted and must be replaced immediately. Repeat this test on both terminals to ensure accuracy.
⚠️ Never skip this test because a grounded element can electrify your entire plumbing system.
Measure Internal Element Resistance
If no short is found, you must verify the element is still functional internally. Place one multimeter probe on each terminal of the element to get a reading. A healthy 3,500-watt element reads approximately 13 ohms.
An infinite resistance reading means the element has failed open and will not heat the water. A reading significantly lower than expected may indicate internal shorting that causes erratic behavior. Replace the element if it fails either of these tests.
🔧 Note: Use a heating element wrench and follow manufacturer specs for torque when installing a new part.
Inspect the Upper Heating Element
Do not stop your inspection at the lower element. The upper heating element can also short or fail, leading to an overheating situation. You must test both components to ensure the system is safe.
Repeat the same two tests on the upper element. Check for continuity between each terminal and the tank metal. Then check the internal resistance across the terminals. Even if only one element is faulty, replace it immediately to prevent future issues.
✅ Pro Tip: Label wires before disconnecting anything to prevent miswiring during reassembly.
Diagnose a Stuck Thermostat

If both elements test normal, the culprit is likely a faulty thermostat. These control units turn the heating elements on and off based on water temperature. When they stick closed, power flows nonstop and leads to runaway heating.
Thermostats cannot be reliably tested in place with standard tools. The best diagnostic approach is to replace the lower thermostat first. This component typically wears out faster because it manages reheating during normal usage cycles.
Replace the Lower Thermostat
Start the repair process by swapping out the lower thermostat. Follow these steps to ensure a safe replacement:
- Power off the unit at the main breaker.
- Remove the access panel and insulation layer.
- Take note of wire positions or photograph them for reference.
- Disconnect wires carefully from the old thermostat.
- Remove mounting screws and swap in the new thermostat.
- Reconnect wires exactly as they were before.
- Reinstall insulation and the access panel.
Use only a compatible replacement that matches the voltage and amperage of your unit.
Upgrade the Upper Thermostat if Needed
If overheating continues after replacing the lower unit, move to the upper thermostat. Follow the same replacement process used for the lower unit. Ensure you match the model exactly to maintain safety features.
⚠️ Warning: Never mix up high-limit and operating thermostats. Installing the wrong type can disable safety cutoffs.
Check Temperature Settings
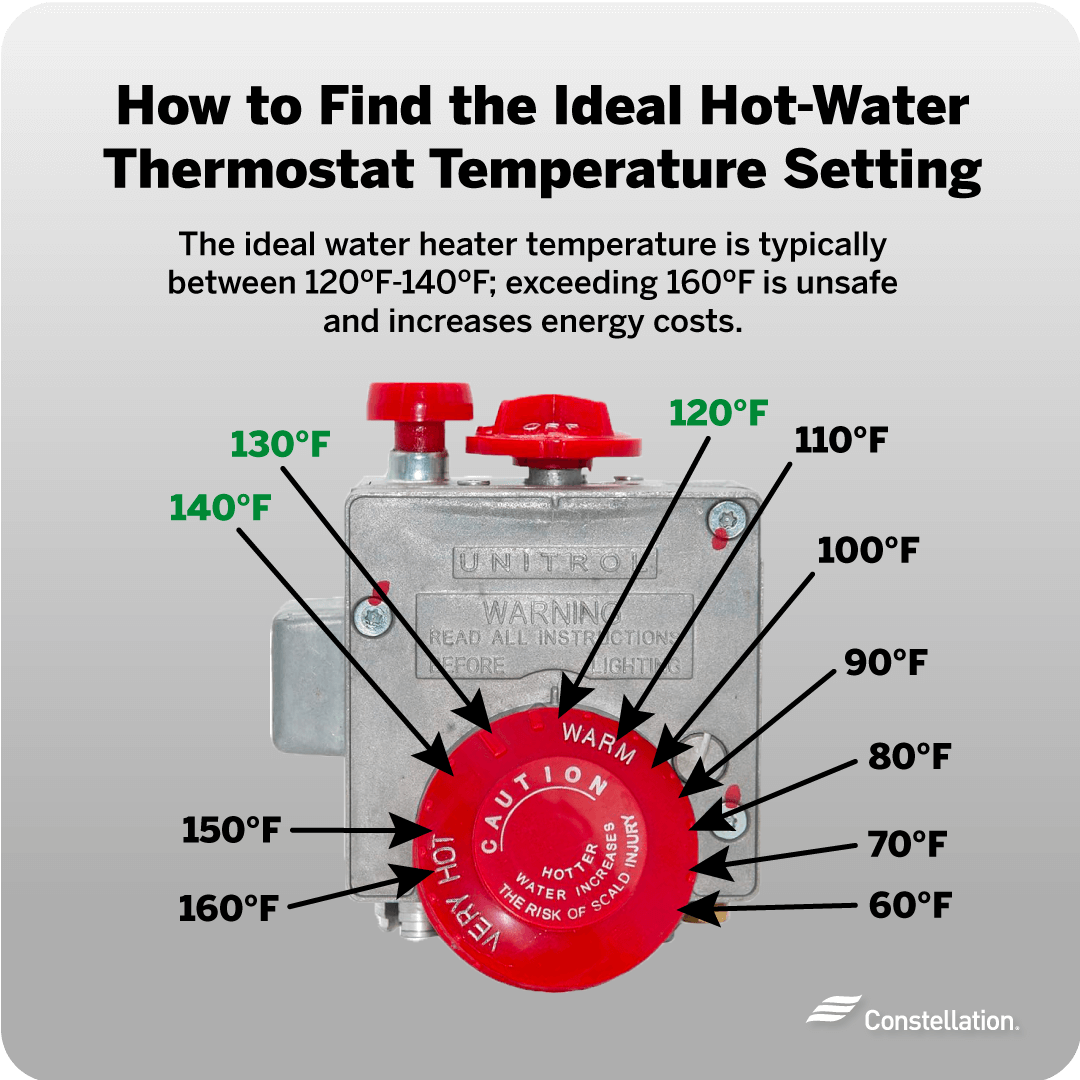
After completing repairs, verify the thermostat settings are correct. Most manufacturers preset thermostats to 120°F, which balances safety and efficiency for most households.
Reset to 120°F Standard
Adjusting the temperature requires care and the right tools. Turn off the power before removing the access panel. Use a flathead screwdriver to rotate the temperature dial gently.
Align the marker with “Medium” or 120°F on the dial. Avoid max settings like “Hot” or “Very Hot” because these can exceed 150°F and cause burns. Some models have hidden dials under the insulation, so refer to your unit’s manual for precise location details.
🔥 Did You Know? Water at 140°F can cause third-degree burns in just 5 seconds. Keeping it at 120°F reduces scald risk significantly.
Verify Power Supply Stability
Electrical issues outside the heater can mimic internal faults. A malfunctioning circuit breaker might not fully cut power or could send erratic voltage to the unit. Check your breaker panel for signs of trouble.
Confirm Breaker Function
Ensure the breaker clicks firmly into the “Off” position when toggled. Look for signs of arcing, burning smells, or warmth on the panel surface. If the heater cycles unexpectedly after being turned off, the breaker may be faulty.
Replace faulty breakers immediately to prevent fire hazards. Consult an electrician if you are unsure about handling electrical panels.
Test Outlet and Voltage (if applicable)
For plug-in tankless or portable units, use a multimeter to test outlet voltage. Ensure it reads 240V ±10% for proper operation. Low or fluctuating voltage can confuse controls and cause temperature drift. Hardwired units should be checked by a licensed professional.
Examine Wiring and Connections
Loose or corroded wiring can cause short circuits or thermostat malfunctions. Inspect all visible connections with the power off. Look for burn marks, melted insulation, or loose wires around the thermostats and elements.
Tighten all connections on thermostats and elements securely. Replace any damaged wire nuts or terminals to ensure a solid connection. Ensure no bare copper touches the metal tank to prevent grounding issues.
✅ Best Practice: Add dielectric grease to terminals during reassembly to prevent future corrosion.
Flush the Tank to Prevent Sediment Buildup
While not a direct cause of overheating, sediment accumulation can insulate the lower element. This causes it to overheat locally and trigger false signals or inefficient operation.
Perform an Annual Flush
Flush your tank annually to remove mineral deposits. Turn off power and the cold water supply before starting. Attach a garden hose to the drain valve and open a hot water tap nearby to reduce vacuum.
Open the drain valve and let the tank empty completely. Refill the tank and restore power only when it is full. This simple maintenance step removes deposits that reduce efficiency and shorten component life.
⏱️ Time Estimate: 30–60 minutes
🛠️ Tools Needed: Hose, bucket, gloves, safety glasses
Monitor Indicator Signs Post-Repair
After completing repairs, monitor the system closely for any signs of continued trouble. Allow the heater to stabilize for 30 minutes after re-energizing the unit.
Wait 30 Minutes Before Testing
Run hot water at a sink for 2–3 minutes once the waiting period is over. Use a thermometer to check the temperature accurately. The ideal range is 115°F to 125°F for safe household use.
If water exceeds 130°F, turn off power again immediately. Recheck thermostat wiring and confirm both thermostats are properly seated and secured. Double-check your work to ensure no steps were missed.
Prevent Future Overheating Issues
Avoid repeat problems with regular maintenance and smart habits. Installing safety devices can provide an extra layer of protection for your family.
Install a Mixing Valve

A tempering valve blends cold water with hot output to deliver safer temperatures at fixtures. This is ideal for homes with young children or elderly occupants. It ensures safe water even if the tank runs hotter for sanitation purposes.
Schedule Annual Maintenance
Perform these checks once per year to keep your system running well:
* Test the pressure relief valve
* Flush sediment from the tank
* Inspect elements and thermostats
* Verify thermostat calibration
✅ Bonus: A well-maintained heater lasts 2–5 years longer and uses less energy.
Upgrade to a Smart Thermostat (Optional)
Some modern water heaters support digital thermostats with advanced features. These include digital temperature readouts and overheat alarms. Remote monitoring via app provides real-time feedback and prevents unnoticed temperature drift.
Summary: Fix Hot Water Tank Overheating Fast
| Problem | Solution | Tools Needed |
|---|---|---|
| Shorted heating element | Replace element | Multimeter, wrench |
| Open (dead) element | Replace element | Same as above |
| Stuck lower thermostat | Replace thermostat | Screwdrivers, multimeter |
| Faulty upper thermostat | Replace second thermostat | Same |
| Incorrect temp setting | Adjust dial to 120°F | Flathead screwdriver |
| Sediment buildup | Flush tank annually | Hose, bucket |
| Loose wiring | Tighten connections | Insulated tools |
✅ Final Safety Reminder: Always de-energize the unit before working. Never restore power until all panels, insulation, and safety covers are back in place.
By following this guide, you can confidently troubleshoot and resolve a hot water tank overheating issue. Protect your household from burns, electrical risks, and costly repairs by starting with the lower element and thermostat. Use a multimeter to confirm faults and always prioritize safety. With proper care, your water heater will deliver safe, reliable hot water for years.
Frequently Asked Questions About Hot Water Tank Overheating
Why is my water heater producing scalding hot water?
Your water heater likely has a shorted heating element or a stuck thermostat. These failures cause the unit to heat continuously without shutting off. Testing these components with a multimeter will identify the specific fault.
Can a bad thermostat cause a water heater to overheat?
Yes, a stuck thermostat allows power to flow to the heating element nonstop. This results in dangerously high water temperatures. Replacing the lower thermostat first is the recommended fix for this issue.
How do I test if my heating element is shorted?
Set a multimeter to resistance mode and touch one probe to a terminal and the other to the metal tank. A reading of “1” or “OL” means it is safe. Any numeric value indicates a short that requires replacement.
What is the safe temperature setting for a water heater?
The standard safe temperature is 120°F. This setting prevents scalding while inhibiting bacterial growth. Settings above 140°F significantly increase the risk of severe burns in seconds.
How often should I flush my water heater?
You should flush your water heater once a year to remove sediment. Sediment buildup can insulate elements and cause local overheating. Regular flushing extends the life of your unit.
Is it safe to work on a water heater with the power on?
No, never work on a water heater with the power on. Always turn off the circuit breaker before removing panels or touching components. Restoring power should only happen after all repairs are complete.
Key Takeaways for Fixing Hot Water Tank Overheating
Addressing a hot water tank overheating problem requires systematic testing of heating elements and thermostats. Start by turning off the power and testing the lower element for shorts or resistance issues. Replace faulty parts immediately to restore safe operation.
Regular maintenance like flushing the tank and checking settings prevents future overheating incidents. Keep your thermostat set to 120°F and inspect connections annually. Taking these steps ensures your home stays safe from scalding hazards and electrical dangers.