A failing check valve can quietly drain your system’s performance, whether you operate a home air compressor, a well pump, or industrial hydraulic equipment. These one-way valves prevent backflow that could damage motors, contaminate supplies, or trigger electrical faults. When they fail, the symptoms often mimic other problems, making accurate diagnosis essential. This guide walks you through how to check a check valve using field-tested methods, from simple listening tests to full disassembly, so you can catch failures early and avoid costly repairs.
You’ll learn to recognize warning signs, perform hands-on tests for compressors and water systems, inspect internal components, and select the right replacement. Each method draws on real diagnostic procedures used by technicians across residential and industrial applications.
Identify Check Valve Failure Symptoms
Before touching any tools, observe how your system behaves. Most check valve problems announce themselves through repeatable symptoms tied to pressure, sound, or cycling frequency.
Listen for Hissing or Banging Sounds
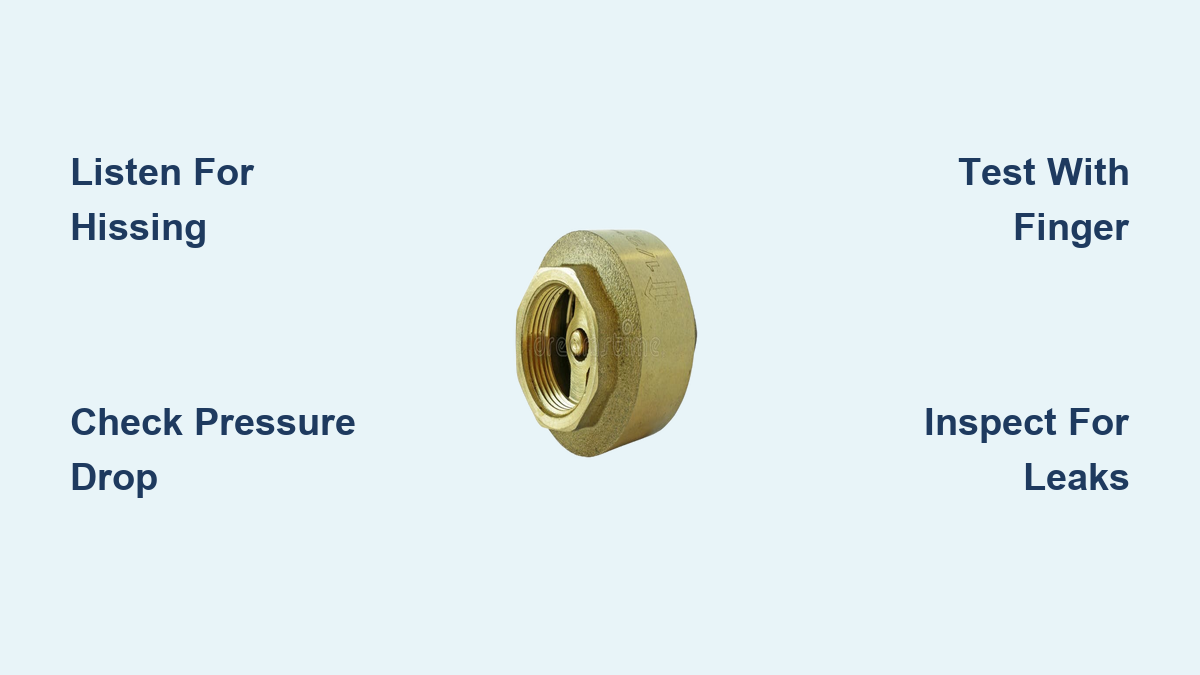
A hissing noise when the system is off usually means internal leakage. In air compressors, this sound comes from the intake filter as pressurized air bleeds backward from the tank. In water lines, it may appear as a faint leak near the valve body. Loud banging, known as water hammer, occurs when the valve slams shut too quickly, a common issue with swing-type checks that lack spring assistance.
Monitor Pressure Drops
If system pressure slowly declines after shutdown with no usage, backflow is likely. Attach a pressure gauge and watch for these patterns:
- Water systems: Pressure drops from cut-out (around 60 psi) to cut-in (40 psi) within minutes.
- Air compressors: The tank bleeds down rapidly, indicating a failed seal.
This is one of the clearest indicators that the valve isn’t holding.
Watch for Pump Short Cycling
Frequent pump activation points to pressure loss. When a check valve leaks internally, the pump must restart often to maintain pressure. This wastes energy and accelerates wear on motors and pressure switches.
Test an Air Compressor Check Valve

Air compressors are among the most common applications where check valve failure leads to electrical and mechanical stress.
Perform the Finger Test
This quick field check confirms backflow from the tank.
Steps:
1. Let the compressor build full pressure and turn it off.
2. Remove the air intake filter.
3. Place your finger firmly over the intake port.
4. Wait 20 to 30 seconds, then slowly pull away.
Result: If you feel suction pulling your finger toward the port or hear a faint pop, pressurized air is flowing backward. The check valve has failed.
⚠️ Pro Tip: Always disconnect power before removing filters or accessing moving parts.
Disconnect the Supply Line
This test isolates the source of leakage.
Steps:
1. Shut off and unplug the compressor.
2. Drain some air to reduce residual pressure.
3. Locate the tube connecting the pump head to the tank.
4. Carefully disconnect it from the pump side.
Result: If air rushes out from the tank side, the check valve isn’t sealing. If no air escapes but pressure still drops, suspect the pressure switch or tank valve.
Diagnose Water System Check Valve Problems

In well pumps and household plumbing, a faulty check valve causes inefficiency and potential contamination.
Monitor Pressure Without Usage
Use a gauge on a hose bib or pressure tank:
- Turn off all water sources.
- Let the system pressurize and shut down.
- Observe the gauge over 15 to 30 minutes.
Failure Indicator: A steady drop to lower pressure means backflow. Rule out visible leaks first, since faulty joints or dripping faucets can mimic valve failure.
Suspect Deep-Well Valves Early
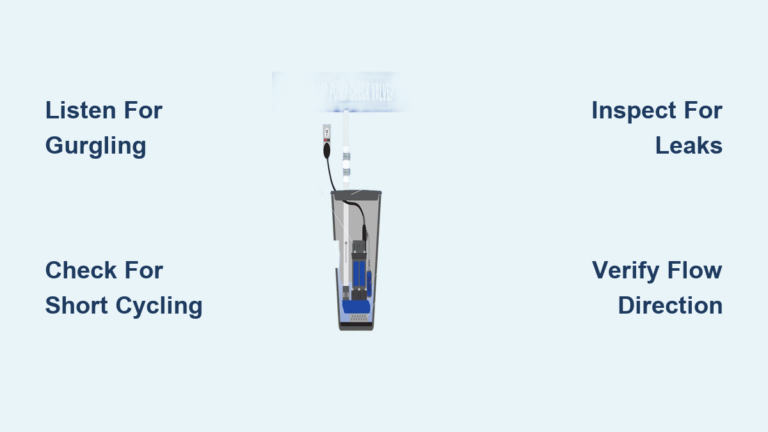
Check valves in submersible well pumps sit 25 to 30 feet above the pump. If the pump cycles frequently and no above-ground leaks exist, the submerged valve is likely faulty.
❗ Note: These cannot be repaired in place. The entire pump must be pulled for inspection or replacement.
Detect General System Faults
Across pneumatics, hydraulics, and process systems, six key signs indicate check valve trouble.
Identify Chattering and Vibration
A rattling noise with subtle vibration suggests the valve isn’t fully opening or closing.
Common causes include:
– Flow rate too low to overcome cracking pressure
– Valve oversized for the line (Cv too high)
– Loose internal components
This leads to premature wear and seal damage.
Confirm Reverse Flow with Instruments
Use flow meters or pressure transducers to detect backward movement. Install a temporary inline flow indicator. If reverse flow registers during shutdown, the valve isn’t sealing properly.
Look for Sticking Behavior
A valve that intermittently blocks or restricts flow may have debris lodged in the bore, corroded O-rings, or a worn ball or poppet mechanism. Cycle the system multiple times. Inconsistent performance indicates mechanical binding.
Conduct a Physical Inspection

When testing suggests failure, disassemble the valve for visual confirmation.
Shut Down and Depressurize
Never open a pressurized line.
Steps:
1. Isolate the valve using upstream and downstream shut-offs.
2. Open a drain valve or bleeder to release pressure.
3. Confirm zero pressure with a gauge.
Work in a clean area and keep small parts organized.
Disassemble a Swing Check Valve
Common in water systems, swing checks use a hinged flapper.
Steps:
1. Remove the main body bolt with a wrench.
2. Loosen the small access bolt near the hinge.
3. Tap out the hinge pin gently with a punch.
4. Lift out the flapper and hinge assembly.
Inspect these components:
– Flapper: Cracks, warping, or wear on the sealing edge
– Seat: Pitting, erosion, or debris
– Hinge Pin: Corrosion or bending
– O-Rings: Dryness, cracking, or compression set
Replace damaged parts or the entire valve.
Replace the Check Valve Correctly
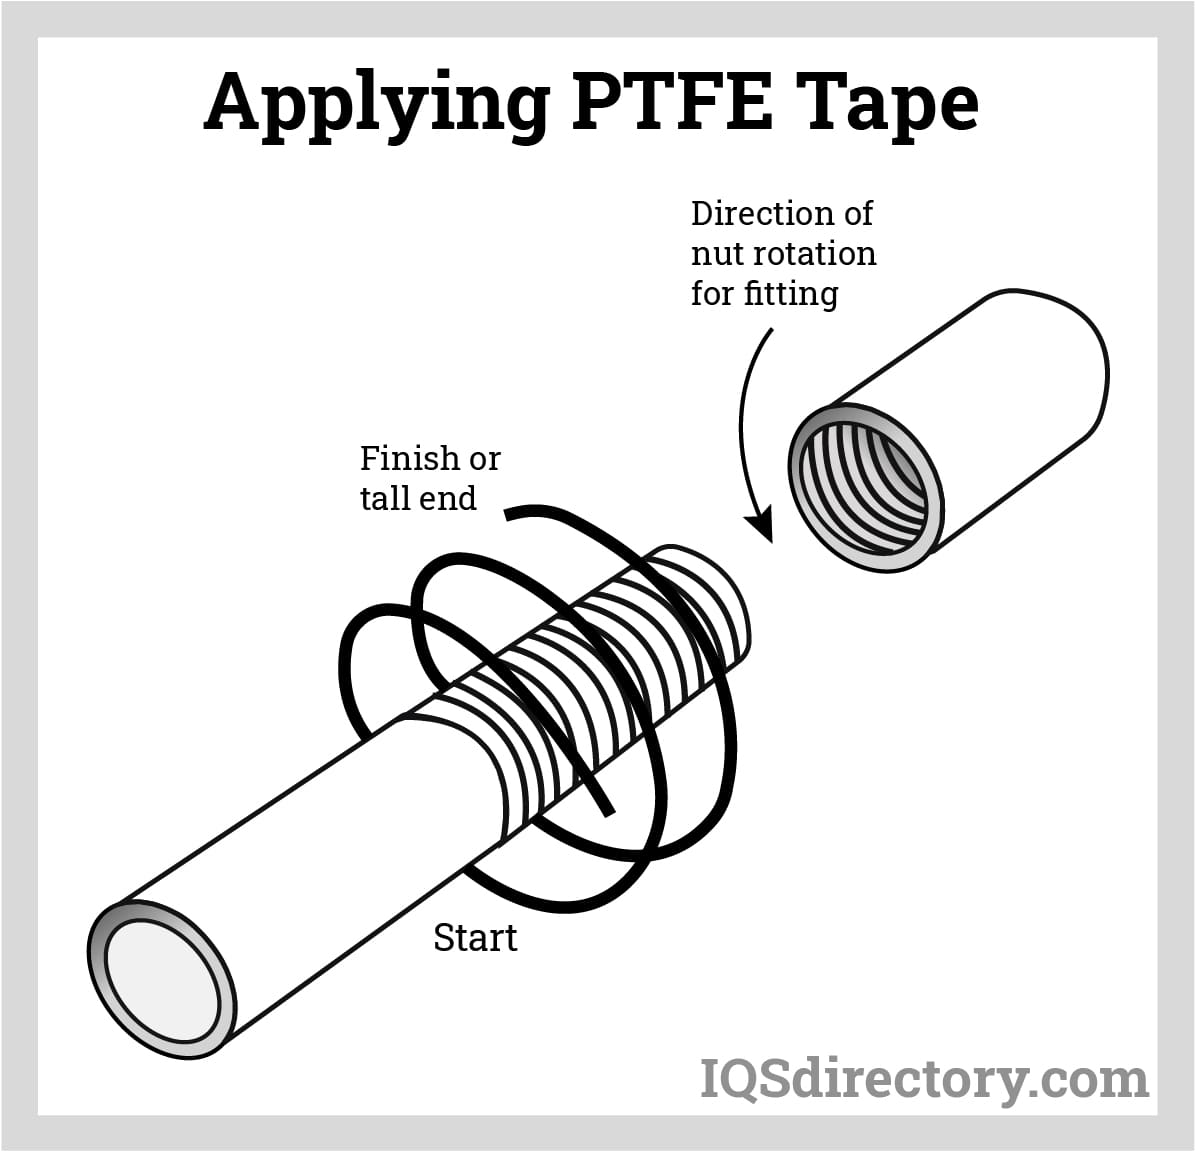
A new valve fails quickly if installed incorrectly. Follow best practices for longevity.
Prepare Threads Properly
Use Teflon tape only, unless specified otherwise.
Technique:
– Wrap counterclockwise around male threads.
– Apply 3 full turns without overlapping past the thread end.
– Break tape cleanly with no loose tails.
✅ Do not use pipe dope with tape. This creates sludge and debris.
Hand-Tighten First, Then Wrench
For compressors or small fittings:
- Thread by hand until snug.
- Use two wrenches: one to hold the valve body, one to turn.
- Tighten one and a half turns past hand-tight.
Over-tightening cracks brass bodies or distorts seals.
Install in the Right Position
Orientation affects performance and lifespan.
Follow the Flow Arrow
Always align the arrow on the valve body with the direction of flow. Installing backward renders the valve useless.
Choose Correct Orientation
- Swing Checks: Must be installed horizontally. Gravity closes the flapper. Vertical installation prevents proper seating.
- Piston, Ball, or Poppet Checks: Can usually be installed in any position, especially if spring-loaded.
Check manufacturer specs for vertical flow-down applications.
Allow Upstream Straight Pipe
Install at least 10 pipe diameters of straight pipe before the valve.
Example: For a 1-inch pipe, use 10 inches of straight run before the valve.
This ensures smooth, laminar flow. Elbows or tees too close cause turbulence, leading to vibration and chattering.
Size for Performance, Not Just Pipe
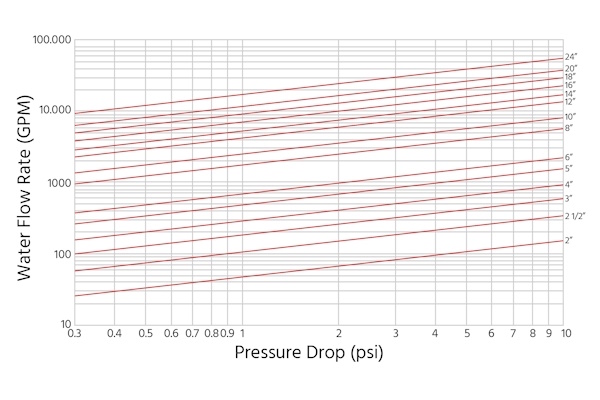
Selecting the right valve isn’t about matching pipe size. It’s about matching flow conditions.
Understand Cv (Flow Coefficient)
Cv measures flow capacity. Incorrect sizing is a top cause of failure.
| Issue | Cause | Consequence |
|---|---|---|
| Too Small | High pressure drop, high velocity | Erosion, noise, wear |
| Too Large | Insufficient pressure to open fully | Chattering, premature failure |
Choose a valve with a Cv that matches your system’s minimum and maximum flow rates.
Match Materials to Media
Avoid corrosion and seal degradation.
Water Wells: Use 304 or 316 stainless steel. Avoid brass-stainless connections to prevent electrolysis.
Air and Gas Systems: Use Buna-N or Viton O-rings for bubble-tight shutoff.
High Temperature or Chemicals: Select compatible elastomers or metal-seated valves.
Prevent Failure with Proactive Maintenance
Check valves last longer with smart design and routine checks.
Install Upstream Filtration
A simple inline filter stops debris from entering the valve.
Benefit: Prevents sticking, seat damage, and early wear.
Use a 40 to 100 micron filter in dirty systems.
Replace Elastomers Every 5 Years
Even if the valve seems fine, O-rings and seals degrade over time.
Rule of Thumb: Replace elastomer-based check valves every 5 years. Metal-only designs can last up to 20 years.
Avoid the 33-Foot Rule in Wells
In deep-well systems, never place the check valve more than 33 vertical feet above the water level.
Beyond this point, atmospheric pressure can’t support the water column. When the pump restarts, water slams into the valve, causing severe water hammer and potential pipe damage.
Choose the Right Valve Type

Different systems need different designs.
Use Piston or Spring-Assisted Valves to Stop Water Hammer
Swing checks close slowly and cause shock waves. Instead, use:
– Piston check valves
– Center-guided designs
– Flange insert (silent check) types
These close quickly and quietly, protecting piping and fittings.
Pick Ball Checks for Viscous Fluids
In oil, sludge, or syrup lines, ball checks work best. The rolling ball provides a wiping action that clears thick media.
Avoid swing or piston types, as they clog easily.
Know When to Use Duckbill or Diaphragm
For low-pressure applications like drainage or vent lines, flexible rubber duckbill valves open under pressure and collapse to seal.
Ideal for:
– Flood prevention
– Sewage ejection
– Marine systems
They degrade faster but are inexpensive and easy to replace.
Troubleshoot Fast with a Decision Matrix
Use this guide to match symptoms to causes and fixes.
| Symptom | Likely Cause | Fix |
|---|---|---|
| Hissing at intake | Leaking check valve | Replace valve |
| Blown fuses | Back-pressure on restart | Replace check valve immediately |
| Chattering | Oversized valve or low flow | Install correct Cv valve |
| Loud bang on shutdown | Water hammer | Add arrestor; switch to spring check |
| Slow pressure build | Internal leakage | Test and replace |
| Pump short cycles | Failed seal or deep-well valve | Inspect or pull pump |
| Sticking | Debris or dry seals | Clean system; add filter |
Frequently Asked Questions About Checking a Check Valve
What is the fastest way to check a check valve on an air compressor?
The finger test is the quickest method. Remove the intake filter, place your finger over the port, and wait 30 seconds. If you feel suction when pulling away, the valve is leaking.
How do I know if my well pump check valve is bad?
Watch for frequent pump cycling and pressure drops when no water is being used. If visible fittings show no leaks, the submerged check valve is the likely culprit.
Can a check valve be repaired instead of replaced?
Some swing checks allow internal part replacement, including flappers, O-rings, and hinge pins. However, corroded bodies or severely worn seats usually require full replacement.
Why does my check valve make a banging noise?
Loud banging (water hammer) happens when flow stops suddenly and the valve slams shut. Swing checks are most prone to this. Switching to a spring-assisted or piston valve eliminates the problem.
How often should check valves be replaced?
Elastomer-based valves should be replaced every 5 years. All-metal valves can last up to 20 years with proper maintenance and compatible media.
What causes a check valve to stick?
Debris in the bore, corroded seals, or worn internal components cause sticking. Installing upstream filtration and cycling the system regularly helps prevent this issue.
Key Takeaways for Checking Your Check Valve
Knowing how to check a check valve saves money, prevents downtime, and protects critical equipment. Start with simple tests: listen for unusual sounds, watch pressure gauges, and try the finger test on compressors. Move to disassembly only when symptoms confirm failure. Always replace with the correct type, size, and material for your system. A $20 valve can cause $300 in damage if ignored, so regular inspection is your best defense. Whether you maintain a garage compressor or a municipal water pump, a functioning check valve keeps your system flowing smoothly in one direction only.