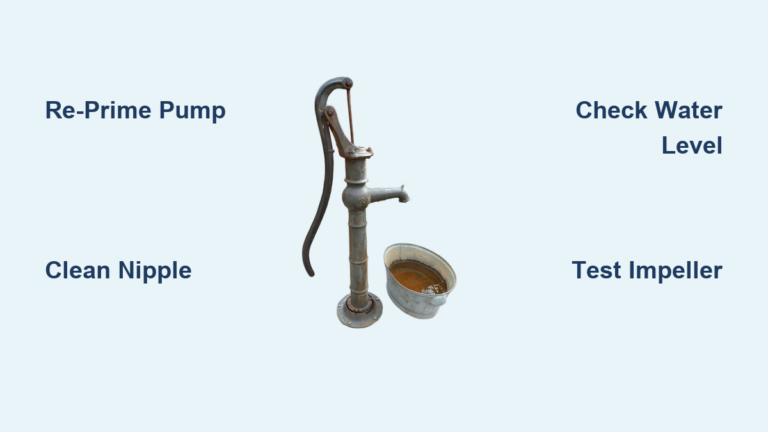

You turn on your pool pump, expecting a smooth rush of water through the system. Instead, the strainer basket barely fills, air bubbles swirl inside the transparent lid, and the return jets sputter weakly. If your pool pump is not filling with water, it has lost prime, which is the critical seal of water needed for the pump to circulate effectively. This common but frustrating issue disrupts filtration, risks equipment damage, and often stems from preventable causes like air leaks or blockages.
The good news is that most cases can be diagnosed and fixed at home with basic tools and a systematic approach. This guide walks you through every possible cause, how to test for it, and exactly what to do to restore full water fill and reliable operation.
Check Pool Water Level First
Before diving into complex repairs, confirm the most basic requirement: is there enough water in the pool?
Water Below Skimmer Midpoint
If the water level drops below the skimmer opening, the pump will suck in air instead of water. Even a few inches too low can break prime.
Ideal level: Midpoint to upper third of the skimmer opening.
Minimum safe level: At least halfway up the skimmer throat.
Warning sign: A visible whirlpool or vortex in the skimmer indicates air being drawn in.
Action step: Use a garden hose to bring the water level up to at least the midpoint of the skimmer. Then restart the pump and observe if the basket fills completely.
Inspect Pump Lid and O-Ring

A faulty seal around the pump lid is the most common cause of air entering the system.
Cracked or Worn O-Ring
Over time, the rubber O-ring degrades due to chlorine exposure, UV light, and dry running.
Inspect closely: Remove the lid and turn the O-ring inside out. Look for micro-cracks along the inner curve.
Signs of failure include:
• Flattened or square profile instead of round
• Black residue or swelling
• Brittle texture or split seams
Even if the O-ring looks fine, it may still leak under vacuum pressure.
Lubricate Properly
Dry O-rings do not seal well. But use the right lubricant.
Use: Teflon-based or silicone-based grease.
Never use: Petroleum-based products, which degrade rubber.
Apply a thin, even layer. Over-lubrication attracts dirt and shortens seal life.
Test with a Borrowed Lid
Still unsure? Try this quick field test. Ask a neighbor with the same pump model to lend their pump lid. Install it on your pump and run the system. If the basket fills and stays full, your original lid or O-ring is the culprit.
Tighten and Test Drain Plug
The threaded drain plug on the front of the pump housing is another frequent air entry point.
Loose or Damaged Plug
Even a slightly loose plug can allow air to seep in when the pump creates suction.
Check visually: Look for moisture, mineral deposits, or dripping.
Test while running: Gently splash water over the plug. If air bubbles in the basket clear momentarily, you have found the leak.
Replace if necessary: Remove the plug and inspect the small O-ring inside. If cracked or flattened, replace it. Reinstall and hand-tighten. Do not overtighten, which can strip the threads.
Detect Suction-Side Air Leaks
Air leaks on the inlet side before the pump are the leading cause of failed priming. These often go unnoticed because they only draw air under vacuum.
Use the Garden Hose Trickle Test
This is the most reliable DIY method to locate invisible leaks.
How to perform the test:
1. Start the pump and watch the air in the strainer basket.
2. Slowly run water from a garden hose over each joint, valve, union, and fitting on the suction side.
3. Focus on pump front union, skimmer lid gasket, valve stems, and PVC unions near the pump.
4. If the air bubbles in the basket suddenly disappear, water is being pulled into the leak, confirming its location.
Try the Plastic Bag Method
For a temporary seal, wrap a grocery bag tightly around a suspect joint. Tape it in place to block air entry. If the pump primes, the leak is isolated.
Clear Suction Line Blockages
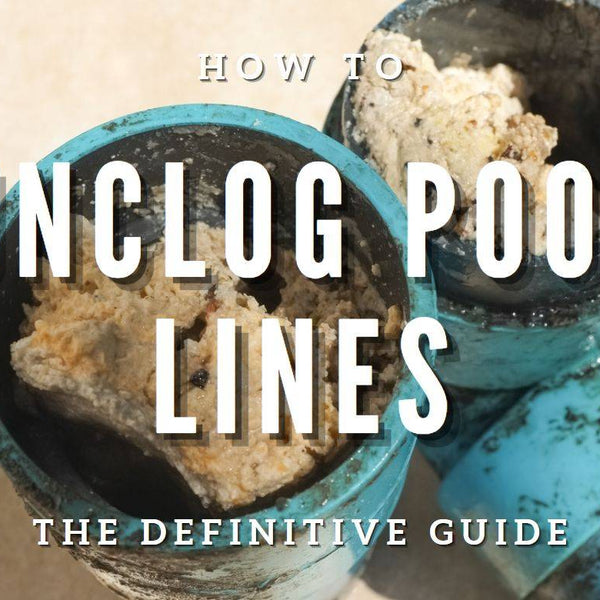
No water reaching the pump means it cannot fill, often due to a clog in the skimmer line.
Common Clog Locations
• Skimmer basket (check first)
• First 90-degree elbow after the skimmer
• Main drain line if multiple inlets
• Broken butterfly inside a closed valve
Hose-in-Skimmer Test
To check for blockages, remove the skimmer basket. Insert a garden hose into the skimmer hole. Wrap a T-shirt or rag around the hose to seal the opening. Turn on the water and start the pump.
What to expect:
• Clear line: Water flows through return jets and fills the pump basket.
• Blocked line: Little or no flow. Water backs up in the skimmer.
Clear with a Plumber’s Snake
Feed a flexible auger into the skimmer pipe. Rotate slowly to break up debris. Common culprits are leaves, pebbles, hair, or small toys. Sharp bends in plumbing may limit access. Work gently to avoid damaging pipes.
Use a Rubber Bladder Tool
This specialized device expands inside the pipe when water pressure is applied. Insert into the pump inlet port. Turn on the hose. The bladder inflates and forces water backward, dislodging clogs near the skimmer. This is highly effective for partial blockages that resist snaking.
Verify Valve Positions
A single closed or mispositioned valve can stop water flow entirely.
Suction-Side Valves
Ensure all intake valves are fully open:
• Skimmer line
• Main drain
• Auto-vacuum line if connected
Even a partially closed valve creates resistance and can introduce air.
Multiport Valve Settings
If using a sand or D.E. filter, set to Filter, not Recirculate, Backwash, or Closed. Confirm the handle turns freely and locks into position.
Never Close Return Valves During Startup
Closing the return side while starting the pump builds dangerous pressure. This can blow out the shaft seal and causes erratic priming behavior. Always keep both suction and return lines open during operation.
Inspect the Impeller
A clogged or damaged impeller prevents water movement, even if the motor runs.
Signs of Impeller Problems
• Pump hums but no water flow
• Strainer basket does not fill
• Low or zero filter pressure
• Unusual noises like grinding or rattling
How to Check
- Turn off power at the breaker.
- Close valves and drain the pump housing.
- Remove the pump cover and inspect the impeller.
- Look for debris caught between vanes, cracks or chips, or loose fit on the motor shaft.
Clean or Replace
Remove debris with a soft brush or compressed air. If cracked or worn, replace the impeller, which is a model-specific part. Reassemble carefully and ensure the diffuser and seal are seated properly.
Clean or Remove the Filter
A dirty filter adds resistance, making it harder for the pump to prime.
Cartridge Filters
Remove and inspect each cartridge. Soak in filter cleaner or degreaser. Rinse thoroughly with a hose.
Sand and D.E. Filters
Check the pressure gauge. If 8 to 10 psi above clean baseline, backwash. For D.E. filters, recharge with fresh powder after backwashing.
Bypass the Filter Temporarily
To test if the filter is the issue, remove the cartridge or open the multiport to Recirculate. Attempt to prime the pump. If it fills and runs normally, the filter was restricting flow. Reinstall only after cleaning or backwashing.
Bleed Air from the Filter
Trapped air in the filter tank creates backpressure and disrupts flow.
How to Bleed
- Locate the air relief valve on top of the filter.
- Open it slowly while the pump runs.
- Wait for a steady stream of water to exit.
- Close the valve.
If water spits then stops, air is still being drawn in elsewhere. Do this after every maintenance session or long shutdown.
Fix Poor Plumbing Design
Even with all components working, bad plumbing can prevent full prime.
Hard 90-Degree Elbow at Pump Inlet
A sharp turn immediately before the pump disrupts water flow.
Industry standard: Minimum 5 times pipe diameter of straight pipe before first fitting.
• For 2-inch PVC: 10 inches of straight run.
• For 1.5-inch PVC: 7.5 inches of straight run.
Without this, turbulence reduces priming efficiency.
Upgrade Fittings
• Replace street elbows with long-radius bends.
• Use full-port ball valves instead of restricted models.
• Minimize the number of turns on the suction side.
These changes improve flow dynamics and reduce air entrapment.
Rule Out Shaft Seal Failure
While shaft seals usually leak water externally, they can sometimes allow air in.
When to Suspect It
• Pump is below pool water level but still loses prime.
• No other leaks found.
• Moisture around motor shaft.
However, an experienced technician notes that a broken underground pipe is almost never the cause. Most issues are above ground.
If all else fails and the pump is old, consider professional shaft seal replacement, which requires disassembly and special tools.
Prevent Future Issues
Avoid recurring problems with routine care and smart practices.
Maintenance Schedule
• Clean pump basket weekly.
• Inspect and lubricate O-rings quarterly.
• Deep clean cartridges every 3 to 6 months.
• Backwash sand or D.E. filter when pressure rises 8 to 10 psi.
• Inspect impeller seasonally.
• Check valve O-rings annually.
Lubrication Tips
Use silicone or Teflon-based lube only. Apply sparingly, just enough to create a slick surface. Store pump lid with O-ring in place to prevent warping.
Water Level Management
Keep water at skimmer midpoint year-round. Use automatic fillers in areas with high evaporation.
When to Call a Professional
DIY fixes work in most cases, but some situations require expert help.
Call a Technician If
• You suspect a broken valve internal or underground pipe.
• Multiple tests fail to resolve the issue.
• Pump housing is cracked.
• Motor does not start or trips breaker.
• Shaft seal needs replacement.
• Electrical issues are present.
If under warranty or unsure, contact a certified pool technician.
Frequently Asked Questions About Pool Pump Not Filling with Water
Why does my pool pump lose prime after running for a few minutes?
This typically indicates an air leak on the suction side. The pump initially pulls water, but as the water level in the basket drops, air is drawn in through a weak seal. Common culprits include a worn O-ring, loose drain plug, or suction-side valve leak.
Can a clogged filter cause the pump not to fill with water?
Yes. A heavily clogged filter restricts flow and creates excessive resistance. This makes it difficult for the pump to draw water and establish prime. Clean or backwash the filter, or temporarily bypass it to test.
How do I know if the impeller is blocked?
Signs include the pump humming without moving water, no water filling the strainer basket, and low or zero filter pressure. You will need to shut off power, drain the pump housing, and visually inspect the impeller for debris or damage.
Will a low pool water level prevent the pump from priming?
Absolutely. If water is below the skimmer midpoint, the pump will draw air instead of water. Keep the pool water level at least halfway up the skimmer opening at all times.
Can I use petroleum jelly to lubricate the pump O-ring?
No. Petroleum-based products degrade rubber O-rings over time. Use only Teflon-based or silicone-based lubricants specifically designed for pool equipment.
How long does it take to prime a pool pump normally?
Under normal conditions, a properly functioning pump should prime within 2 to 5 minutes. If it takes longer or fails to prime, there is an underlying issue that needs investigation.
Final Thoughts on Fixing Your Pool Pump Not Filling with Water
The majority of pool pump filling issues come down to three main categories: air leaks, blockages, or low water level. By working through the systematic diagnostic steps outlined in this guide, you can identify the exact cause without unnecessary part replacements. Start with the simplest fixes, such as refilling the pool and cleaning the baskets, before moving to more advanced diagnostics like the garden hose leak detection test.
Remember to perform routine maintenance to prevent future issues. Keep O-rings lubricated with the correct products, maintain proper water levels, and clean filters regularly. If your pump is aging or showing multiple failures, consider whether professional service or replacement makes more financial sense than continued repairs. With the right approach, your pump will fill completely, run smoothly, and keep your pool water clear and healthy.