If your sump pump seems to run constantly or cycles every few minutes, the problem may not be the pump itself. A failing check valve lets water flow backward into the sump pit after each cycle, forcing the pump to re-handle the same water repeatedly. This recycling wastes energy, shortens motor life, and increases flood risk during heavy rain. Learning how to check check valve on sump pump helps you catch problems early and protect your basement from costly water damage.
This guide walks you through diagnosing, inspecting, testing, and replacing a sump pump check valve. You will learn what sounds, behaviors, and visual signs indicate failure, plus how to verify proper installation and choose the right replacement.
Listen for Warning Sounds
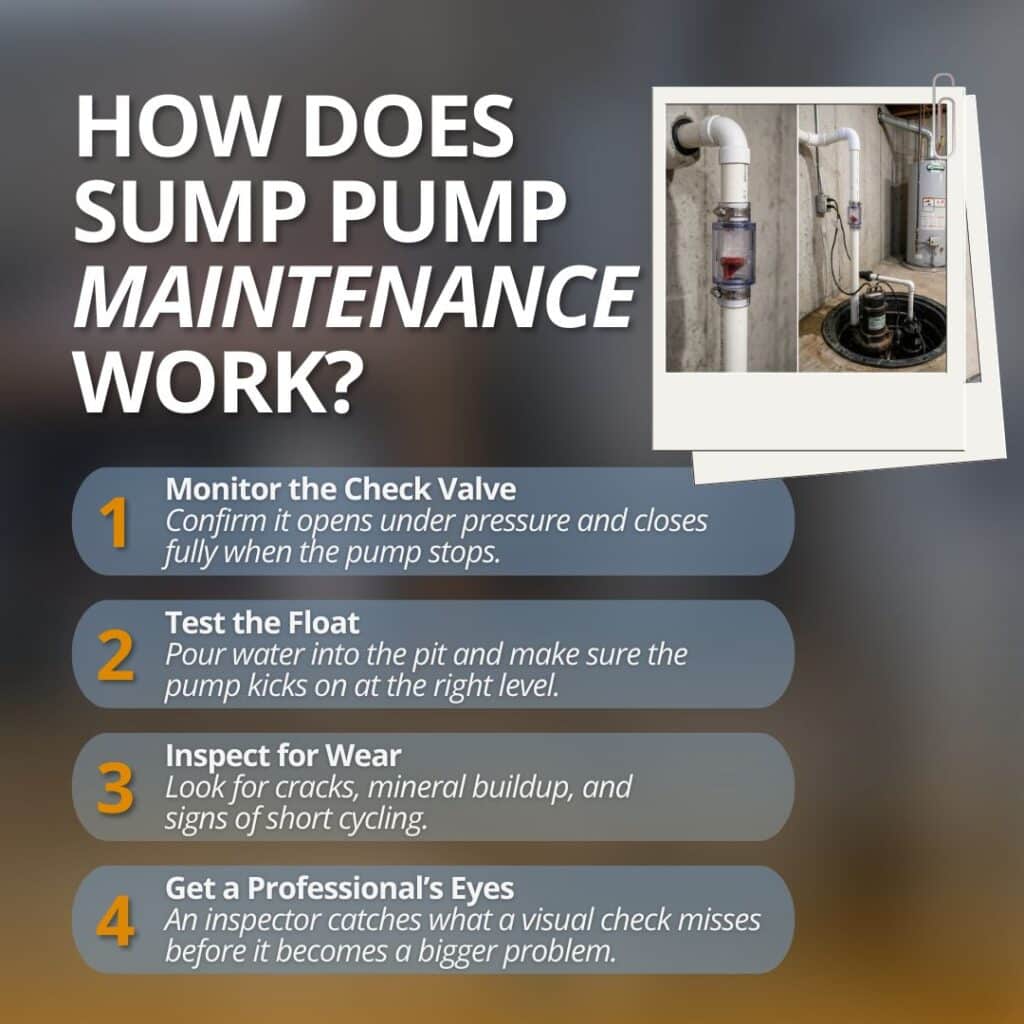
The first clue to a failing check valve often comes from your ears. Unusual noises after the pump shuts off can reveal backflow or mechanical problems before any visible damage appears.
Hear Gurgling After Shutdown
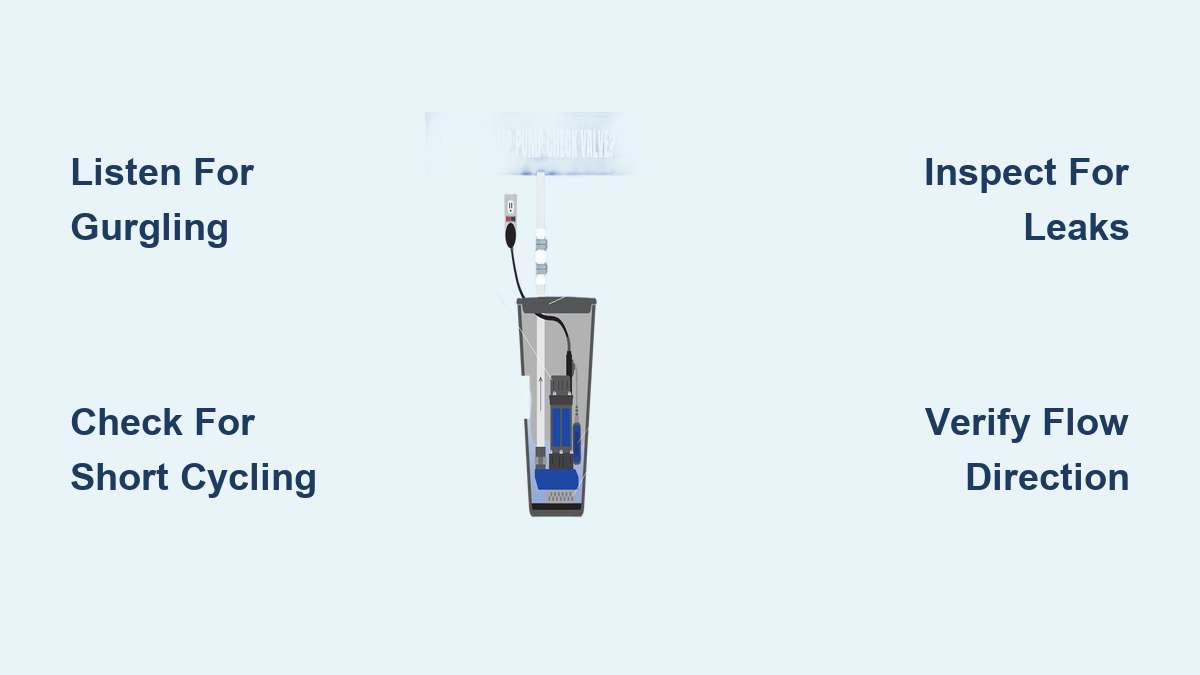
A gurgling or draining sound right after the pump stops means water is flowing backward through the discharge pipe. This washing machine drain noise happens because the flapper or ball inside the valve is not sealing properly. Backflow refills the pit quickly, causing the float switch to trigger another cycle in what is known as short cycling.
Detect Loud Water Hammer
A sharp clunk or banging noise when the pump turns off indicates a swing or flapper valve slamming shut. While this shows the valve is closing, excessive force points to wear, lack of dampening, or high water velocity. Over time, this stress can crack pipes or damage the valve seat.
Notice Silence During Operation
If the pump runs but you hear no water moving, the check valve may be installed backward or seized shut. This blocks discharge completely and leaves water sitting in the pit. Always verify the flow arrow on the valve points upward, away from the pump.
Watch for Operational Issues
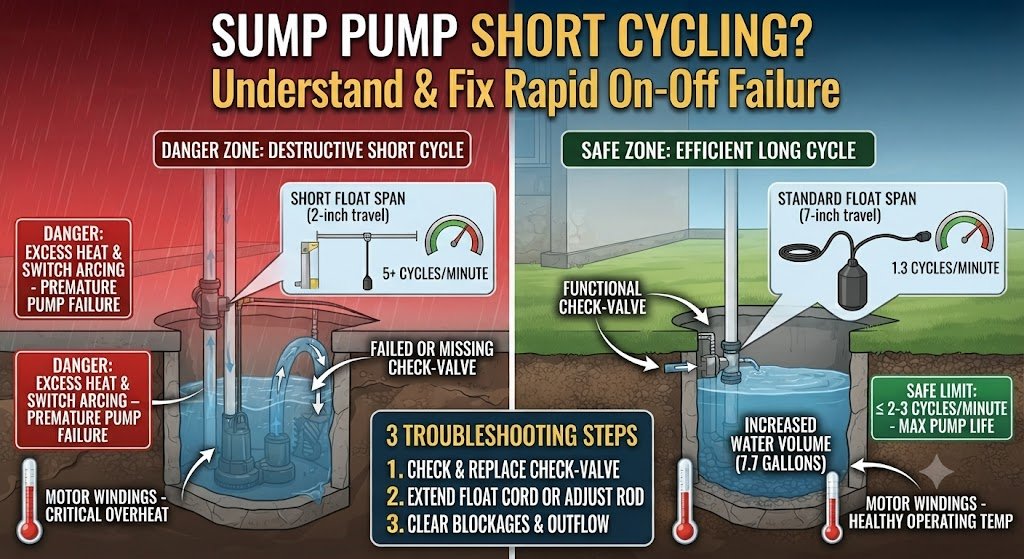
Beyond sound, how your sump pump behaves can confirm a check valve problem. Pay attention to cycle frequency and water level changes after each run.
Spot Frequent Cycling
Short cycling, where the pump turns on and off every few minutes, is a red flag. If inflow has not increased, backflow is likely refilling the pit. Time the cycles. If the pump runs for 10 to 15 seconds and repeats every 30 to 60 seconds, the valve deserves a closer look.
See Water Level Rise After Shutoff
Peek into the sump pit after the pump stops. If the water level climbs again within seconds, backflow is happening. A working check valve keeps the discharge pipe full and the pit empty between cycles.
Find Continuous Running in Heavy Rain
During storms, continuous operation may be normal. However, if running persists after rain stops, a stuck-open valve could be reducing pumping efficiency. Backflow adds volume the pump must re-handle, overwhelming it even after inflow drops.
Inspect Valve Physically
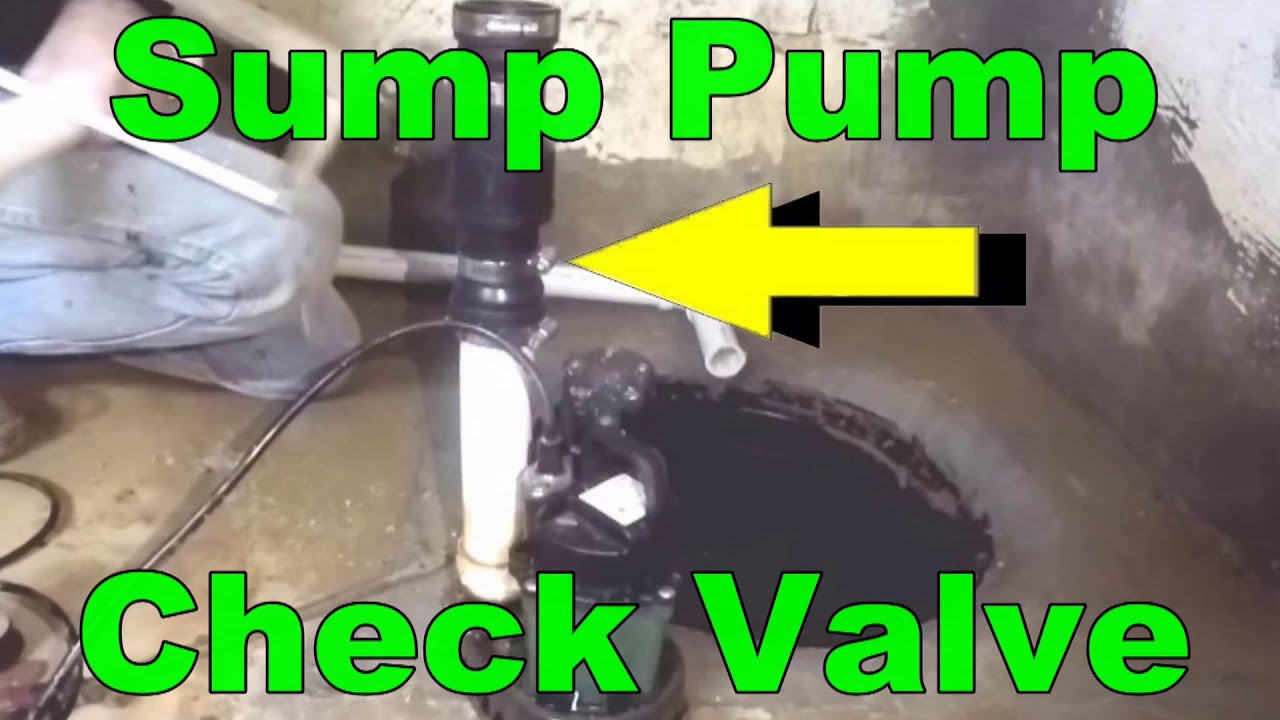
A visual and hands-on inspection reveals damage, leaks, or incorrect installation that other diagnostic methods might miss.
Check for Leaks and Cracks
Shine a flashlight on the valve body and connections. Look for water spray, drips, or pooling around clamps or joints. Cracks in the housing, often caused by freezing or impact, mean immediate replacement is needed.
Verify Correct Orientation
Locate the flow arrow on the valve body. It must point upward, toward the discharge pipe. If it points down, the valve blocks flow entirely. Rotate it so water travels from pump to valve to pipe in the correct direction.
Look for Debris Buildup
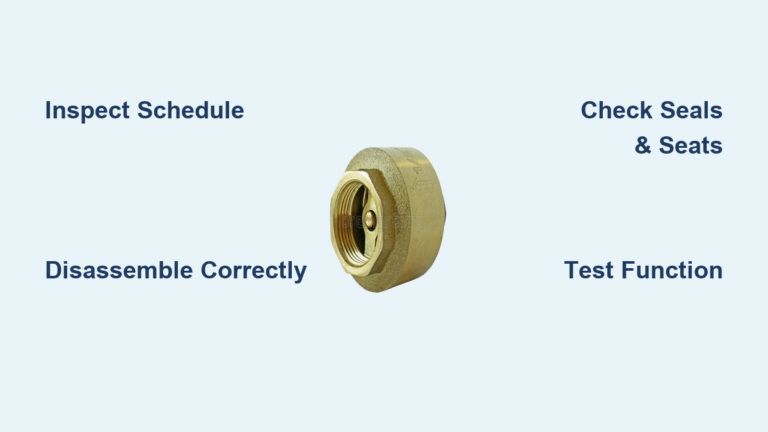
In sewage or high-solids systems, open the valve if accessible, or remove it to inspect the flapper or ball. Mud, grit, or waste can prevent a tight seal. Ball check valves resist clogs better than flapper types in these applications.
Test Valve Function Manually
You can test the valve internal mechanism without powering the pump. This hands-on approach confirms whether the seal is compromised.
Remove and Shake the Valve
After disconnecting power and draining the pit, remove the check valve. Hold it vertically and shake it gently. A working flapper or ball should move freely. If it feels stiff or stuck, the valve is failing.
Pour Water Through It
Hold the valve upright and pour water into the bottom. It should flow through easily. Flip it upside down and pour again. The water should be blocked. If it leaks backward, the seal is compromised and replacement is necessary.
Check Spring Tension on Quiet Valves
For spring-loaded models, press the flapper down with a screwdriver. It should resist and spring back when released. Weak or broken springs cause slow closure and allow backflow to occur.
Confirm Proper Installation
Even a new valve will not work if installed incorrectly. Follow these guidelines to ensure optimal performance.
Install 8 to 12 Inches Above the Pump
Place the valve on the vertical pipe 8 to 12 inches above the pump outlet. This placement avoids turbulent water interfering with the valve mechanism and ensures smooth flow stabilization.
Match Pipe Diameter Exactly
Use a valve that matches your discharge pipe size, typically 1.25 inch, 1.5 inch, or 2 inch. Never reduce size, such as using a 1.25 inch valve on a 1.5 inch pipe, as this creates a bottleneck, increases strain, and reduces efficiency.
Use the Correct Connection Type
Choose the right valve for your system setup:
- Slip-on with clamps: Easy to install, use tension clamps for reliability
- Threaded or compression: No glue needed, good for serviceable setups
- Glued PVC: Permanent, add a union or ball valve above for future access
Replace a Failed Valve
If inspection confirms failure, replace the valve promptly to restore system protection.
Turn Off Power and Drain the Pit
Unplug the pump or shut off the breaker. Lower water in the pit below the valve. Place a bucket under the discharge line to catch residual water.
Remove the Old Valve
For clamped types, loosen clamps with a 5/16 inch nut driver, slide them down, and pull off the valve. For glued types, cut out the old valve with a hacksaw, then clean pipe ends and sand them smooth.
Install the New Valve
Follow these steps for proper installation:
- Slide new clamps onto both pipes
- Attach rubber boots to pipe ends
- Insert the new valve with the arrow pointing up
- Connect boots to valve ends
- Tighten clamps securely
For glued models, use PVC primer and cement. Hold the joint for 30 seconds and cure for 2 hours before testing.
Test the System
After installation, restore power and pour water into the pit to trigger the pump. Watch for the valve opening during discharge, sharp quiet closure when the pump stops, no backflow into the pit, and no leaks at connections.
Choose the Right Valve Type
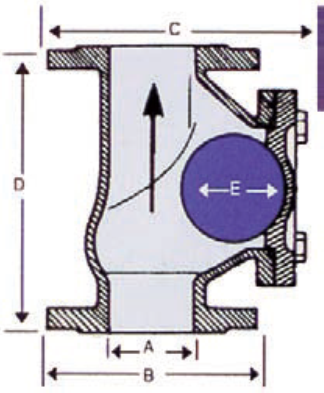
Not all check valves perform the same. Pick the best one for your specific system needs.
Use Ball Valves for Sewage Applications
Ball check valves handle solids better than other types. Their spherical design resists jamming and allows waste to pass cleanly. Install them horizontally or at a 45 degree angle to prevent debris buildup on the sealing surface.
Pick Spring-Loaded Valves for Quiet Operation
In basements or living areas, spring-loaded quiet valves reduce water hammer. The spring gently closes the flapper, turning a loud bang into a soft thud or near silence.
Consider Combination Units for Easy Maintenance
Models with a built-in ball valve let you isolate the discharge line. This allows valve replacement without draining the entire system or getting soaked during service.
Prevent Future Failures
A little routine maintenance goes a long way toward extending valve life and preventing emergencies.
Replace When You Replace the Pump
Treat the check valve like a filter. Replace it every time you install a new sump pump. A 10 year old valve may look fine on the outside but could be worn internally.
Add a Weep Hole in Cold Climates
In freezing areas, drill a small weep hole about 1/8 inch in the discharge pipe between the pump and valve. This lets air escape to prevent air lock and allows slight drainage to reduce freeze risk, though it slightly reduces backflow prevention.
Inspect Annually
Once a year, unplug the pump, remove the valve, and check for wear, cracks, or debris. Clean the flapper or ball and test movement before reinstalling.
Frequently Asked Questions About Sump Pump Check Valves
How do I know if my sump pump check valve is bad?
Common signs include gurgling sounds after the pump shuts off, frequent short cycling, water level rising in the pit after shutdown, and visible leaks around the valve body. Any of these symptoms suggest the valve is not sealing properly and needs inspection or replacement.
Where should a check valve be installed on a sump pump?
Install the check valve on the vertical discharge pipe 8 to 12 inches above the pump outlet. The flow arrow must point upward, away from the pump. This placement prevents turbulence from interfering with the valve and ensures proper sealing.
Can I run a sump pump without a check valve?
Technically yes, but it is not recommended. Without a check valve, water drains back into the pit after each cycle, forcing the pump to re-handle the same water. This wastes energy, increases wear, and can cause the pump to burn out prematurely.
How often should a sump pump check valve be replaced?
Replace the check valve whenever you replace the sump pump itself. Additionally, inspect it annually for wear, and replace immediately if you notice symptoms like short cycling, backflow sounds, or visible cracks.
What is the difference between a flapper and ball check valve?
A flapper valve uses a hinged flap that closes by gravity and is best for clean water. A ball check valve uses a free-moving sphere that resists clogging and is preferred for sewage or solids-heavy applications.
Why does my sump pump make a banging noise?
A loud bang or clunk when the pump shuts off is called water hammer. It happens when the valve slams shut under high pressure. Upgrading to a spring-loaded quiet valve dampens this noise and reduces stress on your plumbing.
Key Takeaways for Checking Your Sump Pump Check Valve
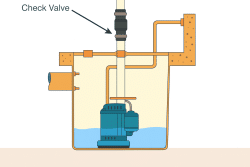
A working check valve operates silently and keeps your sump pump running efficiently. The main signs of failure include gurgling sounds after shutdown, frequent cycling, and water level rising in the pit. Always verify the flow arrow points upward and that the valve sits 8 to 12 inches above the pump outlet.
If you detect any warning signs, inspect the valve physically and test it manually before deciding on replacement. When replacement is needed, match the pipe diameter exactly and choose a valve type suited to your application. For sewage systems, ball valves offer superior clog resistance. For noise-sensitive areas, spring-loaded valves provide quiet operation.
Schedule an annual inspection and replace the valve whenever you install a new pump. Taking these steps now protects your basement from flooding and extends the life of your entire sump pump system.