If your water pump runs for only a few minutes before shutting down, only to restart later, this is not normal operation. This recurring issue affects residential, irrigation, pool, and RV systems, often signaling an underlying problem that could lead to permanent motor failure or even fire hazards. The root cause typically lies in thermal protection activation, electrical faults, loss of prime, or system design flaws. Ignoring these symptoms risks motor burnout, increased energy costs, and costly replacements. In this guide, you will learn how to diagnose and fix exactly why your water pump stops after a few minutes with actionable steps and expert-backed solutions.
Check for Thermal Overload First
Most electric water pumps have built-in thermal overload protectors that cut power when internal temperatures rise too high. When the motor cools, it resets automatically, which explains why the pump restarts after 5 to 30 minutes.
Motor Shuts Off When Hot
If the motor housing is too hot to touch, typically reaching 180 to 200 degrees Fahrenheit, thermal overload is likely the culprit. This is not just a sign of aging, it is a red flag that requires immediate attention. Overheating can stem from an overloaded motor due to mechanical resistance, failing bearings or windings, poor ventilation in enclosed spaces, or clogged cooling vents.
Pro Tip: Use an infrared thermometer to check surface temperature. Anything above 180 degrees Fahrenheit means trouble and you should investigate further.
Look for Burnt Wiring Clues
A melted wire nut or discolored insulation near the terminal box indicates excessive heat from poor connections. Even small resistance in wiring increases current draw, generating dangerous heat that can melt insulation and create fire hazards.
Common Mistake: Assuming the pump is faulty when the real issue is upstream electrical failure causing the motor to overheat.
Fix It:
– Turn off power at the breaker
– Inspect all wire connections for corrosion, looseness, or melting
– Replace damaged wire nuts with lever nuts or crimp connectors
– Ensure tight, clean terminals at the motor
Test the Relay and Electrical System
In many cases, especially in RVs and automated systems, a failing relay cuts power when hot, then restores it after cooling. This mimics pump failure but originates in the control circuit rather than the pump itself.
Faulty Latching Relay in RVs and Campers
A 10A or 15A Intellitech-style latching relay commonly fails under heat. Symptoms include the pump running for 1 to 2 minutes, then stopping with no power at the pump during shutdown, and power returning after 5 to 10 minutes when the relay cools.
Case Study: A 2020 Red 37BA RV had repeated pump shutdowns. After replacing the pump with no change, a technician found the latching relay overheating and cutting out, not the pump itself.
How to Diagnose:
1. Use a multimeter to test voltage at the pump terminals when it stops
2. If no voltage is present, trace back to the relay
3. Test relay output under load to confirm failure
Fix It: Replace the relay for approximately $20 to $50. Choose a higher-quality model with better heat dissipation to prevent recurrence.
Pressure Switch Problems
The pressure switch turns the pump on and off based on system pressure. If its contacts burn or the sensing orifice clogs with sediment, it may shut off prematurely before the cycle completes.
Signs of Failure:
– Erratic cycling with on and off every 30 seconds
– Pump stops before the pressure tank fills completely
– No water despite the motor running
Fix It:
– Shut off power and drain the system
– Remove and inspect the switch for damage
– Replace if contacts are pitted or the diaphragm is stiff
– Clean the nipple or tube connecting to the switch
Verify Voltage and Wiring Integrity
Low voltage or high-resistance connections cause motors to overheat and shut down, even if everything else seems fine. This is especially common in systems with long wire runs from the breaker to the pump.
Long Wire Runs Cause Voltage Drop
A 40-foot run from breaker to pump can drop voltage below safe levels, especially with undersized wire. This forces the motor to draw more amps, creating excess heat that triggers thermal protection.
What to Do:
– Test voltage at the motor while running under load
– Acceptable drop is 10 percent or less of nominal voltage, meaning 108 volts or higher on a 120V circuit
– If voltage is below acceptable levels, upgrade wire gauge or shorten the run
Check for Loose or Corroded Connections
Loose lugs, corroded terminals, or oxidized splices increase resistance. These hot spots can melt insulation and create fire hazards that go beyond simple pump failure.
Prevention Steps:
– Tighten all connections annually as part of routine maintenance
– Apply dielectric grease to prevent oxidation on metal contacts
– Use copper connectors only and never aluminum for pump wiring
Diagnose Loss of Prime When Motor Runs But No Flow Occurs
If the motor keeps spinning but water stops flowing after a few minutes, the issue is hydraulic, not electrical. The pump has lost prime, meaning air has entered the suction side and broken the water column.
Air Enters Through Leaky Seals
Common leak points include the strainer basket lid gasket, pump housing O-ring, suction pipe joints, and check valve failure. Even a tiny air leak breaks suction. Once air reaches the impeller, the pump cannot move water effectively.
User Fix: Lubricating the strainer basket lid gasket fixed recurring issues for one pump owner. The pump was getting air and losing prime due to a dried or cracked gasket that allowed air infiltration.
Low Water Source Level
If the pump draws from a canal, pool, or shallow well, and the water level drops too low, air gets sucked in. This causes intermittent flow and automatic shutoff as the pump tries to re-establish prime.
Visual Clue: Bubbles appearing in the strainer pot after running indicate air ingestion on the suction side.
Faulty Check Valve Lets Water Drain Back
A failed foot valve or check valve allows water to drain back into the source when the pump stops. When it starts again, it must re-prime, which often fails if the check valve is not holding.
Test It:
1. Shut off the pump and wait
2. Open the strainer housing to check water level
3. If empty, the check valve is likely leaking and needs replacement
Fix It: Replace the check valve and ensure vertical pipe length before any upward bend meets minimum requirements, typically 25 feet for self-priming pumps.
Inspect Impeller and Mechanical Components

Even with perfect wiring and priming, internal damage can stop water flow and cause the pump to appear to fail when it is actually a mechanical issue.
Broken or Clogged Impeller
Debris like sand, leaves, or plastic can crack or jam the impeller. The motor runs, but no water moves through the system, leading to overheating from lack of cooling flow.
Symptoms:
– Reduced or zero flow from the discharge
– Unusual noise such as grinding or rattling
– Motor overheats quickly without water movement
How to Check:
1. Turn off power and close all isolation valves
2. Open the pump housing to access the impeller
3. Spin the impeller by hand to verify it rotates freely
4. Look for cracks, missing vanes, or accumulated debris
Fix It: Clean or replace the impeller. Install a strainer basket upstream to prevent future clogs from debris.
Failing Bearings Cause Overheating
Worn bearings create friction, making the motor work harder than designed. Heat builds until thermal overload trips the protection, shutting down the pump.
Warning Signs:
– Grinding or screeching noise during operation
– Shaft wobble when spinning manually
– Metal shavings visible in motor vent holes
Real-World Evidence: Tapping on a running motor caused metal chunks to shoot from the vents, confirming internal bearing failure that required complete motor replacement.
Solution: Replace the motor or the entire pump assembly if bearings have failed.
Rule Out System Design Flaws
Sometimes the pump works perfectly, but the system it serves causes premature shutdowns that appear to be pump failures.
Pump Output Exceeds Demand
Example: A pump delivers 30 GPM, but the system only uses 25 GPM. Pressure builds rapidly, hitting the cut-off point too soon and shutting down before the cycle should end.
This leads to short cycling, with the pump turning on and off every 30 to 60 seconds, which wears out components faster than normal operation.
Fix Options:
– Install a pressure tank of at least 20 gallons to buffer the flow
– Add a flow regulator or bypass valve to match demand
– Resize to a lower-capacity pump that matches actual system requirements
Dead-Heading Burns Out Motors
Running a pump against a closed valve or blocked line forces all energy into heat. With no water moving through the motor, temperature spikes in minutes, triggering thermal protection.
Prevent It:
– Always verify discharge valves are open before starting the pump
– Install a relief valve on critical systems to prevent overpressure
– Never let a pump run dry or against a closed head
Investigate Pressure Tank and Short Cycling
Rapid on and off cycling stresses motors and reduces lifespan. This is often mistaken for pump failure when the real issue is the pressure control system.
Waterlogged Pressure Tank
If the air bladder fails or air escapes, the tank fills with water completely. Without an air cushion, pressure spikes instantly when the pump starts, triggering immediate shutdown.
Test Air Charge:
1. Drain the tank completely of water
2. Use a tire pressure gauge on the air valve
3. Refill to 2 psi below the cut-in pressure, for example 28 psi for a 30/50 pressure switch
Too Much Air in Tank
Over-inflation causes premature shutoff before the tank fills properly. The result is short run times and frequent restarts that wear out the motor.
Fix: Release air until the correct pressure is reached, matching the pump cut-in specification.
Blocked Lines or Clogged Filters
Sediment in pipes or filters restricts flow, causing pressure fluctuations that confuse the pressure switch and cause erratic cycling.
Solution:
– Flush lines with high-pressure water to clear debris
– Replace old galvanized pipes that rust and restrict flow
– Clean inline filters monthly to maintain proper flow
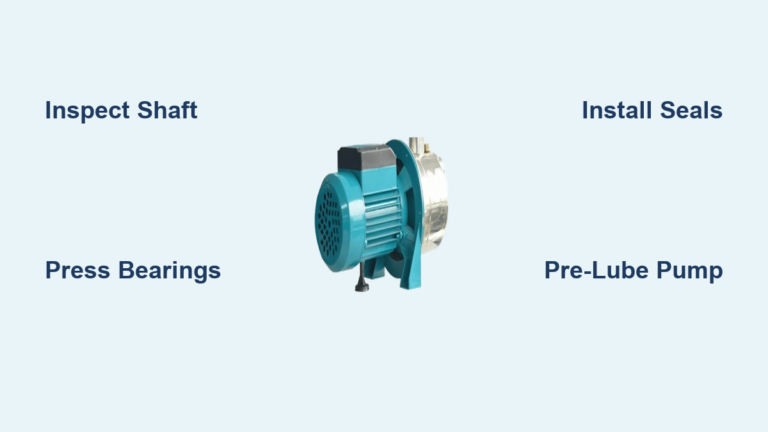
Prevent Future Shutdowns with Maintenance
Regular care prevents approximately 80 percent of premature pump failures and extends the life of your equipment significantly.
Annual Cleaning Routine
- Turn off power and close isolation valves before servicing
- Open the strainer basket and remove all debris
- Inspect and clean the impeller cavity
- Check the multiport valve, SWG cell, and all O-rings for wear
- Lubricate gaskets with silicone grease, never petroleum-based products
Pro Tip: Saltwater pool owners should clean the SWG cell and impeller every 3 to 6 months due to faster buildup and corrosion.
Monitor Motor Health
- Listen for unusual noises during operation every month
- Feel motor temperature after running to establish a baseline
- Record amperage annually to track motor wear; rising amps mean trouble is developing
Upgrade for Reliability
After six years, motors show wear including rust on windings, noisy bearings, and reduced efficiency. Consider replacement before complete failure.
Expert Advice: Replace the entire unit for best reliability. Sta-Rite pumps last 15 to 20 years with minimal service when properly maintained.
Consider Submersible Pumps: These eliminate priming issues entirely, require lower maintenance, and are better suited for lakes, wells, and deep sumps where the pump sits below the water surface.
Follow This Diagnostic Flow
Use this step-by-step checklist to pinpoint your specific issue quickly and efficiently.
Tools You Will Need:
– Multimeter for electrical testing
– Infrared thermometer for temperature checks
– Tire pressure gauge for tank testing
– Wrench set for disassembly
– Replacement gaskets and seals for common repairs
Diagnostic Steps:
1. Motor stops running entirely: Check temperature, voltage, relay, and wiring for faults
2. Motor runs but no water flows: Check prime status, air leaks, impeller condition, and check valve operation
3. Pump cycles rapidly: Test pressure tank air charge, inspect the switch, and check for line blockages
4. Runs fine then quits: Inspect thermal overload protection, all connections, and ambient heat conditions
Safety First: Avoid Fire Risks
Overheated motors and burnt connections are not just inconvenient, they are dangerous and can start fires in your home or facility.
Never Ignore These Red Flags
- Melted wire nuts or insulation
- Discolored insulation on any wiring
- Burning smell during operation
- Hot motor casing that cannot be touched
Final Warning: Do not attempt electrical repairs if you are not qualified. Call a professional for any work involving live circuits or control panel modifications.
When to Call a Pro:
– Uncertain about testing live circuits safely
– Need to rewire or replace control panels
– Suspect well pump or submersible issues requiring specialized equipment
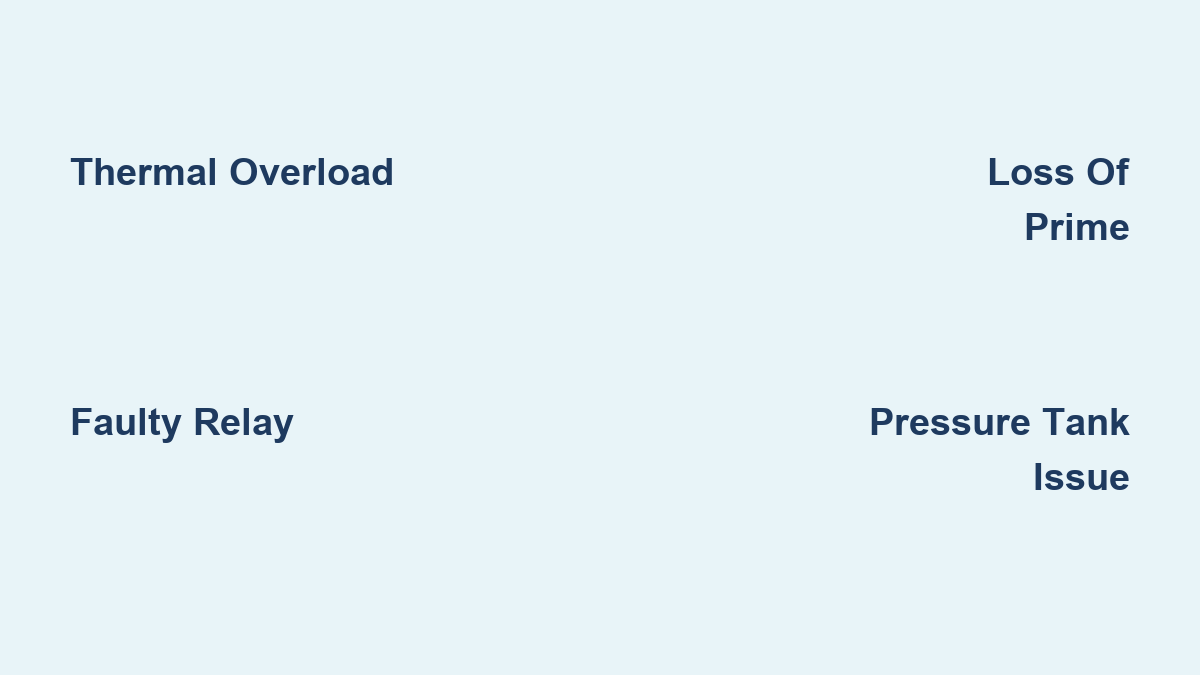
Summary: Top Causes and Fixes

| Cause | Key Signs | Solution |
|---|---|---|
| Thermal overload | Hot motor, restarts after cooling | Fix wiring, improve ventilation |
| Faulty relay | No power when off, returns after cool-down | Replace relay, especially in RV systems |
| Loss of prime | Motor runs, no flow, fixes after restart | Seal leaks, lubricate gaskets |
| Pressure switch or tank | Rapid cycling, pressure spikes | Adjust air charge, replace switch |
| Impeller failure | No flow, grinding noise, debris in housing | Clean or replace impeller |
| Electrical faults | Melted wires, voltage drop at motor | Rewire, clean and tighten all connections |
| System mismatch | Pressure builds too fast for demand | Resize pump or add flow control |
Frequently Asked Questions About Why Water Pump Stops After a Few Minutes
Why does my water pump keep shutting off after running for a few minutes?
This is typically caused by thermal overload protection activating when the motor overheats. The pump will restart after cooling down, creating a循环 pattern. Common causes include poor electrical connections, voltage drop, a failing relay, or mechanical issues that make the motor work harder than normal.
How do I know if my pump is overheating?
Touch the motor housing after it stops. If it is too hot to keep your hand on, or if an infrared thermometer reads above 180 degrees Fahrenheit, overheating is occurring. Check for melted wire nuts, discolored insulation, or a burning smell as additional indicators.
Can a bad relay cause my pump to stop working intermittently?
Yes. In RVs and many automated systems, a faulty latching relay can cut power when it overheats, then restore power after cooling. This mimics pump failure but the relay itself needs replacement, typically costing $20 to $50.
What causes a water pump to lose prime?
Air entering through leaky seals, a cracked suction pipe, faulty check valve, or low water source level can cause loss of prime. The motor keeps running, but no water flows because air has broken the suction column. Inspect gaskets, O-rings, and all suction connections for leaks.
How do I test my pressure tank air charge?
Drain the tank completely, then use a tire pressure gauge on the air valve. Refill to 2 psi below your pump cut-in pressure. For example, if you have a 30/50 pressure switch, the tank air should be set to 28 psi.
When should I replace my water pump instead of repairing it?
Replace the entire unit if the motor shows signs of winding damage, bearings are failing, or the pump is more than six years old with multiple issues. Frequent repairs on an aging pump often cost more than replacement, and newer units run more efficiently.
Key Takeaways for Fixing Your Water Pump
A water pump stopping after a few minutes is a warning sign, not a quirk you should ignore. Whether the issue is a failing relay, air leak, overheating motor, or system design flaw, early diagnosis saves money and prevents hazards. Start with temperature and voltage checks, then move to hydraulic and system-level tests. With regular maintenance and smart upgrades, you can keep your pump running reliably for years to come. If you are not comfortable performing electrical diagnostics safely, call a qualified professional to avoid injury or further damage.