A single sewer backup can flood your basement with contaminated water in minutes, causing thousands of dollars in damage and serious health risks. Heavy rain, municipal blockages, or aging infrastructure can push wastewater backward through your home’s drain line without warning. A backwater check valve installation creates a one-way barrier that lets sewage exit but blocks reverse flow during surcharge events. This guide covers placement strategies, valve selection, installation steps, maintenance routines, and cost-saving subsidies available in many municipalities.
Whether you own a new build or a decades-old home with a basement, proper installation and ongoing care determine whether your valve protects you when it matters most. Below, you will learn how to position the device correctly, choose the right model for your risk level, and avoid the mistakes that leave homeowners vulnerable even after spending money on equipment.
Optimal Placement Inside the Foundation Wall
Install Before Any Plumbing Branches
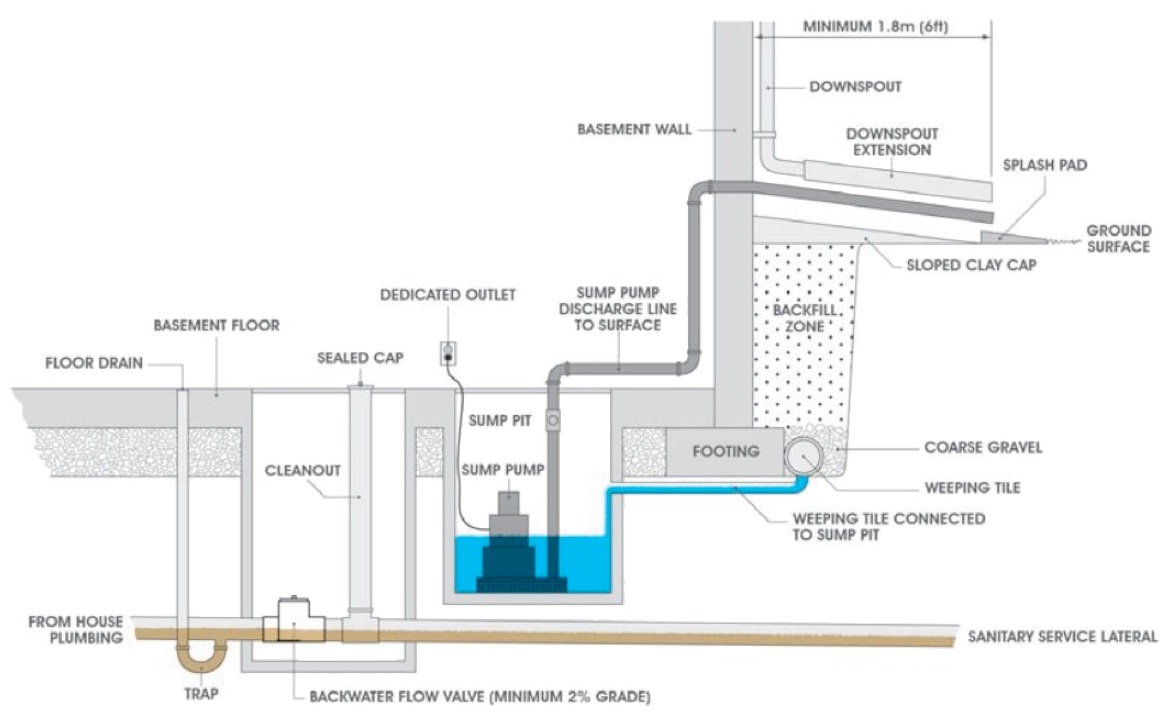
The single most important rule in backwater check valve installation is location. The valve must be the first fitting just inside the foundation wall, before any internal plumbing connects to the sewer line. If a bathroom, laundry drain, or floor drain ties in upstream of the valve, those fixtures stay unprotected during a backup.
Pressurized wastewater will always seek the easiest escape route. With an unprotected branch, that route could be your basement floor drain or toilet. Existing fittings such as house traps and fresh air inlets often need to be relocated farther into the home to make room for the valve. Any component left on the street side of the device becomes a potential leak point under pressure.
Avoid Exterior Installations Without Proper Protection
Some systems place the valve outside in a pit for easier access, but this approach carries risks. Freezing temperatures can damage internal floats and seals, while soil shifting may compromise pipe connections over time. If exterior placement is unavoidable, use an insulated, watertight enclosure that stays accessible year-round for inspection and service.
Choose the Right Valve Type for Your Home
Normally Open Versus Normally Closed Designs
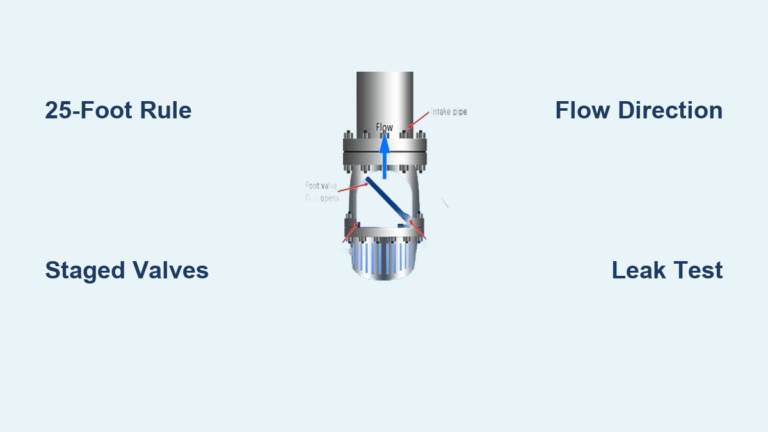
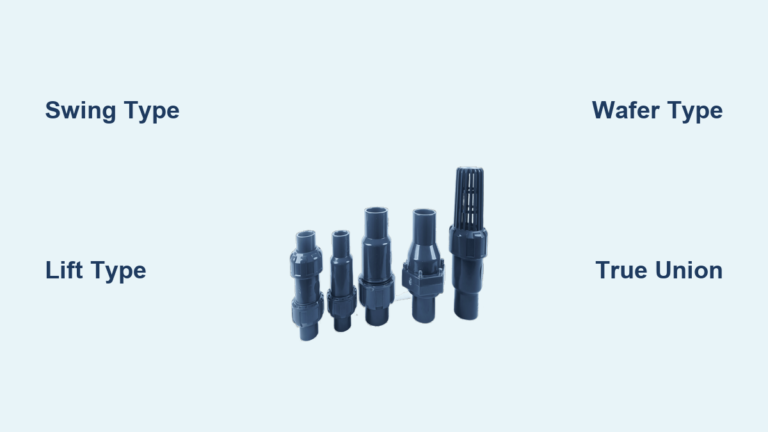
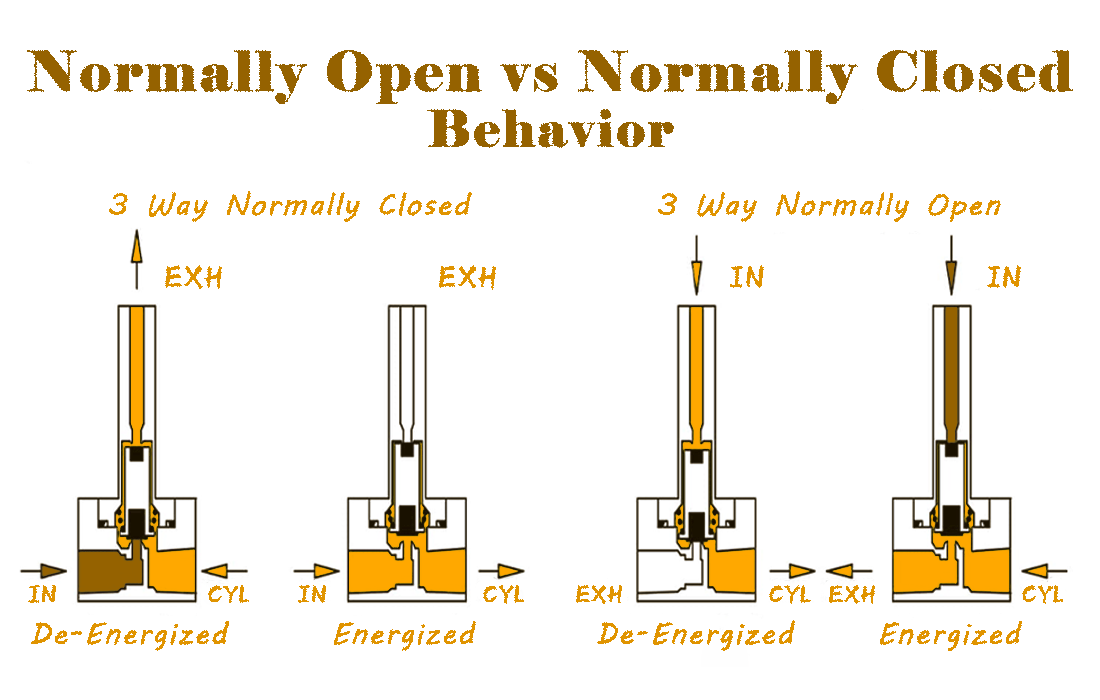
Two primary designs dominate residential applications. Normally open valves rest with the flap in the open position and only close when reverse flow lifts integrated floats. They allow free drainage at all times but do not block sewer gases unless equipped with an airtight lid.
Normally closed valves stay shut until outgoing wastewater pressure pushes them open. They offer superior odor control and immediate protection, making them ideal for homes near septic systems or low-flow municipal mains where gases accumulate. Choose based on your risk profile. For odor-prone areas or frequent surcharge zones, a normally closed model delivers better performance.
Full-Port and Double-Flap Configurations
For maximum flow and minimal clogging, consider full-port valves like the FR4 model. Their unobstructed interior reduces debris buildup, especially important in older homes with tree root infiltration.
In high-risk flood zones, double-flap configurations such as the Fernco BWV provide redundancy. If one flap fails, the other still offers partial protection. These models cost slightly more but deliver peace of mind where backups happen regularly.
When Flood Gate or Dual Valves Make Sense
For extreme conditions like areas with prolonged sewer surcharge, automatic knife-edged flood gate valves stop backflow completely. Unlike standard check valves that reduce reverse flow, these seal 100 percent, though they require precise pipe pitch and professional calibration.
Dual backflow valves combine gate and check mechanisms for layered defense. Though costly, they are recommended for buildings with a repeated flooding history.
Pre-Installation Inspection and Code Compliance
Conduct a Camera Line Survey First
Before cutting concrete or pipes, perform a video camera inspection of the main sewer line. This reveals hidden issues such as cracks, root intrusion, misaligned joints, or blockages. The survey also confirms pipe material, whether cast iron, clay, or PVC, so you can select compatible couplings.
Most importantly, the inspection verifies whether the line has adequate slope leading to the valve location. Poor pitch causes solids to settle inside the valve, increasing clog risk. If the pipe is flat or sagging, regrading may be necessary before installation begins.
Verify Local Plumbing Code Requirements
Backwater valves are required by the National Plumbing Code when any fixture sits below the elevation of the next upstream manhole, which is common in basements. Local codes vary, so always confirm requirements before starting work.
Obtain a plumbing permit before any installation. In cities like Windsor, Toronto, or Edmonton, inspections are mandatory, and unpermitted work can void warranties and insurance claims. Some jurisdictions also require a No Adverse Impact (NAI) assessment to ensure your installation does not redirect floodwater onto neighboring properties.
Step-by-Step Backwater Check Valve Installation Process
Cut Concrete and Access the Main Line
For retrofits, access typically starts at the basement floor drain. Cut a hole, usually 18 by 18 inches, using a concrete saw. Excavate soil down to the sewer lateral, typically two to four feet deep. Work carefully to avoid damaging surrounding utilities.
Once exposed, clean the pipe thoroughly. Measure and mark the section to be removed, leaving enough clearance for the valve body and couplings.
Cut and Fit the Valve Correctly
Use a tubing cutter or reciprocating saw for a clean, straight cut. Remove the pipe segment and dry-fit the backwater valve.
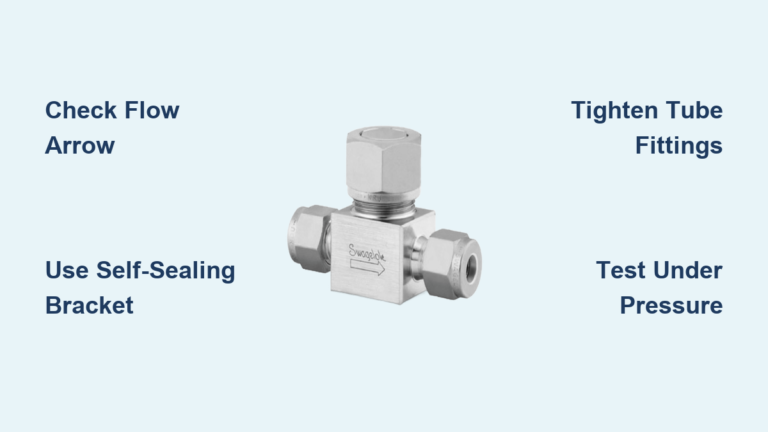
Apply silicone-based lubricant to the pipe ends to ease insertion. Push the pipe firmly into the valve inlet and outlet. Ensure the flow direction arrow on the valve body matches wastewater flow, pointing away from the house.
Slide shear-banded mechanical couplings over both connections and tighten securely with a wrench. These couplings must withstand hydrostatic pressure and soil movement without leaking.
Reconnect and Restore the Floor
Double-check that the valve sits level and aligned with the pipe run. Reattach any upstream drains and test for leaks by flushing upper-level toilets.
Once confirmed watertight, patch the floor with high-strength concrete. Set a removable access cover flush with the finished floor so the valve remains easy to inspect and service.
Integrate Cleanouts for Easy Maintenance
Install a House-Side Cleanout
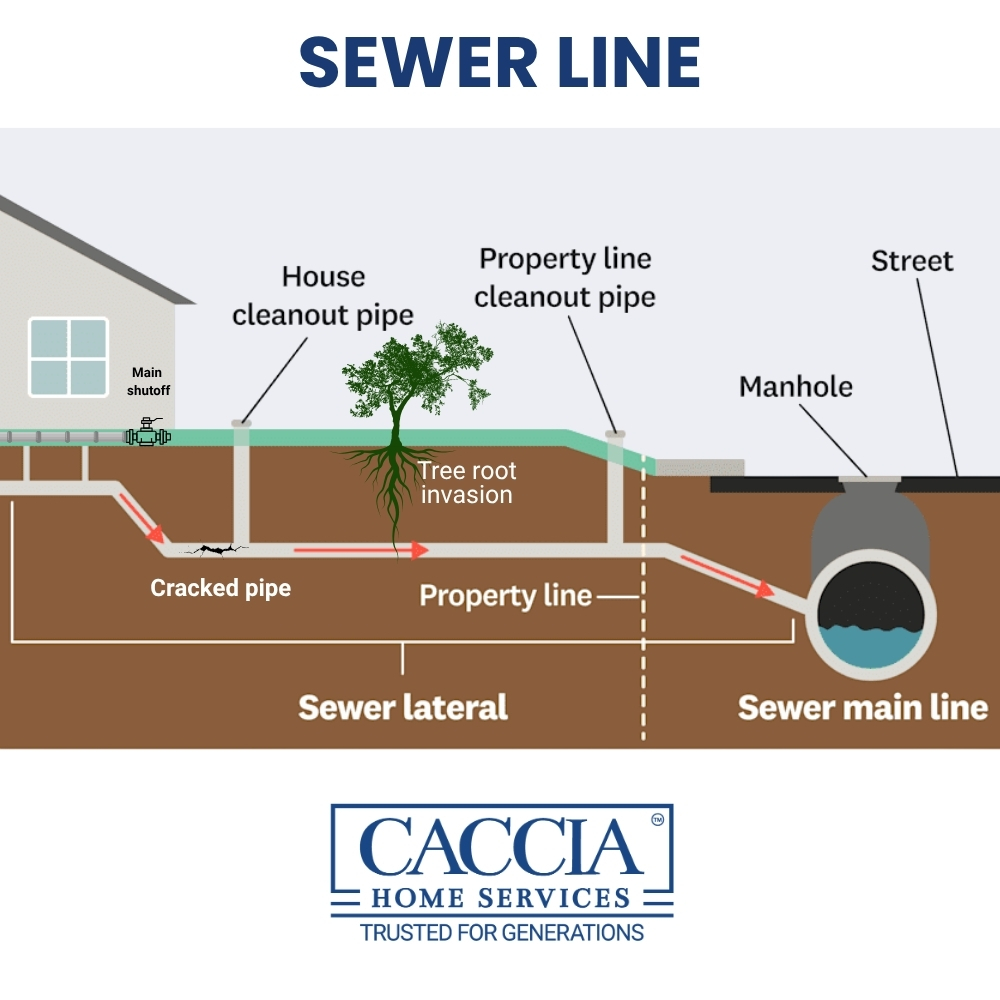
If your valve lacks a built-in cleanout, like the FR4 model, install a dedicated cleanout tee on the house side just before the valve. This provides a safe entry point for drain snakes without forcing tools through the flap mechanism, which can cause damage.
Use a 4-inch PVC cleanout with a threaded plug for easy removal. Label it clearly so future plumbers understand its purpose.
Add a Street-Side Cleanout for Flood Gates
For automatic knife-edged flood gate valves, manufacturers often require a cleanout on the street side of the device. This allows clearing debris from the public side without disassembling the entire system. Skipping this step voids warranties and limits serviceability.
Always insert drain snakes through the top of the valve after removing the lid, or via the dedicated cleanout, never through downstream fixtures.
Annual Maintenance Prevents Costly Failures
Inspect and Clean Twice a Year
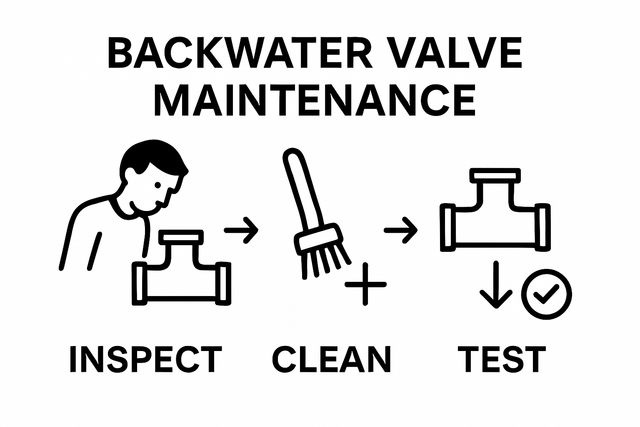
A neglected valve is a failed valve. Schedule biannual maintenance, especially before rainy seasons. Remove the cover, usually held by four bolts, and inspect the interior.
Wear gloves and use a long-handled brush to scrub the flap, seat, floatation devices, and interior walls. Flush with hot soapy water beforehand to loosen grease buildup. Check the O-ring on the lid and replace it if cracked or brittle to maintain a gas-tight seal.
Replace Worn Floats and Flaps
Over time, floats absorb water and lose buoyancy. A non-rising float means the valve will not close during a backup. Test by pouring water into the line and watching for flap closure. If it does not seal, replace the float assembly immediately.
Inspect the flap for warping or cracks. Debris like wipes or rags can jam it open. Regular cleaning prevents this, but if damage occurs, replace the internal mechanism per manufacturer specifications.
Troubleshoot Common Post-Installation Issues
Flooding Despite Valve Presence
If sewage still enters after installation, do not assume the valve failed. Several factors can bypass it:
- Stormwater infiltration: Water entering through foundation cracks or weeping tiles is not stopped by a sanitary sewer valve.
- Upstream blockages: A clog between the valve and a fixture can cause localized backup.
- Improper usage during events: Residents flushing toilets or running washing machines during a municipal surge fill internal pipes. With the valve closed, water has nowhere to go and overflows in the basement.
Educate household members: during heavy storms, minimize water use to prevent internal flooding.
Damage from Snaking Attempts
Never run a sewer snake through a closed backwater valve. Forcing the cable can bend the flap, damage the seat, or dislodge floats. Always remove the lid or use the cleanout port for rodding.
If the valve is difficult to open, check for locking mechanisms that hold the flap open during servicing. Some models include this feature for safe maintenance.
Cost Breakdown and Municipal Subsidy Programs
Installation Price Estimates
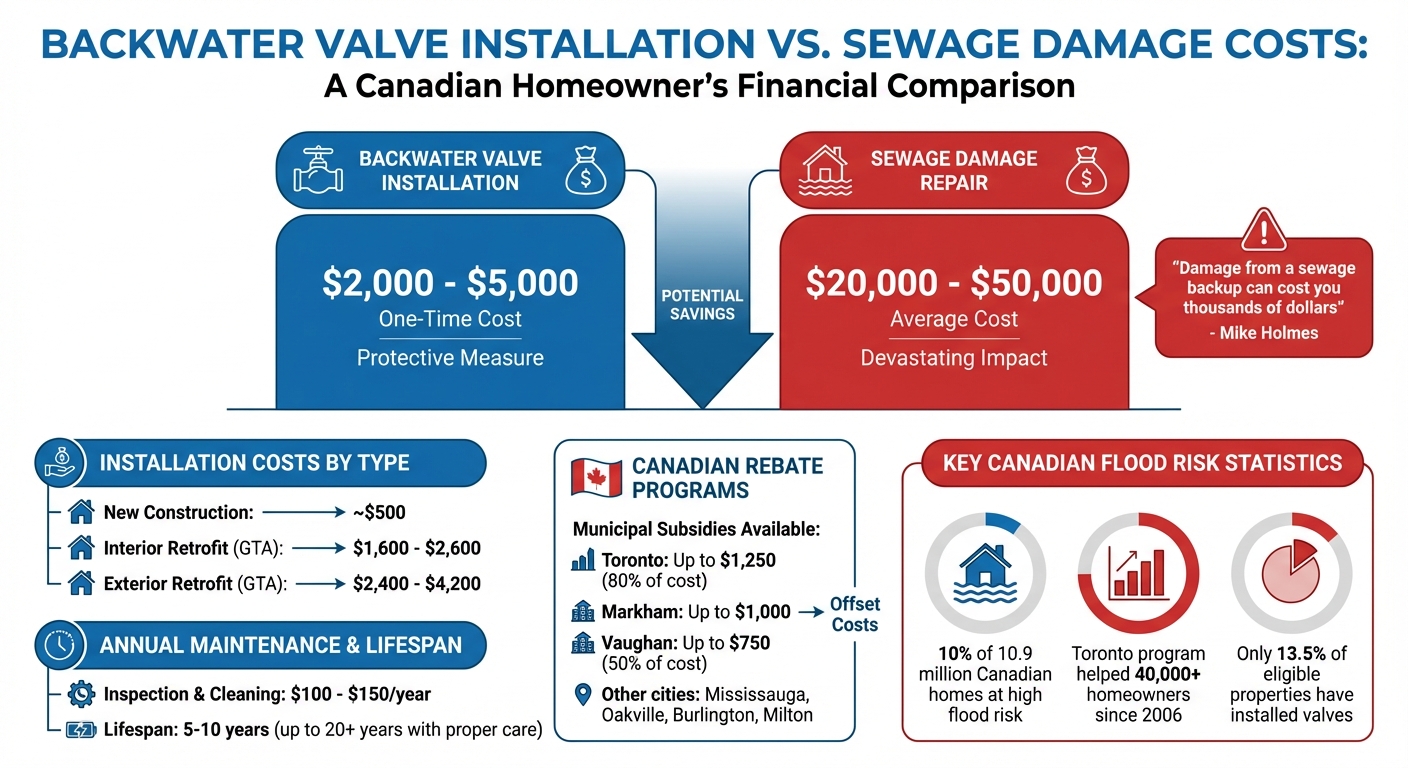
Installation costs vary significantly based on project type:
- New construction: Approximately $500. Easier access since the device installs before the slab pour.
- Retrofit installation: $2,000 to $5,000. Includes concrete removal, excavation, and restoration.
- Valve unit only: $250 to $500. Higher-end models like flood gates or dual valves cost more.
Labor and permitting drive retrofit costs. Always get multiple quotes from licensed plumbers before committing.
Claim Available Municipal Subsidies
Many cities offer rebates to reduce homeowner burden:
- Windsor: Up to 80 percent reimbursement, capped at $1,000 for valves.
- Toronto, Ottawa, Edmonton, Hamilton: All have active programs.
- Eligibility often depends on build year. Pre-1992 homes typically qualify for valve plus sump pump subsidies. Post-1992 homes usually receive valve plus overflow piping support.
Requirement: Permits and inspections must be completed before covering the work.
Why Licensed Plumbers Are Essential
Avoid Handyman Installations
Only a licensed master plumber should handle your backwater check valve installation. These professionals understand code requirements, proper slope calculations, and cleanout integration. Handymen or general contractors may cut corners, such as skipping cleanouts or misaligning the valve, leading to failure.
Verify credentials through your local Department of Buildings or plumbing association. Ensure the contractor carries liability insurance and bonding.
Warranty and Inspection Compliance
Improper installation voids manufacturer warranties. Common issues include missing cleanouts, incorrect pipe pitch, and wrong valve orientation.
After installation, schedule a city inspection. Once passed, the system gets tagged with date, device type, and certification details, important for future sales or insurance checks.
Insurance Benefits and Long-Term Value
Lower Premiums and Required Coverage
Installing a backwater valve can reduce home insurance rates. More importantly, some insurers require one to cover water backup damage. Without it, claims may be denied entirely.
Even if not mandated, the investment pays off. Repairing a flooded basement can cost $10,000 or more, far exceeding installation costs. Since standard policies exclude flood damage, prevention is your best protection.
Frequently Asked Questions About Backwater Check Valve Installation
Where should a backwater check valve be installed?
The valve must be the first fitting just inside the foundation wall, before any plumbing branches. This ensures all wastewater passes through it before reaching the city main, protecting every fixture in the home.
How much does backwater check valve installation cost?
Retrofit installations typically run $2,000 to $5,000, including concrete cutting and restoration. New construction installations cost around $500 since the device goes in before the slab is poured. The valve unit alone ranges from $250 to $500.
How often should a backwater valve be maintained?
Inspect and clean the valve at least once per year, though twice yearly is ideal, especially before rainy seasons. Regular maintenance prevents debris buildup, float failure, and seal degradation that compromise protection.
Can a backwater valve fail during a storm?
Yes, if the valve is clogged, the flap is damaged, or floats have lost buoyancy. A neglected valve provides no protection. Additionally, stormwater entering through foundation cracks bypasses sanitary sewer valves entirely.
Are municipal subsidies available for backwater valve installation?
Many Canadian cities offer substantial rebates. Windsor provides up to 80 percent reimbursement capped at $1,000. Toronto, Ottawa, Edmonton, and Hamilton also have active programs with varying eligibility based on home age.
What happens if water is used during a sewer backup?
When the valve closes, wastewater cannot exit the home. If residents continue running washing machines, showers, or toilets, internal pipes fill and overflow into the basement. Minimizing water use during surcharge events is critical.
Key Takeaways for Protecting Your Home With a Backwater Check Valve
A backwater check valve installation is one of the most effective defenses against sewage backups, but only when done correctly. Position the valve as the first fitting inside the foundation wall, choose a design that matches your risk level, and commit to biannual maintenance. Pair the valve with a sump pump and overflow system for comprehensive flood protection in high-risk areas.
Start by scheduling a camera inspection of your main sewer line and consulting a licensed master plumber. Verify local code requirements, obtain permits, and explore municipal subsidy programs that can offset installation costs by 80 percent or more. With proper setup and consistent care, your valve can protect your home for decades, keeping your basement dry and your family safe from contaminated water.