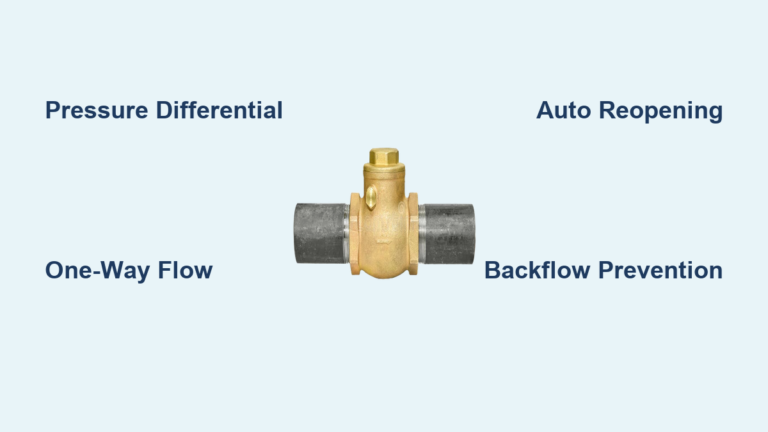
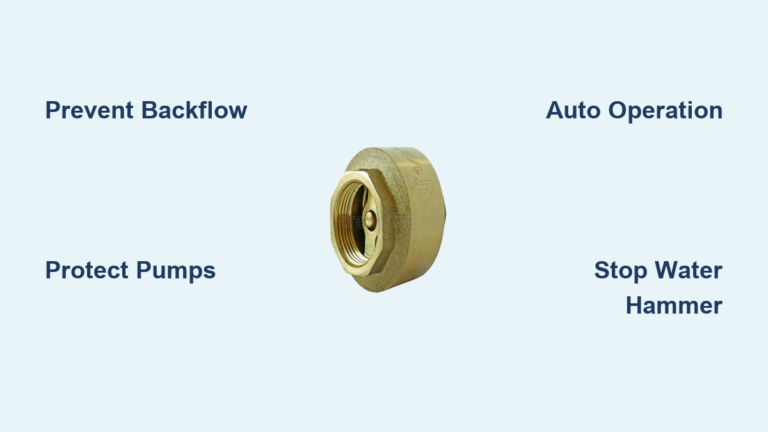
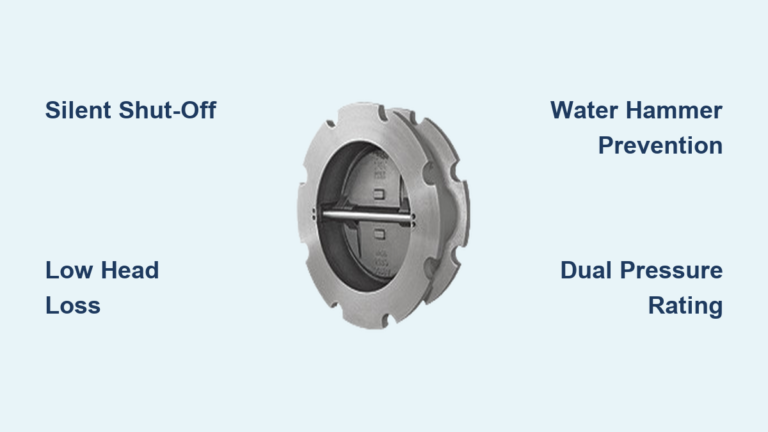
A sump pump check valve not working can turn a quiet basement into a noisy, flood-prone disaster zone. When this small component fails, water rushes back into the pit after each pump cycle, forcing the motor to work overtime and eventually burn out. You might notice chattering sounds, short cycling, or water mysteriously returning to the pit within seconds of shutdown.
This guide walks you through diagnosing the warning signs, identifying the root cause, and replacing the valve with a properly sized upgrade. You will also learn how to prevent future failures and troubleshoot stubborn issues that linger after installation.
Spot the Warning Signs of Check Valve Failure
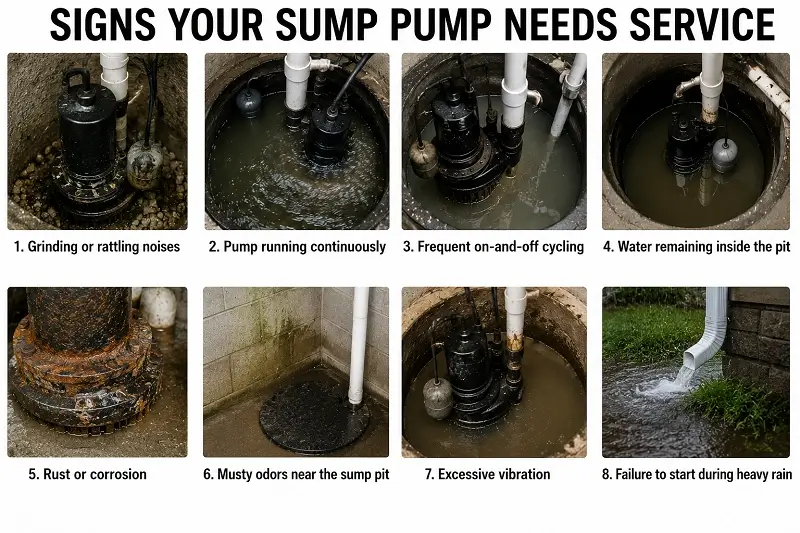
Listen for Unusual Pump Noises
Strange sounds during operation are often the earliest clue that your sump pump check valve is failing. Pay close attention to what your system tells you acoustically.
- Chattering or rattling: A rapid clicking noise when the pump stops means the flapper is fluttering open and closed. This happens with low pressure or a worn spring.
- Loud banging: A sharp percussive bang occurs when a gravity valve slams shut. Occasional noise is normal, but frequent banging stresses pipe joints.
- Gurgling or sucking: Air being pulled through the system often signals a failing seal or a vent hole drawing air when it should not.
- Vacuum-like dragging: Water draining back past a fluttering flapper creates a dragging sound that resembles furniture moving across tile.
These noises are not just annoying. They signal wasted energy and potential damage to your entire drainage system.
Watch for Pump Behavior Changes
Performance shifts often point directly to a faulty valve that no longer holds back water.
- Short cycling: The pump turns on every few minutes because backflow refills the pit immediately. This overheats the motor and shortens pump life dramatically.
- Continuous running: A stuck or leaking valve prevents the pump from reaching its shutoff level, leading to burnout.
- Water returning to the pit: After the pump stops, watch the water level. If it rises again within seconds, backflow is occurring and your valve is not sealing.
These behaviors waste electricity and dramatically increase the risk of failure during heavy storms.
Inspect for Physical Damage
A quick visual check often reveals obvious wear or installation mistakes.
- External leaks: Look for moisture or dripping around the valve body. Even minor seepage indicates a failed seal or cracked housing.
- Corrosion or rust: Metal valves develop surface rust while plastic ones become brittle. Both reduce service life.
- Misaligned flow direction: Confirm the arrow on the valve points upward toward the discharge pipe. Backward installation blocks flow entirely.
- Debris in the valve: Remove the valve and inspect the flapper for sand, grit, or mineral buildup preventing closure.
If the flapper feels stiff, cracked, or warped, replacement is the only reliable fix.
Identify the Root Cause of Failure
Wrong Valve Type or Sizing
Choosing the wrong valve creates immediate, recurring problems.
- Undersized valves: A 1.25-inch valve on a 1.5-inch pipe restricts flow and increases pump strain. Always match the valve to your discharge pipe or upgrade.
- Gravity versus spring-assisted valves: In low-head systems with less than 3 to 4 feet of vertical rise, gravity valves may not seal properly. A spring-assisted silent valve performs better in these conditions.
- Wrong cracking pressure: Spring-loaded valves need sufficient pump pressure to open. A weak pump or stiff spring prevents full opening, causing chattering.
Choose a 2-inch valve whenever possible. Larger diameter reduces resistance and extends pump life.
Poor Installation Practices
Even a high-quality valve fails quickly when installed incorrectly.
- Valve placed too high or too low: Ideal placement is 6 to 12 inches above the pump discharge, below the pit cover. Too high increases backflow risk; too low makes inspection difficult.
- Non-straight pipe alignment: Angled connections stress rubber seals and clamps, leading to slow leaks. Always realign the pump and pipe after replacement.
- Missing or wrong orientation: The flow arrow must point up. Installing it backward stops the pump from working at all.
Never use PVC glue on compression fittings. Tighten clamps evenly instead so future maintenance stays simple.
System Design Flaws
Some issues stem from how the discharge line is routed rather than the valve itself.
- Siphon effect: If the discharge pipe dips down after exiting the house and forms a U-shape, a siphon pulls water out after the pump stops. This drains the line and pulls air through the check valve, causing flutter and noise.
- Freezing in unheated areas: Water trapped above the valve can freeze in garages or crawlspaces, cracking the valve or pipe. Use a weep hole or omit the valve if backflow is minimal.
- Vent hole problems: A 3/16-inch hole below the check valve releases air in bottom-intake pumps. If drilled too high or angled upward, it sucks air when the pump stops, creating noise and flutter.
Fix the pipe layout first, then address the valve. A perfect valve cannot overcome poor plumbing geometry.
Replace a Faulty Check Valve
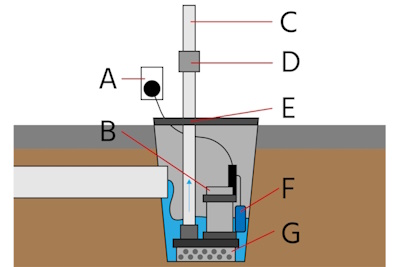
Gather Tools and Materials
You need basic tools and the right replacement parts to complete this job in under an hour.
- Tools: Drill with a 5/16-inch nut driver bit, screwdriver, adjustable wrench (optional)
- Materials:
- 2-inch check valve (preferred size)
- 2-inch to 2.5-inch PVC reducer with rubber seal (if upgrading from 1.5-inch pipe)
- 2-inch heavy-duty tension hose clamps (2 required)
- Replacement rubber seals (if needed)
Skip PVC cement. Compression fittings allow easy future maintenance without cutting pipes.
Disconnect Power and Remove the Old Valve
Safety comes first. Unplug the sump pump completely before starting any work.
- Clear debris around the sump pit for safe access.
- Locate the hose clamps securing the old check valve.
- Use the drill or screwdriver to loosen and remove the clamps.
- Slide off the old valve and discard the worn rubber seal.
- Inspect the discharge pipe end for cracks or deformation.
Note the original configuration. Many failing systems use an undersized valve adapted with a reducer that should be corrected during the upgrade.
Upgrade to a 2-Inch Valve System
Upgrading during replacement prevents future strain and inefficiency.
- Why 2-inch: Larger diameter reduces friction, lowers pump workload, and improves flow capacity.
- Use a reducer: If your pipe is 1.5-inch PVC, install a 2-inch to 2.5-inch reducer with rubber seal. This creates a secure, leak-free transition.
- Ensure correct flow direction: The new valve must have a “Flow Upward” label or arrow pointing toward the discharge pipe. The internal flapper must face up.
This setup eliminates bottlenecks and supports long-term reliability for years to come.
Install and Secure the New Valve
Proper installation ensures a tight, lasting seal without future leaks.
- Slide the new rubber seal onto the 1.5-inch discharge pipe.
- Insert the reducer into the seal.
- Attach the 2-inch check valve to the reducer, keeping it straight and aligned.
- Slide a 2-inch tension hose clamp over each connection.
- Tighten clamps evenly. Do not over-tighten. Snug is sufficient; crushing the seal causes leaks.
Avoid twisting the valve. Keep it upright and stable during the entire process.
Realign and Test the System
Final alignment prevents stress on joints and confirms everything works correctly.
- Reposition the sump pump so the discharge pipe runs perfectly straight.
- Plug in the pump and restore power.
- Fill the pit with water or wait for natural inflow.
- Watch the first few cycles carefully:
– Does water flow freely without hesitation?
– Does the valve close with a soft click (spring type) or mild thud (gravity)?
– Does water stay in the discharge pipe after shutdown? - Check all connections for leaks or seepage.
If the valve chatters, verify system pressure or consider a lower-cracking-pressure model.
Troubleshoot Common Post-Replacement Issues
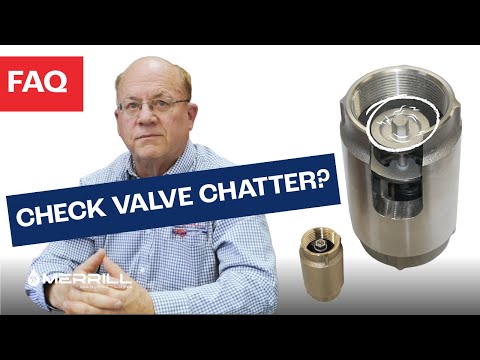
Valve Still Chatters or Flutters
Persistent noise usually means pressure imbalance or air intrusion somewhere in the system.
- Check for low head pressure: If the vertical rise is less than 3 feet, a gravity valve may not seal. Switch to a spring-assisted valve instead.
- Inspect vent hole placement: If the 3/16-inch hole is above water level, it may suck air and cause flutter. Lower it or plug it if unnecessary.
- Verify pump output: A weak pump may not generate enough pressure to fully open a spring valve. Test pump performance or clean the impeller.
A silent valve should close smoothly without vibrating or rattling.
Water Still Drains Back
Backflow after replacement means the valve is not sealing properly.
- Confirm orientation: Double-check the flow arrow points up toward the discharge.
- Inspect flapper or ball: Remove the valve and ensure the internal seal is clean and flexible. Replace if cracked or stiff.
- Check for debris: Flush the discharge line and clean the valve seat thoroughly.
- Test for siphon effect: If water drains continuously after shutdown, re-route the discharge line to eliminate dips.
If backflow is minimal (just a few ounces), the check valve may be unnecessary for your setup.
Noisy Operation After Replacement
Even new valves can be loud if misapplied to your specific system.
- Gravity valves bang: This is normal, but excessive noise may require a water hammer arrestor or a switch to a silent valve.
- Gurgling persists: Likely from a vent hole drawing air. Plug it temporarily to test. If noise stops, re-drill lower or eliminate the hole.
- Clamps too tight: Can distort the seal and cause uneven flow. Loosen slightly and re-tighten evenly.
Silent valves are best for basements near living areas where noise travels easily.
Prevent Future Check Valve Problems
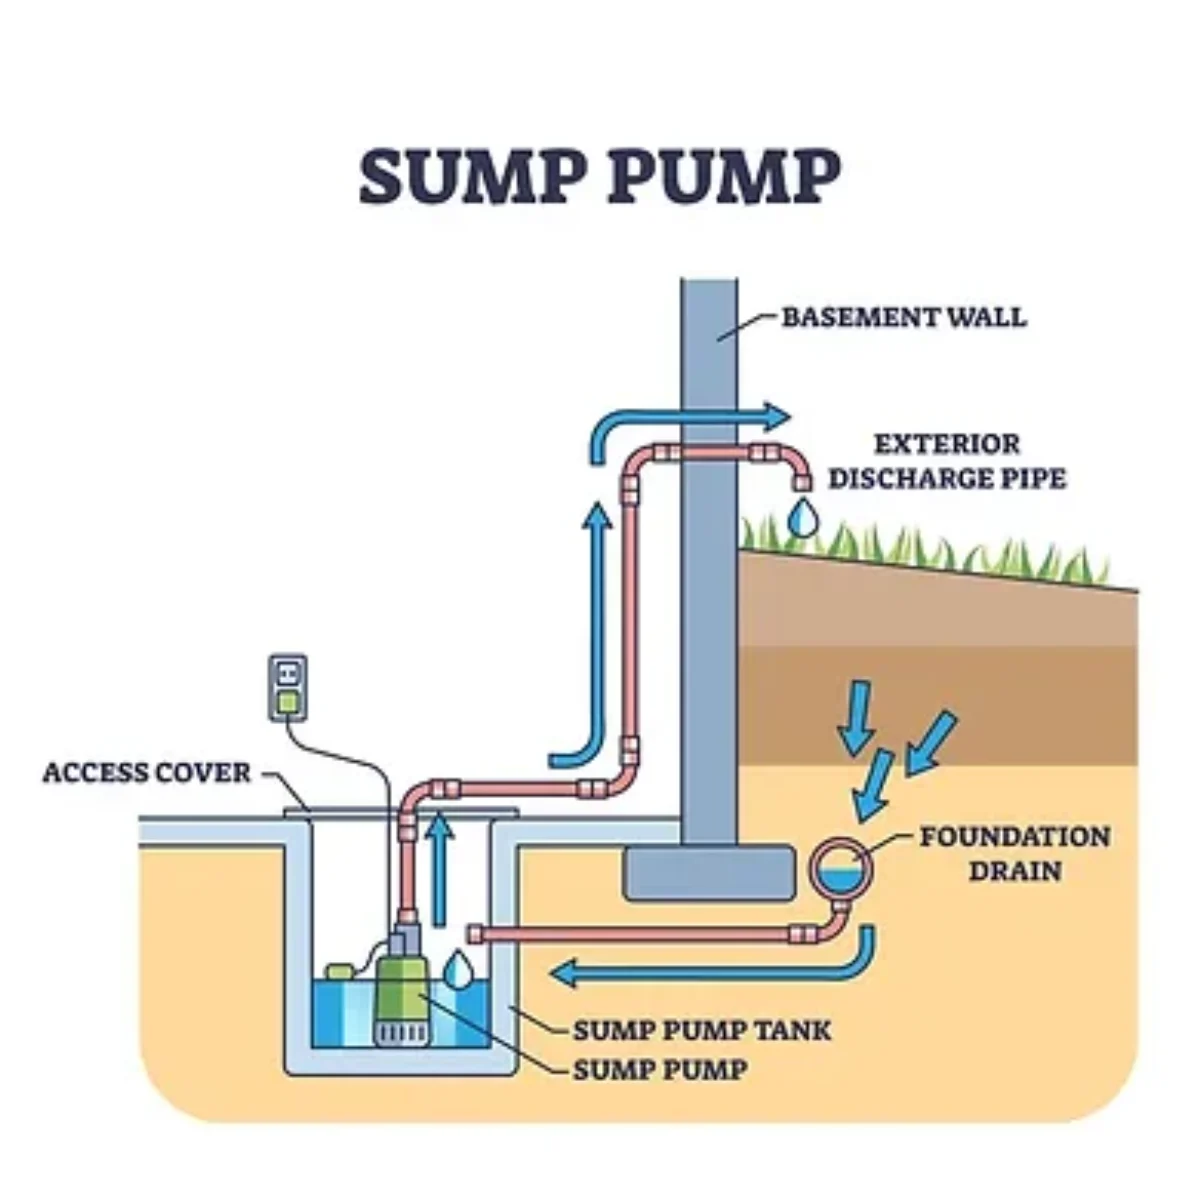
Schedule Annual Inspections
Catching small issues early prevents catastrophic flooding during heavy rain.
- Inspect every spring or before the rainy season begins.
- Look for: Corrosion, cracks, loose clamps, worn seals.
- Listen for: New noises or changes in pump cycle length.
- Test function: Pour water in the pit and confirm no backflow after shutdown.
Replace elastomer parts (flappers and seals) every 5 years, even if they look fine. Rubber loses elasticity over time.
Optimize System Design
Smart design reduces strain and failure risk across the entire drainage system.
- Avoid siphon loops: Route the discharge pipe to exit horizontally or pitch downward immediately after leaving the house.
- Use weep holes in cold areas: Allow water to drain from the line in unheated spaces to prevent freezing damage.
- Omit the check valve if safe: In low-backflow scenarios like a garage with minimal rise, removing the valve eliminates noise and freeze risk.
Always weigh backflow volume against potential damage when deciding whether to keep the valve.
Choose the Right Valve for Your System
Match the valve to your pump capacity and environmental conditions for best results.
| Condition | Recommended Valve Type |
|---|---|
| Standard home basement | Spring-assisted silent 2-inch |
| High flow, deep pit | Heavy-duty gravity or spring |
| Low head (less than 3 ft rise) | Spring-assisted, low cracking pressure |
| Unheated garage | Omit valve or use with weep hole |
| Noisy basement | Silent valve with vibration dampening |
When in doubt, consult a plumber or sump pump specialist who can evaluate your specific head pressure and flow requirements.
Frequently Asked Questions About Sump Pump Check Valves
What does a bad sump pump check valve sound like?
A failing check valve typically produces chattering, rattling, or a loud banging noise known as water hammer. Chattering indicates the flapper is fluttering open and closed rapidly due to low pressure. Banging occurs when a gravity valve slams shut suddenly. Both sounds signal wasted energy and potential damage to your system.
Can a sump pump work without a check valve?
Yes, a sump pump can operate without a check valve, but water will drain back into the pit after each cycle. This causes short cycling, where the pump turns on and off frequently to re-pump the same water. In low-head installations with minimal backflow (just a few ounces), omitting the valve can reduce noise and eliminate freezing risks in unheated spaces.
How often should you replace a sump pump check valve?
Replace elastomer components like rubber flappers and seals every 5 years, even if they appear functional. The valve body itself can last up to 20 years under ideal conditions. However, immediate replacement is needed if you notice short cycling, water returning to the pit, loud banging, or visible leaking around the valve.
Where should a check valve be installed on a sump pump?
Install the check valve 6 to 12 inches above the pump discharge outlet, below the pit cover. This placement keeps it accessible for inspection while preventing excessive backflow. The flow arrow must point upward toward the discharge pipe, and the internal flapper must face up to function correctly.
Why does my sump pump check valve keep chattering?
Chattering usually means the valve is not getting enough pressure to stay fully open, or air is being drawn through a vent hole. In low-head systems (less than 3 feet of vertical rise), switch to a spring-assisted valve with lower cracking pressure. Also check that any vent hole is drilled below water level or angled downward to prevent air intake.
Is a silent check valve better than a gravity check valve?
Silent (spring-assisted) valves are better for basements near living spaces because they eliminate water hammer noise. They also seal more reliably in low-head installations. Gravity valves work fine for utility areas, backup systems, or situations where noise is not a concern, and they have fewer mechanical parts that can fail.
Key Takeaways for Fixing Your Sump Pump Check Valve
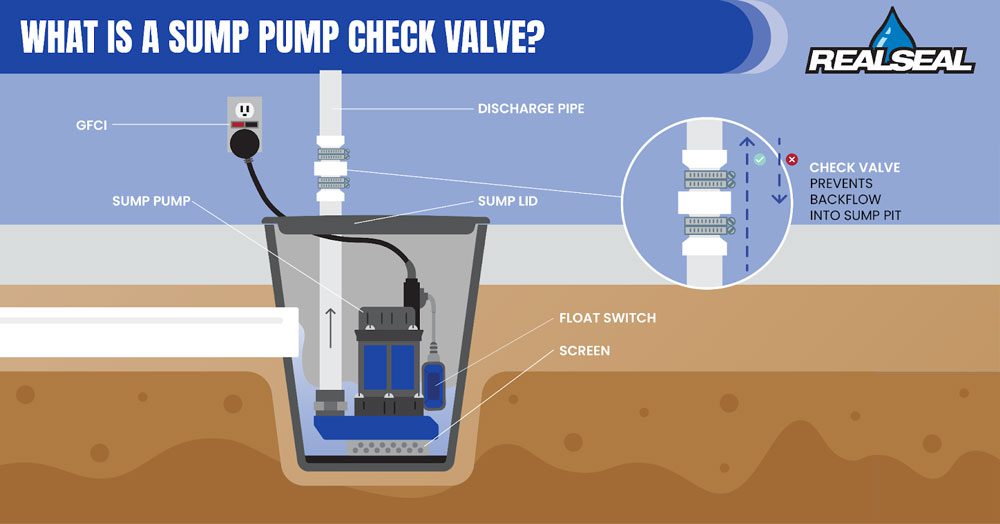
A sump pump check valve not working creates a cascade of problems including short cycling, wasted energy, and potential basement flooding. Recognizing early symptoms like chattering sounds, water returning to the pit, or frequent pump activation allows you to address the issue before catastrophic failure occurs.
Replacing the valve with a properly sized 2-inch model using compression fittings eliminates flow restrictions and simplifies future maintenance. Always verify the flow arrow points upward, keep the discharge pipe straight, and place the valve 6 to 12 inches above the pump.
Combine annual spring inspections with smart system design to keep your sump pump running quietly and reliably for years. If you notice persistent issues after replacement, evaluate your system head pressure, vent hole placement, and discharge line routing before assuming the valve itself is defective.