If you’ve ever needed to drain a flooded basement, empty a pool, or move water from a remote source, a water transfer pump is your most efficient solution. These powerful tools move water quickly and reliably by creating suction and pressure to transfer liquid from one location to another. Whether you’re using an electric, battery-powered, or gas-driven model, knowing how to use a water transfer pump correctly ensures fast results and prevents damage to the equipment.
This guide walks you through every step, from setup and priming to shutdown and maintenance, so you can operate your pump safely and effectively. You’ll learn how to avoid common mistakes like running the pump dry, failing to prime, or misconnecting hoses. By the end, you’ll be confident using your transfer pump for residential, agricultural, or emergency applications.
Choose the Right Pump Type for Your Job
Before operating, confirm your pump matches the job. Different models handle various water conditions and flow demands.
Match Pump to Application
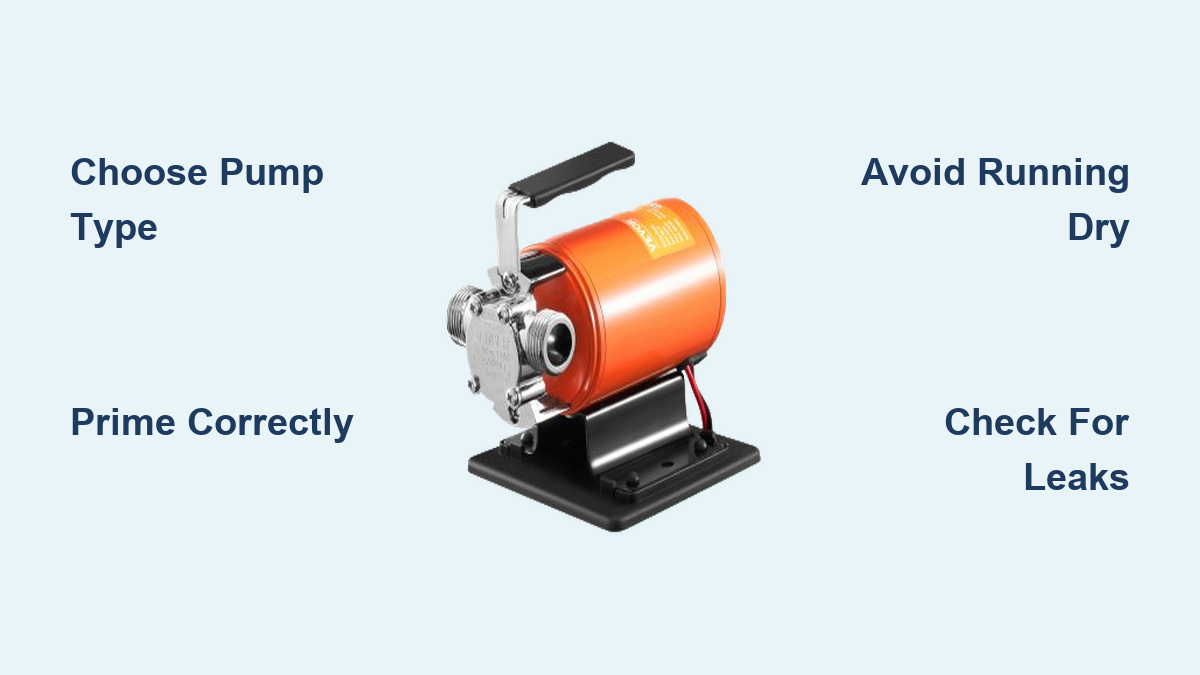
Centrifugal pumps work best for clean water applications like pools, tanks, and irrigation systems. They deliver high flow with low viscosity fluids. Diaphragm pumps excel when handling dirty water, slurry, or debris-laden fluids. Submersible pumps are designed for deep water situations such as sumps and flooded basements, and they don’t require priming. Portable transfer pumps run on gas or battery power for mobility, making them perfect for dewatering or feeding pressure washers.
For indoor or noise-sensitive areas, choose battery or electric models. For remote locations or heavy-duty jobs, gas-powered pumps deliver more power and independence from electrical outlets.
Gather Essential Tools and Setup Materials
Having the right materials on hand prevents delays and ensures safe operation.
Required Setup Items
You will need intake and discharge hoses compatible with your pump’s diameter. Keep hose clamps or quick-connect fittings handy for secure connections. Stock up on Teflon tape for sealing threaded connections. A funnel makes priming and fueling easier. Have a bucket available for priming water or collecting discharge. Always wear safety goggles and gloves when operating the pump. For gas models, keep fresh gasoline and motor oil on hand. Have clean water ready for priming and flushing the system.
Never use damaged hoses or mismatched fittings, as leaks reduce efficiency and create safety hazards.
Follow Critical Safety Precautions
Safety comes first. A few simple precautions prevent injury and equipment failure.
Wear Proper Protective Gear
Wear gloves to protect your hands from sharp fittings or contaminated water. Goggles shield your eyes from splashes. Sturdy footwear prevents slips when working in wet areas.
Key Safety Rules
Never run the pump dry, as water cools and lubricates internal parts. Read the manual before first use. Keep cords and hoses clear of foot traffic to prevent tripping. Inspect components for wear before each use. Label intake and discharge hoses clearly to avoid mix-ups.
Test the pump setup in a safe area before deploying in emergency situations.
Connect Hoses Correctly

Improper hose connections cause air leaks, reduced flow, or complete pump failure.
Attach Intake and Discharge Lines
Connect the intake hose to the suction port first. Place the intake end in the water source with a strainer fully submerged. Link the discharge hose to the outlet port. Route the hose to your drainage point while avoiding kinks or sharp bends.
Seal All Fittings
Use Teflon tape on threaded joints to prevent air intrusion. Secure connections with hose clamps to stop leaks under pressure. Ensure both hoses are free of blockages before starting.
Check hoses visually for twists, cracks, or collapsed sections before each use.
Prime the Pump for Suction
Most transfer pumps, especially centrifugal types, must be primed to start moving water effectively.
Why Priming Matters
Air in the system breaks suction. Priming fills the pump chamber with water to create a vacuum that draws in more water.
Step-by-Step Priming Process
Open the priming cap or fill port on the pump housing. Pour clean water into the chamber until full, typically 1 to 1.5 gallons for larger units. Replace the gasket and cap tightly, as any air leak ruins priming. For electric models, pour water into the inlet before powering on.
Submersible pumps do not require priming since they operate already underwater. Skipping priming leads to air locking, where the pump runs but moves no water.
Start Electric or Battery Models
Electric and battery-powered pumps are simple to start and ideal for indoor use.
Power Up Safely
Plug into a grounded outlet, and never use extension cords unless they are rated for outdoor use. For battery models, connect the positive terminal first, then the negative. Elevate cords off wet surfaces to prevent shocks.
Turn On the Pump
Flip the on/off switch. Water should begin flowing within seconds. If no flow occurs, recheck priming, inspect for clogged strainers, and verify the intake hose is fully submerged.
Battery pumps like the Acquaer 12V can run a pressure washer directly from a bucket with no water hookup needed.
Start Gas-Powered Pumps
Gas engines offer more power but require precise startup steps.
Prepare the Engine
Check the oil level and add if low. Fill the tank with fresh gasoline, as old fuel causes sputtering. Open the fuel valve. Set the choke to off for cold starts. Adjust the throttle to one-third open.
Pull-Start the Engine
Hold both handles firmly. Pull the starter cord smoothly and fully. After ignition, move the choke to on. Let the engine idle for 1 to 2 minutes to warm up. Gradually increase throttle to your desired flow.
It may take 2 to 3 pulls to start. Avoid flooding by not over-pulling with the choke closed. Steady water flow from the discharge hose signals success.
Monitor Water Transfer During Operation
Once running, stay attentive to ensure smooth operation.
What to Watch For
Watch the flow rate, as a sudden drop indicates a clog or air leak. Listen for unusual noises like grinding or knocking, which may mean debris or cavitation. Check for leaks and tighten connections immediately. Monitor the water level and switch to a flat-lay suction tip to remove the last inch when it drops.
Adjust for Efficiency
Reposition hoses to avoid siphon breaks. Increase throttle on gas models or check voltage on battery models if flow slows. Use shorter, wider discharge hoses to reduce friction loss.
Some pumps can directly supply a pressure washer once running, which is ideal for off-grid cleaning.
Shut Down the Pump Properly
A correct shutdown prevents damage and extends pump life.
Turn Off Power Source
For electric or battery models, flip the switch or unplug and disconnect. For gas models, close the fuel valve and let the engine run until it stalls to clear the carburetor, or turn off the ignition if equipped.
Release Pressure and Drain Water
Open the discharge valve or disconnect the hose to relieve pressure. Remove the bottom drain plug and expect a gush of water. Drain into a bucket or over a floor drain.
In winter, any residual water can freeze and crack the pump casing, so drain thoroughly before cold storage.
Clean and Maintain After Use
Cleaning prevents clogs and corrosion, especially after pumping dirty water.
Flush the System
Run clean water through the pump for 1 to 2 minutes. This removes sediment, algae, or contaminants and protects the impeller and seals.
Inspect and Service Components
Clean the strainer and filter by removing leaves, sand, or debris. Check hoses for cracks or wear. Replace worn O-rings, gaskets, or impellers. Lubricate moving parts as the manual specifies.
For gas models, change oil every 25 to 50 hours. Clean or replace the air filter. Inspect the spark plug and clean carbon deposits or replace if fouled.
Service the pump after every 3 to 5 uses for peak performance.
Store the Pump Correctly
Proper storage prevents rust, fuel degradation, and mechanical failure.
Prepare for Long-Term Storage
Drain all water from the pump and hoses. Run the engine briefly after draining fuel on gas models. Remove the battery if applicable and store it charged and dry. Dry the exterior completely by wiping down with a towel. Store upright in a dry, frost-free area.
Never store with old fuel, as it gums up the carburetor and causes hard starts.
Troubleshoot Common Problems
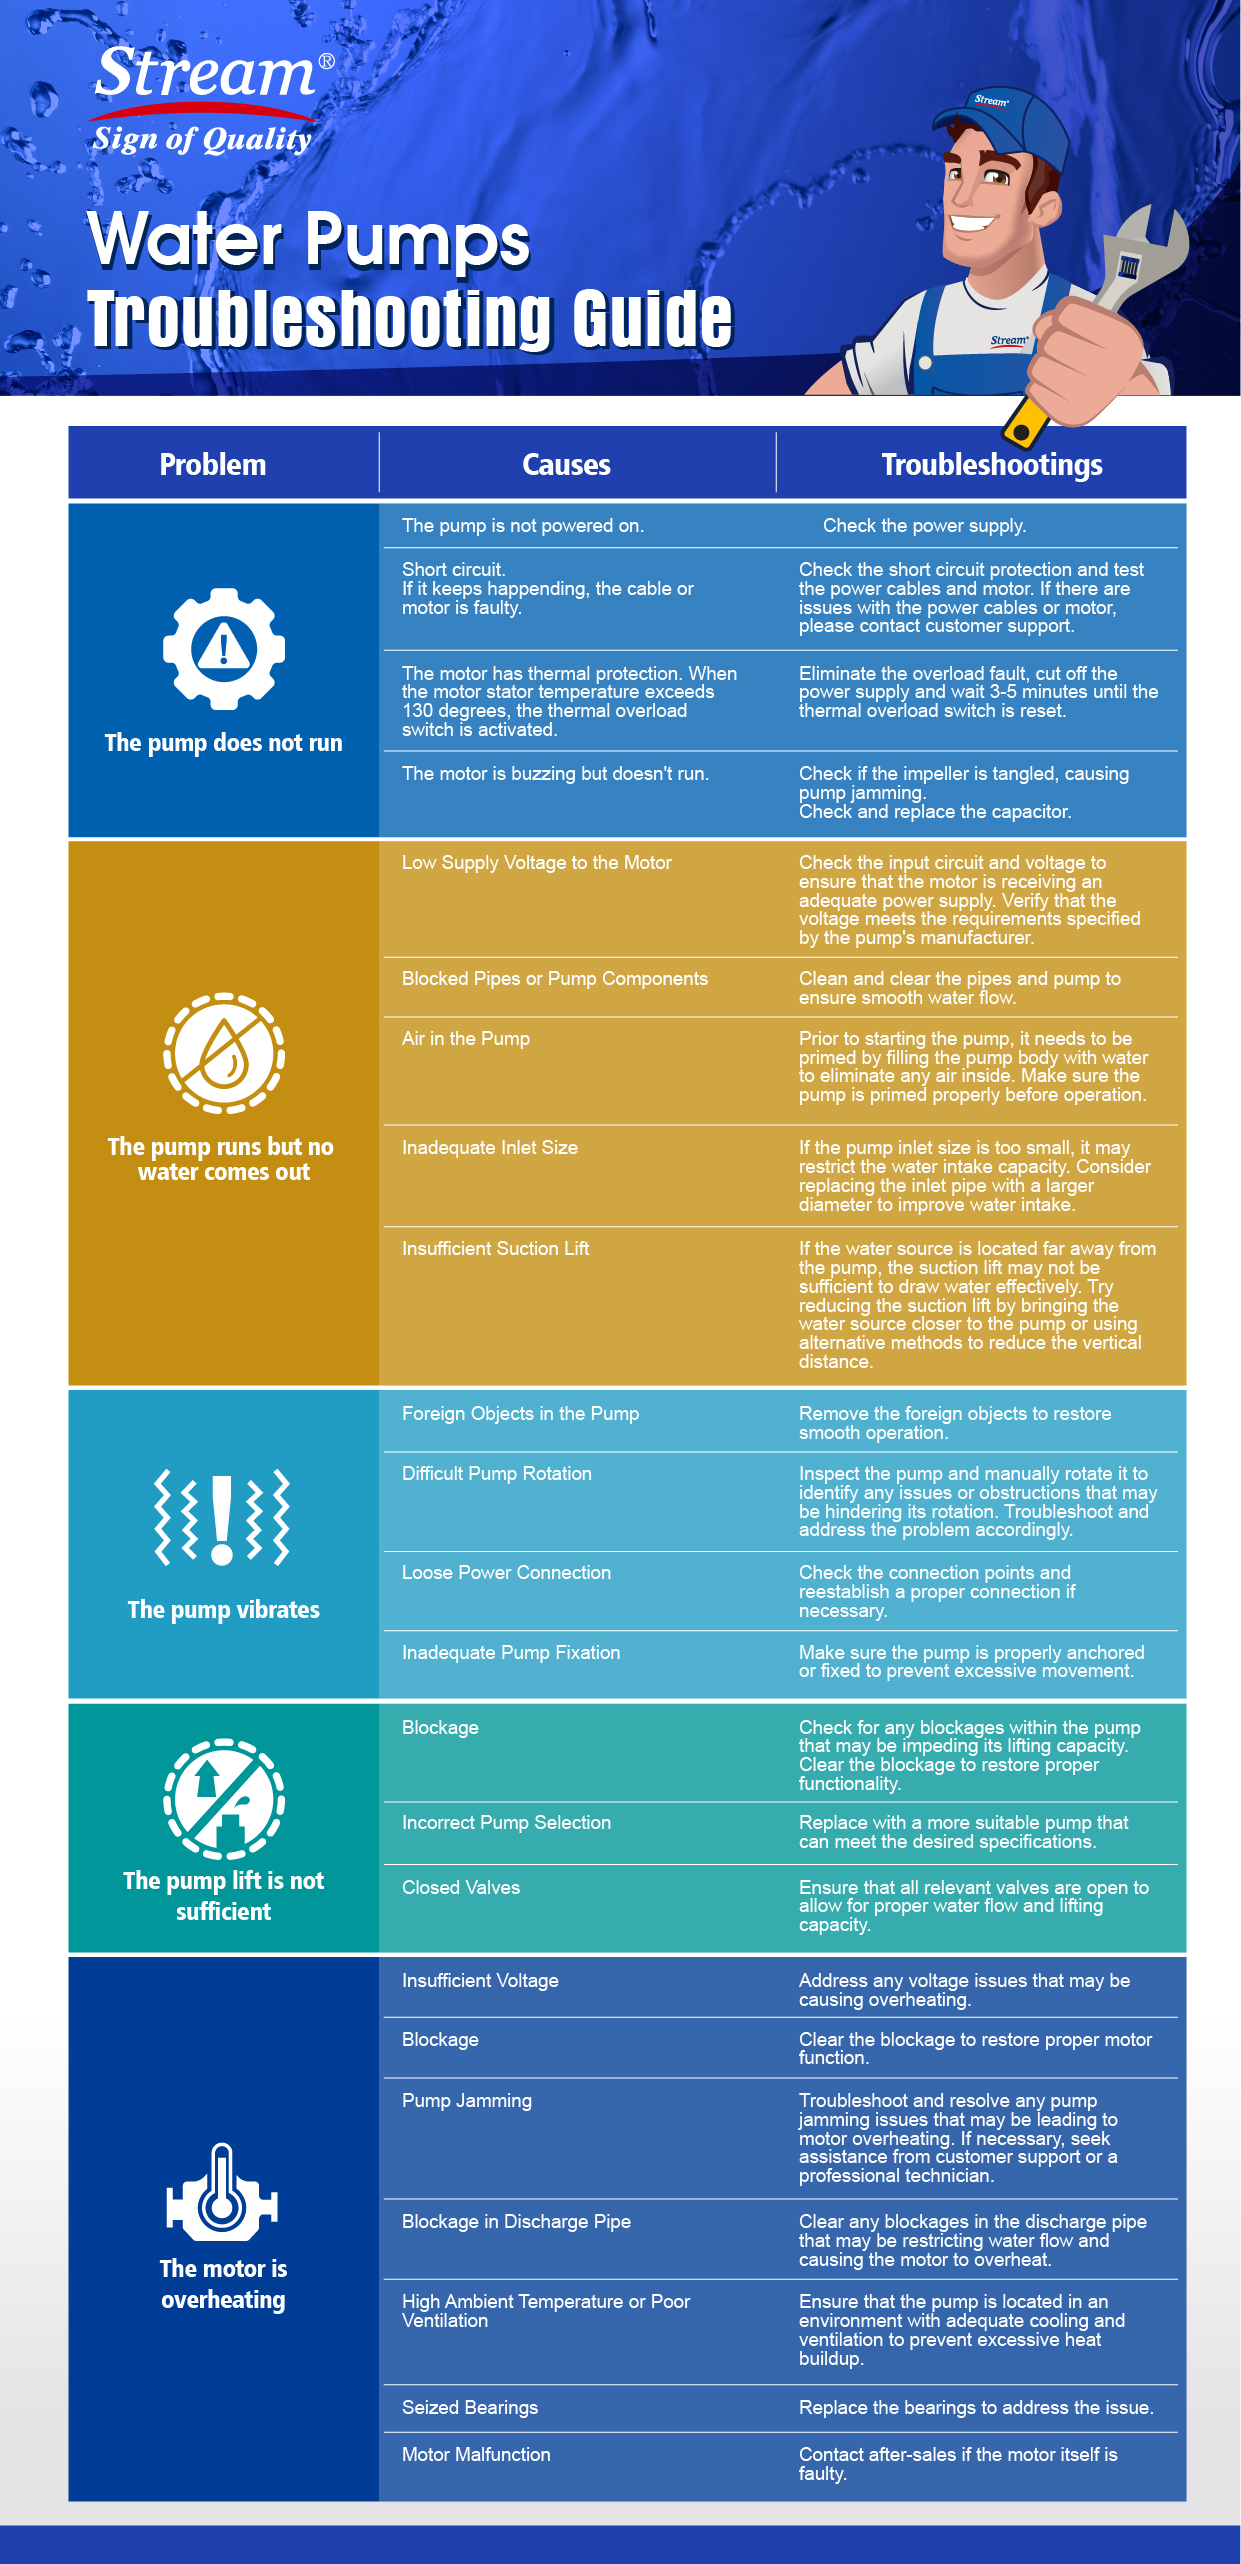
Even well-maintained pumps can develop issues. Here is how to fix them fast.
Pump Won’t Start
Check if the battery is dead and recharge or replace. Verify there is fuel and refill with fresh gasoline. Inspect the spark plug and clean or replace if fouled. Check if the circuit tripped and reset the outlet or examine the fuse.
Low Water Flow
An air leak requires re-priming and checking fittings. A clogged strainer needs cleaning. A kinked hose must be straightened. High lift height may require reducing the vertical distance.
Pump Runs Dry
Turn off immediately, as running dry destroys seals and overheats the motor. Refill the water source, re-prime, and restart.
Engine Sputters or Stalls
Old fuel requires draining and refilling with fresh gas. A clogged carburetor needs cleaning with carburetor cleaner. A dirty air filter must be replaced or cleaned.
Use a fuel stabilizer if storing gas-powered pumps for over 30 days.
Select the Best Pump for Your Needs
Choosing the right model upfront saves time and frustration.
Key Selection Factors
Flow rate, measured in gallons per minute, determines how fast water moves. For pools, hot tubs, and basements, 4 to 5 GPM is sufficient. For large dewatering or irrigation, you need 10 or more GPM.
Maximum head measures vertical pumping capability. A pump with 46 feet max head can lift water that high, but flow drops significantly at maximum height.
Power source options include electric for quiet, low-maintenance, outlet-dependent use. Battery offers cordless portability with limited runtime. Gas provides high power independent of electricity but is louder and heavier.
For portability, lightweight models under 20 pounds work well for homeowners. Heavy-duty gas pumps over 30 pounds suit contractors better.
The Acquaer 12V battery pump excels in residential use. It is compact, self-priming, and pressure washer compatible.
Apply Pumps in Real-World Scenarios
Understanding practical uses helps you get the most from your pump.
Residential Jobs
Empty kiddie pools in minutes. Drain flooded garages after storms. Clean aquariums or fountains without using buckets. Feed pressure washers from a trash can.
Farm and Garden Use
Irrigate crops from ponds or barrels. Fill livestock water tanks. Drain flooded fields or ditches.
Construction and Emergency Work
Dewater trenches or basements. Support concrete curing with water transfer. Respond to floods or storm damage.
Contractors often use 3-inch gas pumps with 7 HP for large-scale dewatering. These are fast but overkill for small jobs.
Maximize Pump Lifespan with Care
A well-maintained pump lasts years. Follow these best practices.
Daily Use Tips
Always prime before starting, except for submersible models. Never run dry; shut off when water runs low. Flush after pumping dirty water. Drain completely after each use. Inspect hoses and seals regularly.
Long-Term Benefits
These practices reduce repair costs, ensure reliability in emergencies, and maintain optimal flow and pressure.
Even occasional users should flush, drain, and store properly. Neglect kills pumps faster than use.
Frequently Asked Questions About Water Transfer Pumps
What is a water transfer pump used for?
A water transfer pump moves water from one location to another for applications like draining pools, emptying flooded basements, irrigating gardens, filling tanks, and feeding pressure washers. It creates suction to draw water in and pressure to expel it through a discharge hose.
Do all water transfer pumps need priming?
Most centrifugal and portable transfer pumps require priming to remove air and create suction. Submersible pumps do not need priming since they operate underwater. Always check your manual to confirm your pump type.
Can I use a transfer pump for dirty water?
Diaphragm pumps handle dirty water, slurry, and debris-laden fluids best. Centrifugal pumps work best for clean water. Using the wrong pump type for dirty water can cause clogging and damage.
How do I prevent my pump from running dry?
Monitor the water source level continuously while operating. Switch to a flat-lay suction tip when water drops to the last inch. Shut off the pump immediately if the source runs dry. Running dry destroys seals and overheats the motor.
What size pump do I need for my project?
Match pump capacity to your task. For pools, hot tubs, and basements, 4 to 5 GPM is adequate. For large dewatering or irrigation, choose 10 or more GPM. Consider maximum head height if you need to lift water vertically.
Key Takeaways for Using a Water Transfer Pump
Mastering how to use a water transfer pump transforms challenging water jobs into simple tasks. The most critical steps are choosing the right pump type for your water conditions, priming correctly before starting, and never running the pump dry. Following proper setup, monitoring during operation, and performing thorough maintenance after each use extends the life of your equipment significantly.
Whether you are a homeowner draining a flooded garage, a farmer irrigating from a pond, or a contractor handling emergency dewatering, the right pump and proper technique deliver reliable performance. Invest in quality equipment like the Acquaer battery pump for residential use or gas-powered models for heavy-duty applications, and always store your pump drained and in a dry location. With these practices, your water transfer pump will serve you reliably for years to come.