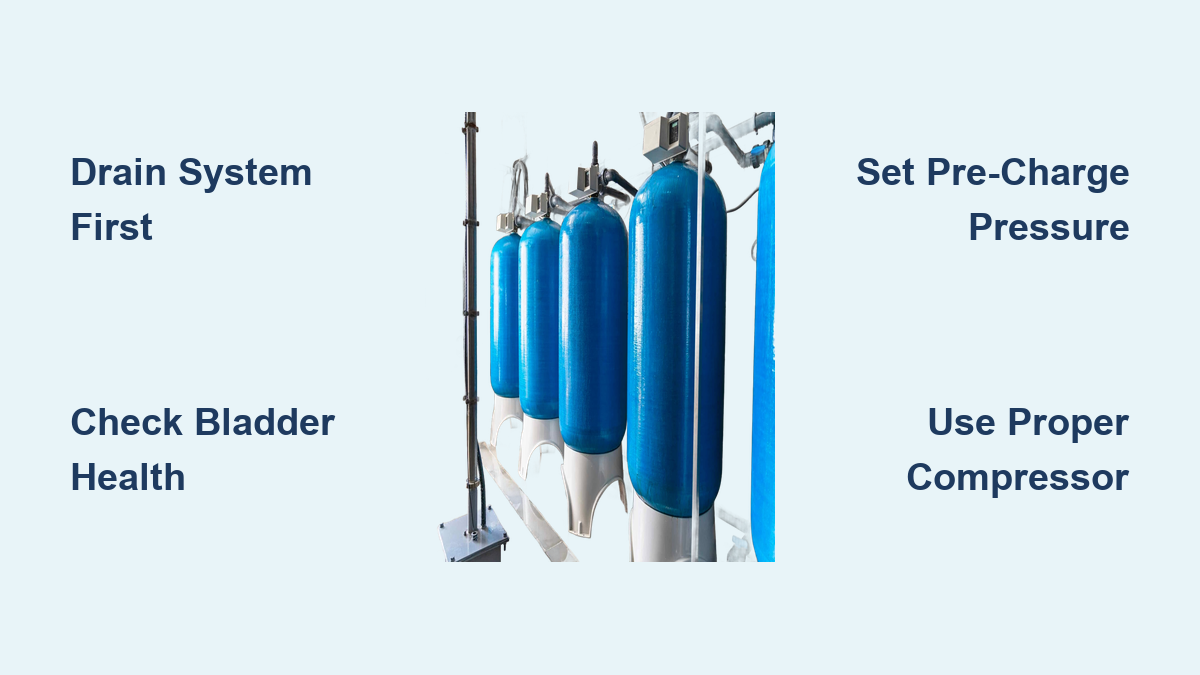
Faucets sputtering and pumps cycling rapidly often signal that your system needs air, not a new pump. Learning how to add air to a water pressure tank correctly prevents costly equipment damage and restores steady water flow.
This guide details the safe steps to drain your system, verify bladder health, and set the precise pre-charge pressure. You will avoid common errors like using weak compressors or skipping the draining process entirely.
Safety Protocols to Prevent Tank Rupture
Over-pressurizing a hydro-pneumatic tank can cause catastrophic failure and serious injury. You must monitor gauges constantly and never exceed the specific limits designed for your system components.
Respect Maximum Pressure Limits
The air charge must never exceed the pump cut-out setting, which is typically 50 or 60 psi. If your tank was completely water-logged, do not exceed 70 psi during the initial charging phase to avoid structural stress.
Verify Gauge Accuracy Before Starting
A faulty gauge can mislead you into dangerous over-pressurization. Replace the gauge if the needle sticks or fails to move smoothly as pressure changes within the system.
Locate the Correct Air Valve
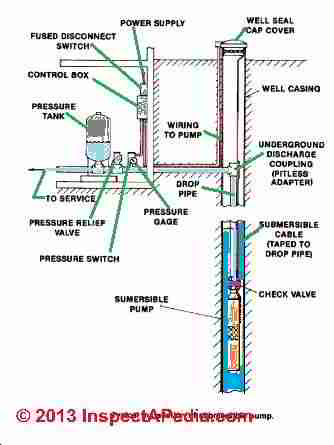
Identify the Schrader valve on the top of the tank or the tank tee at the bottom. Do not confuse this with a snifter valve, which is part of the check valve assembly and cannot handle manual high-pressure charging.
Diagnose Tank Conditions Before Charging
Adding air will not fix a ruptured bladder, so you must confirm the tank is capable of holding a charge first. Proper diagnosis saves time and prevents unnecessary work on a failed unit.
Meet Mandatory Testing Conditions
You can only measure true air pre-charge when the power is off and the tank is fully drained. Any remaining water pressure will invalidate your reading by showing water pressure instead of air pressure.
Understand Why Draining Is Essential
Measuring air pressure while water remains in the tank yields a false reading equal to the current water pressure. You must drain the system to zero psi to see the actual air charge level inside the bladder.
Detect Early Signs of Bladder Failure
A healthy tank accepts air steadily, while a failed one may not build pressure past 20 psi. Look for rapid air loss, a heavy feeling when drained, or water spurting from the air valve as signs the tank is shot.
Select Equipment With Sufficient Air Volume
Standard tire inflators often lack the volume needed to pressurize a large well tank effectively. You need a compressor rated for high cubic feet per minute output rather than just high maximum pressure.
Match Compressor CFM to Tank Size
An 86-gallon tank holds roughly 11.5 cubic feet of air, which is far more than a car tire. Choose a compressor rated for at least 1 CFM at 40 psi to raise pressure at a practical rate of about 1.2 psi per minute.
Avoid High PSI and Low CFM Traps
Many units advertise 250 psi capabilities but lack the airflow volume to fill a large tank efficiently. Check the CFM rating at a realistic operating pressure like 40 psi rather than focusing solely on maximum PSI.
Gather Essential Tools for the Job
- Air compressor with adequate CFM rating
- Accurate pressure gauge for verification
- Hose and bucket or floor drain access
- Schrader valve tool for core adjustments
Hand pumps are technically possible but require extreme physical effort for large pressure increases.
Calculate the Correct Pre-Charge Pressure
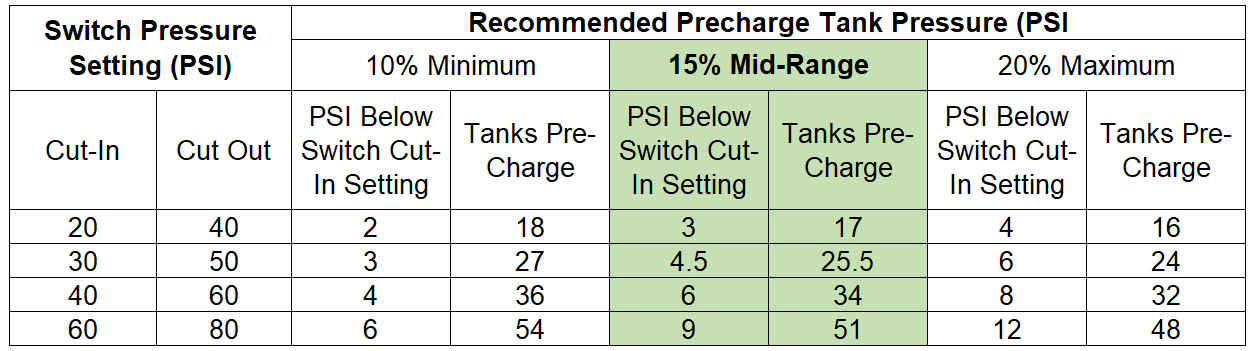
Setting the wrong pre-charge pressure causes poor performance and increased wear on your pump motor. You must match the air charge to your specific pressure switch settings for optimal operation.
Apply the Standard Pre-Charge Formula
Set your pre-charge to 2 psi below the pump cut-in pressure for most residential systems. For a standard 40/60 psi switch, your target pre-charge is 38 psi measured when the tank is empty.
Understand the Minus 2 Psi Rule
This small differential ensures the pump starts drawing water immediately at the cut-in point. If the pre-charge equals or exceeds the cut-in pressure, the tank acts like a solid column and increases cycling frequency.
Recognize Gauge Discrepancy Issues
Water and air pressures equalize when the system is pressurized above the pre-charge level. Significant differences between air and water gauge readings indicate a faulty gauge or a clogged inlet port.
Execute the Step-by-Step Charging Procedure
Follow this exact sequence to safely add air and restore proper function to your water system. Skipping steps or altering the order can lead to inaccurate results and potential safety hazards.
Turn Off Power and Drain System
- Shut off electrical power at the breaker box.
- Open a low-point faucet to relieve system pressure.
- Let water drain completely until flow stops entirely.
- Confirm 0 psi on a reliable pressure gauge.
This process ensures accurate measurement and prevents accidental pump activation during service.
Check Initial Air Pressure Reading
Attach a gauge to the Schrader valve and record the reading carefully. If the pressure is below your target, proceed to charging, but if it is zero or stuck low, suspect a bladder rupture.
Add Air in Controlled Increments
- Connect the compressor hose to the Schrader valve.
- Inflate the tank in 5 to 10 psi bursts.
- Monitor the gauge continuously during inflation.
- Stop immediately when reaching your target pre-charge pressure.
Do not exceed 60 psi unless you are correcting a water-logged condition, and even then, stay under 70 psi.
Verify System Function After Re-Pressurizing
- Close all faucets and restore power to the pump.
- Allow the system to cycle one or two times fully.
- Observe that the pump cuts in at 40 psi and out at 60 psi.
- Check for steady water flow and no rapid cycling at fixtures.
Longer pump run times indicate proper drawdown and a successful air charge adjustment.
Troubleshoot Common Charging Problems
Even with correct procedures, you may encounter issues that prevent proper pressurization. Logical diagnosis helps identify whether the problem lies with your equipment or the tank itself.
Address Stagnant Pressure Readings
If pressure stalls at 20 psi despite a running compressor, the unit likely lacks sufficient CFM. Test with a larger compressor, and if pressure still fails to build, the bladder is likely ruptured.
Investigate Rapid Air Loss Issues
A tank should hold air indefinitely, so pressure drops within days indicate a leak. Check for a loose valve core or slow bladder degradation common in tanks over 10 years old.
Resolve Persistent Short Cycling
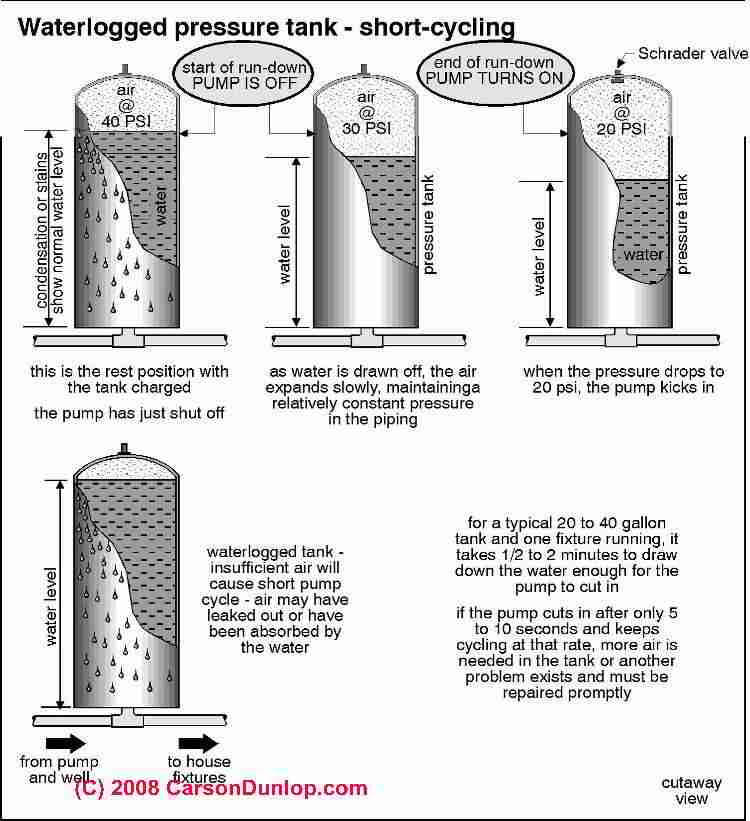
If the pump cycles rapidly after charging, recheck your pressure switch settings and look for water-logged conditions. Confirm there are no air leaks in the plumbing and that your pressure gauge is accurate.
Maintain System Reliability Long Term
Preventive care keeps your well system running smoothly and avoids emergency repairs down the road. Regular checks extend the life of both the tank and the pump motor.
Perform Annual Pressure Checks
Test your air charge once per year, ideally in spring before high-use seasons begin. Draining and checking takes less than 30 minutes but prevents significant long-term damage to components.
Recheck After Any System Work
Always verify air pre-charge after replacing pressure switches or installing new gauges. Any plumbing repair that involves draining the system requires a subsequent air pressure adjustment.
Watch for Early Failure Signs
Frequent recharging needs, sputtering faucets, and water hammer noises indicate declining bladder integrity. Plan for replacement before these issues cause expensive pump motor damage.
Know When to Replace the Tank Entirely
No amount of air charging will fix a failed bladder, making replacement the only solution for certain conditions. Understanding these limits saves money and prevents futile repair attempts.
Recognize Irreparable Bladder Failure
The internal bladder cannot be repaired if the tank will not hold air and the valve is not the culprit. You must replace the entire tank assembly when the bladder is compromised.
Consider Typical Tank Lifespan
Most tanks last 10 to 14 years, but performance declines with age and usage. Older tanks are more prone to water-logging and air loss, warranting proactive replacement planning.
Weigh Cost Against Risk Factors
A new pressure tank costs significantly less than replacing a pump damaged by short cycling. Proper air maintenance protects your entire well system investment effectively.
Frequently Asked Questions About Water Pressure Tanks
How often should I add air to my pressure tank?
You should check the air charge annually, though most tanks do not need frequent recharging if functioning properly. If you find yourself adding air multiple times a year, the bladder is likely failing and the tank needs replacement.
Can I use a standard bicycle pump for this task?
While technically possible, a bicycle pump lacks the volume to efficiently pressurize a large tank. It would take an excessive amount of time and physical effort to raise the pressure significantly.
What happens if I set the pre-charge too high?
Setting pre-charge too high reduces the amount of water the tank can hold, causing the pump to cycle on and off rapidly. This short cycling wears out the pump motor and pressure switch much faster than normal.
Why does my pressure gauge show different readings?
If air and water gauges show different readings when the system is pressurized, one gauge is likely faulty or clogged. Both should read the same pressure once the system exceeds the pre-charge level.
Is it normal for the tank to lose air over time?
No, a healthy pressure tank should hold its air charge indefinitely without needing top-ups. Frequent air loss indicates a slow leak in the bladder or valve core, signaling impending tank failure.
What tools do I absolutely need for this job?
You need an air compressor with adequate CFM, an accurate pressure gauge, and a way to drain the tank completely. A Schrader valve tool is also helpful for checking or replacing the valve core if needed.
Key Takeaways for Adding Air to Your Water Pressure Tank
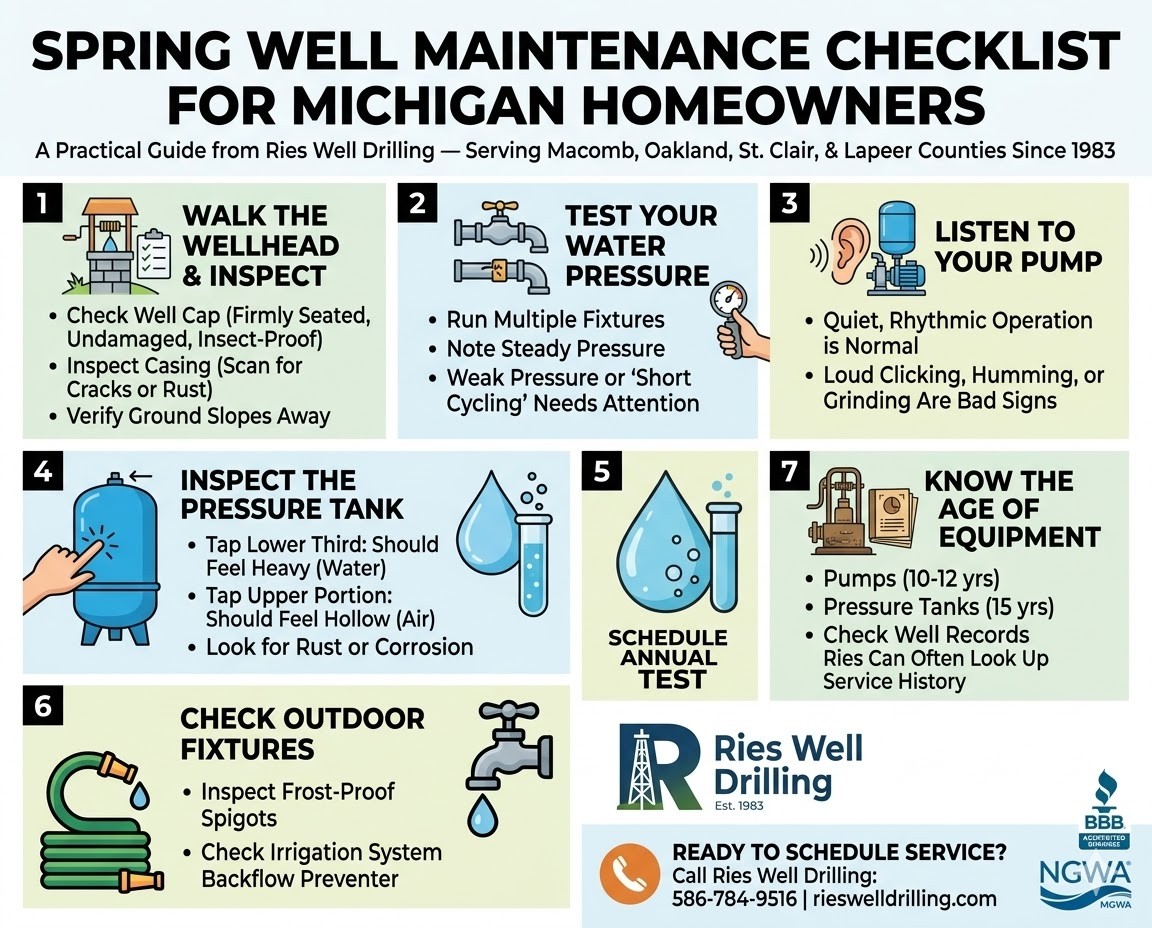
Properly charging your water pressure tank requires draining the system completely and setting the air pressure to 2 psi below the pump cut-in setting. Using a compressor with sufficient CFM ensures you can raise the pressure effectively without misdiagnosing a healthy tank as failed.
Always prioritize safety by monitoring gauges closely and never exceeding the maximum pressure limits of your system. If the tank fails to hold air after verifying the valve is tight, plan for immediate replacement to protect your pump motor.
Take action today by checking your current pre-charge pressure and scheduling annual maintenance to keep your well system running efficiently for years.