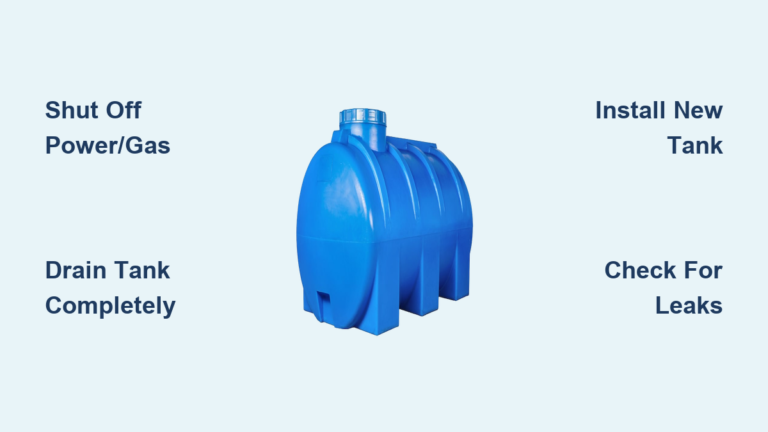
If your water pump isn’t delivering water, you’re not alone. Thousands of homeowners face this issue every year, and a water pump not working can cut off your home’s water supply, disrupt irrigation, or leave you without essential pressure for daily use. But before calling a technician, most problems can be diagnosed and often fixed with basic tools and a systematic approach. This guide walks you through every step, from checking power and pressure to testing capacitors and priming the system, so you can restore water flow fast.
Check Power and Breaker Status
The first and most common cause of a failed water pump is electrical. Always start here before diving into mechanical repairs.
Reset Tripped Circuit Breaker
Locate the breaker labeled “well,” “pump,” or “irrigation” in your electrical panel. If it’s in the middle (tripped) position, turn it fully off, wait 3 to 5 seconds, then switch it firmly back on. If the breaker trips again immediately, do not reset repeatedly. This indicates a serious issue like a short circuit or motor failure. Stop and call a licensed electrician.
Inspect for Blown Fuses
Older systems may use fuses instead of breakers. Look for a broken filament inside the glass. Replace only with an exact amperage-rated fuse to prevent fire or damage.
Verify Shut-Off Switch Position
Check the disconnect switch near the pressure tank or wellhead. It can be accidentally turned off. Flip it to “on” and ensure it’s making solid contact. Test for voltage downstream with a multimeter if possible.
Rule Out Power Outage
Confirm the issue isn’t a system-wide outage. Check lights and appliances. If power is out, your pump won’t run unless you have a backup generator.
Confirm No Water Flow System-Wide
Before assuming the pump is broken, verify the problem affects the entire system.
Test Multiple Fixtures
Turn on faucets in different areas. If only one fixture is dry, the issue is likely a clogged aerator or closed valve, not the pump. Clean aerators and check shutoff valves.
Listen for Pump Operation
Stand near the pressure tank. If the pump runs but no water flows, possible causes include air lock, dry running, impeller damage, or suction line leak. If the pump is silent, move to electrical testing.
Read Pressure Gauge and Tank Condition
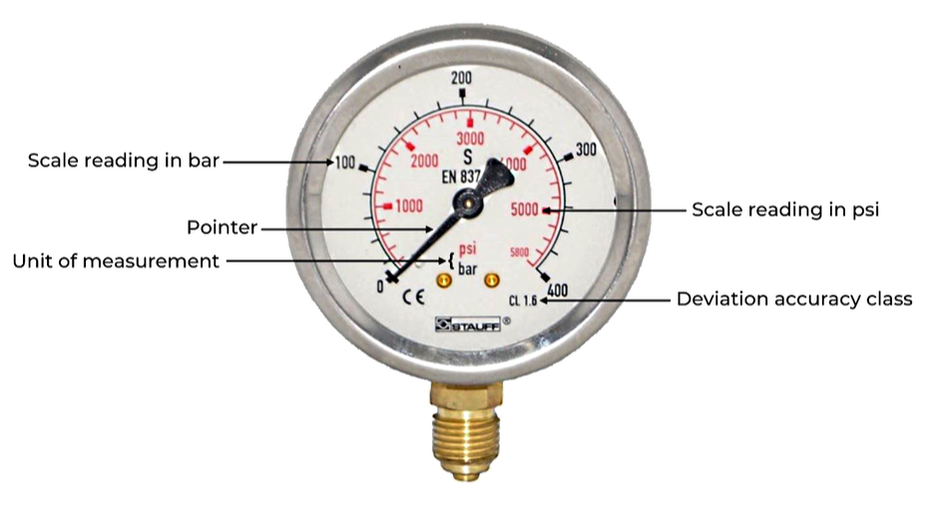
Your pressure gauge is a key diagnostic tool for pump and tank health.
Check Gauge Reading
A zero reading when the pump should be active suggests the pump isn’t running, the pressure switch failed, or the pressure tank is water-logged. A pulsing gauge may indicate short cycling or air in the system.
Test Pressure Tank Air Charge
With the system off and drained, use a tire pressure gauge on the air valve at the top of the tank. Air pressure should be 2 psi below the cut-in pressure. For a 30/50 psi switch, aim for 28 psi. For a 40/60 psi switch, aim for 38 psi. If water sprays out when you press the valve, the bladder is ruptured and the tank needs replacement.
Assess Tank Weight and Movement
A functioning tank should feel light and rock slightly. If it’s heavy and immovable, it’s water-logged and needs replacement.
Inspect for Plumbing Blockages
Even with power, clogs can stop water flow.
Clean Sediment Filter
Remove and inspect the sediment filter cartridge. Replace if discolored, clogged, or damaged. A blocked filter can completely stop flow.
Bypass Water Treatment Systems
Isolate water softeners, iron filters, or RO units using bypass valves. If water returns, the treatment system is the culprit.
Check for Frozen Pipes
In cold climates, above-ground pipes can freeze. Look for frost, swelling, or silence in the line. Thaw with heat tape or a hair dryer. Never use open flame.
Diagnose Pump Running But No Water
When the motor runs but no water comes out, the issue is often mechanical or hydraulic.
Prime the Pump to Remove Air Lock
An air lock prevents water from entering the pump. Fix it by following these steps:
- Turn off the pump
- Locate the bleeder valve or highest cap
- Remove cap or open valve
- Pour water directly into the opening
- Repeat if needed
- Restart the pump
Test While Pump Is Running
With the pump on, open the bleeder valve. Let air escape until water flows steadily, then close.
Confirm Water Source Availability
Ensure the well has water and the intake is submerged. Running dry destroys impellers and motors fast.
Test and Replace Pressure Switch
The pressure switch turns the pump on and off based on system pressure.
Inspect for Burned Contacts
Turn off power. Remove the switch cover. Look for pitting, corrosion, or blackened contacts. Tapping the switch tube with a screwdriver may temporarily restore function if contacts are stuck.
Clear Clogged Sensor Tube
A blocked tube prevents accurate pressure reading. Disconnect and blow through it or flush with water.
Replace Failed Switch
Pressure switches are inexpensive, around $25, and not repairable. Replace with an identical model, matching pressure range and thread size. Reuse existing wiring.
Examine Control Box and Capacitor

For submersible pumps, the control box is critical.
Open Control Box Safely
Turn off power. Look inside for bulging or leaking capacitor, burn marks, or corrosion or ant infestation. Ants can cause arcing. Use a disposable nail file to clean contacts.
Replace Faulty Capacitor
Capacitors provide startup torque. If failed, the motor may hum but not start. Follow these steps:
- Turn off power
- Discharge capacitor by shorting terminals with an insulated screwdriver
- Disconnect wires, noting positions
- Install exact replacement, matching microfarad and voltage
Capacitors are low-cost and responsible for 90% of pump failures according to field data.
Test Motor Windings with Multimeter
Check internal motor health to rule out burnout.
Set Up Multimeter
Use resistance mode. Disconnect motor leads.
Measure Resistance
For a typical half horsepower, 230V pump, black to yellow should read 4.6 to 5.2 ohms. Red to yellow should read 16.7 to 20.5 ohms.
Interpret Results
Readings within range mean the motor is healthy. Infinite resistance indicates open winding, meaning burned out. Zero resistance means short circuit. Out-of-spec readings mean the motor needs rewinding or replacement.
Fix Reverse Polarity and Voltage Issues
For 240V systems, wiring errors can prevent operation.
Check Wiring Diagram
Ensure correct terminal connections. Reverse polarity causes the motor to run backward, resulting in no or low water output.
Verify Supply Voltage
Use a multimeter to confirm 230 to 240V at the pump. Low voltage causes weak performance or failure to start.
Prevent Future Failures
Extend pump life with simple maintenance.
Install Dry-Run Protection
Add an automatic shutoff device that cuts power when the well runs dry. It monitors current and prevents motor burnout. Set delay to 3 to 30 minutes based on usage.
Maintain Pressure Tank
Check air charge annually. Keep pressure 2 psi below cut-in setting.
Clean Filters and Valves
Replace sediment filters every 3 to 6 months. Inspect check valves for debris.
Flush System Periodically
Prevent mineral buildup and clogs by flushing lines annually.
Decide: Repair or Replace?
Use this framework to make a smart decision.
Consider Pump Age
Submersible pumps last 8 to 15 years, up to 25 with care. Jet pumps last 8 to 10 years. Pumps over 10 to 15 years old are better replaced.
Compare Costs
A pressure switch costs about $25. A capacitor costs $20 to $50. A control box costs about $75. A pressure tank costs $200 or more. Full replacement costs $975 to $2,750. If repair exceeds 50% of replacement cost, replace the pump.
Evaluate Breakdown Frequency
Multiple repairs in a year signal declining reliability. Replacement offers better long-term value.
When to Call a Professional
Some issues require expert hands.
Call Immediately If
Breaker trips repeatedly, there are burnt wires or scorch marks, there’s a burning smell, the pump is submersed and needs retrieval, or there’s no water despite all checks, indicating possible well collapse or deep leak.
Benefits of Professional Service
Professionals provide safety because high-voltage systems are dangerous. They offer accuracy using flow meters and insulation testers. Certified repairs preserve warranty coverage.
Prepare for Power Outages
Ensure water access during blackouts.
Use a Backup Generator
Most pumps need electricity. A generator keeps water flowing for drinking, sanitation, and heating.
Install a Hand Pump
Consider retrofitting a manual hand pump for emergency access, especially in outage-prone areas.
Final Checklist: Fix Water Pump Fast
- Reset breaker. Do not ignore tripped power.
- Check disconnect switch. Ensure it’s on.
- Inspect for frozen or clogged pipes.
- Bypass water treatment systems.
- Test pressure gauge and tank air charge.
- Examine pressure switch. Clean or replace.
- Open control box. Look for bulging capacitor.
- Replace capacitor if faulty.
- Prime the pump if air-locked.
- Test motor windings with multimeter.
- Check for dry running. Confirm water source.
- Decide repair or replace based on age and cost.
- Call a pro for electrical faults or submersible units.
Key Takeaways for Fixing Water Pump Not Working
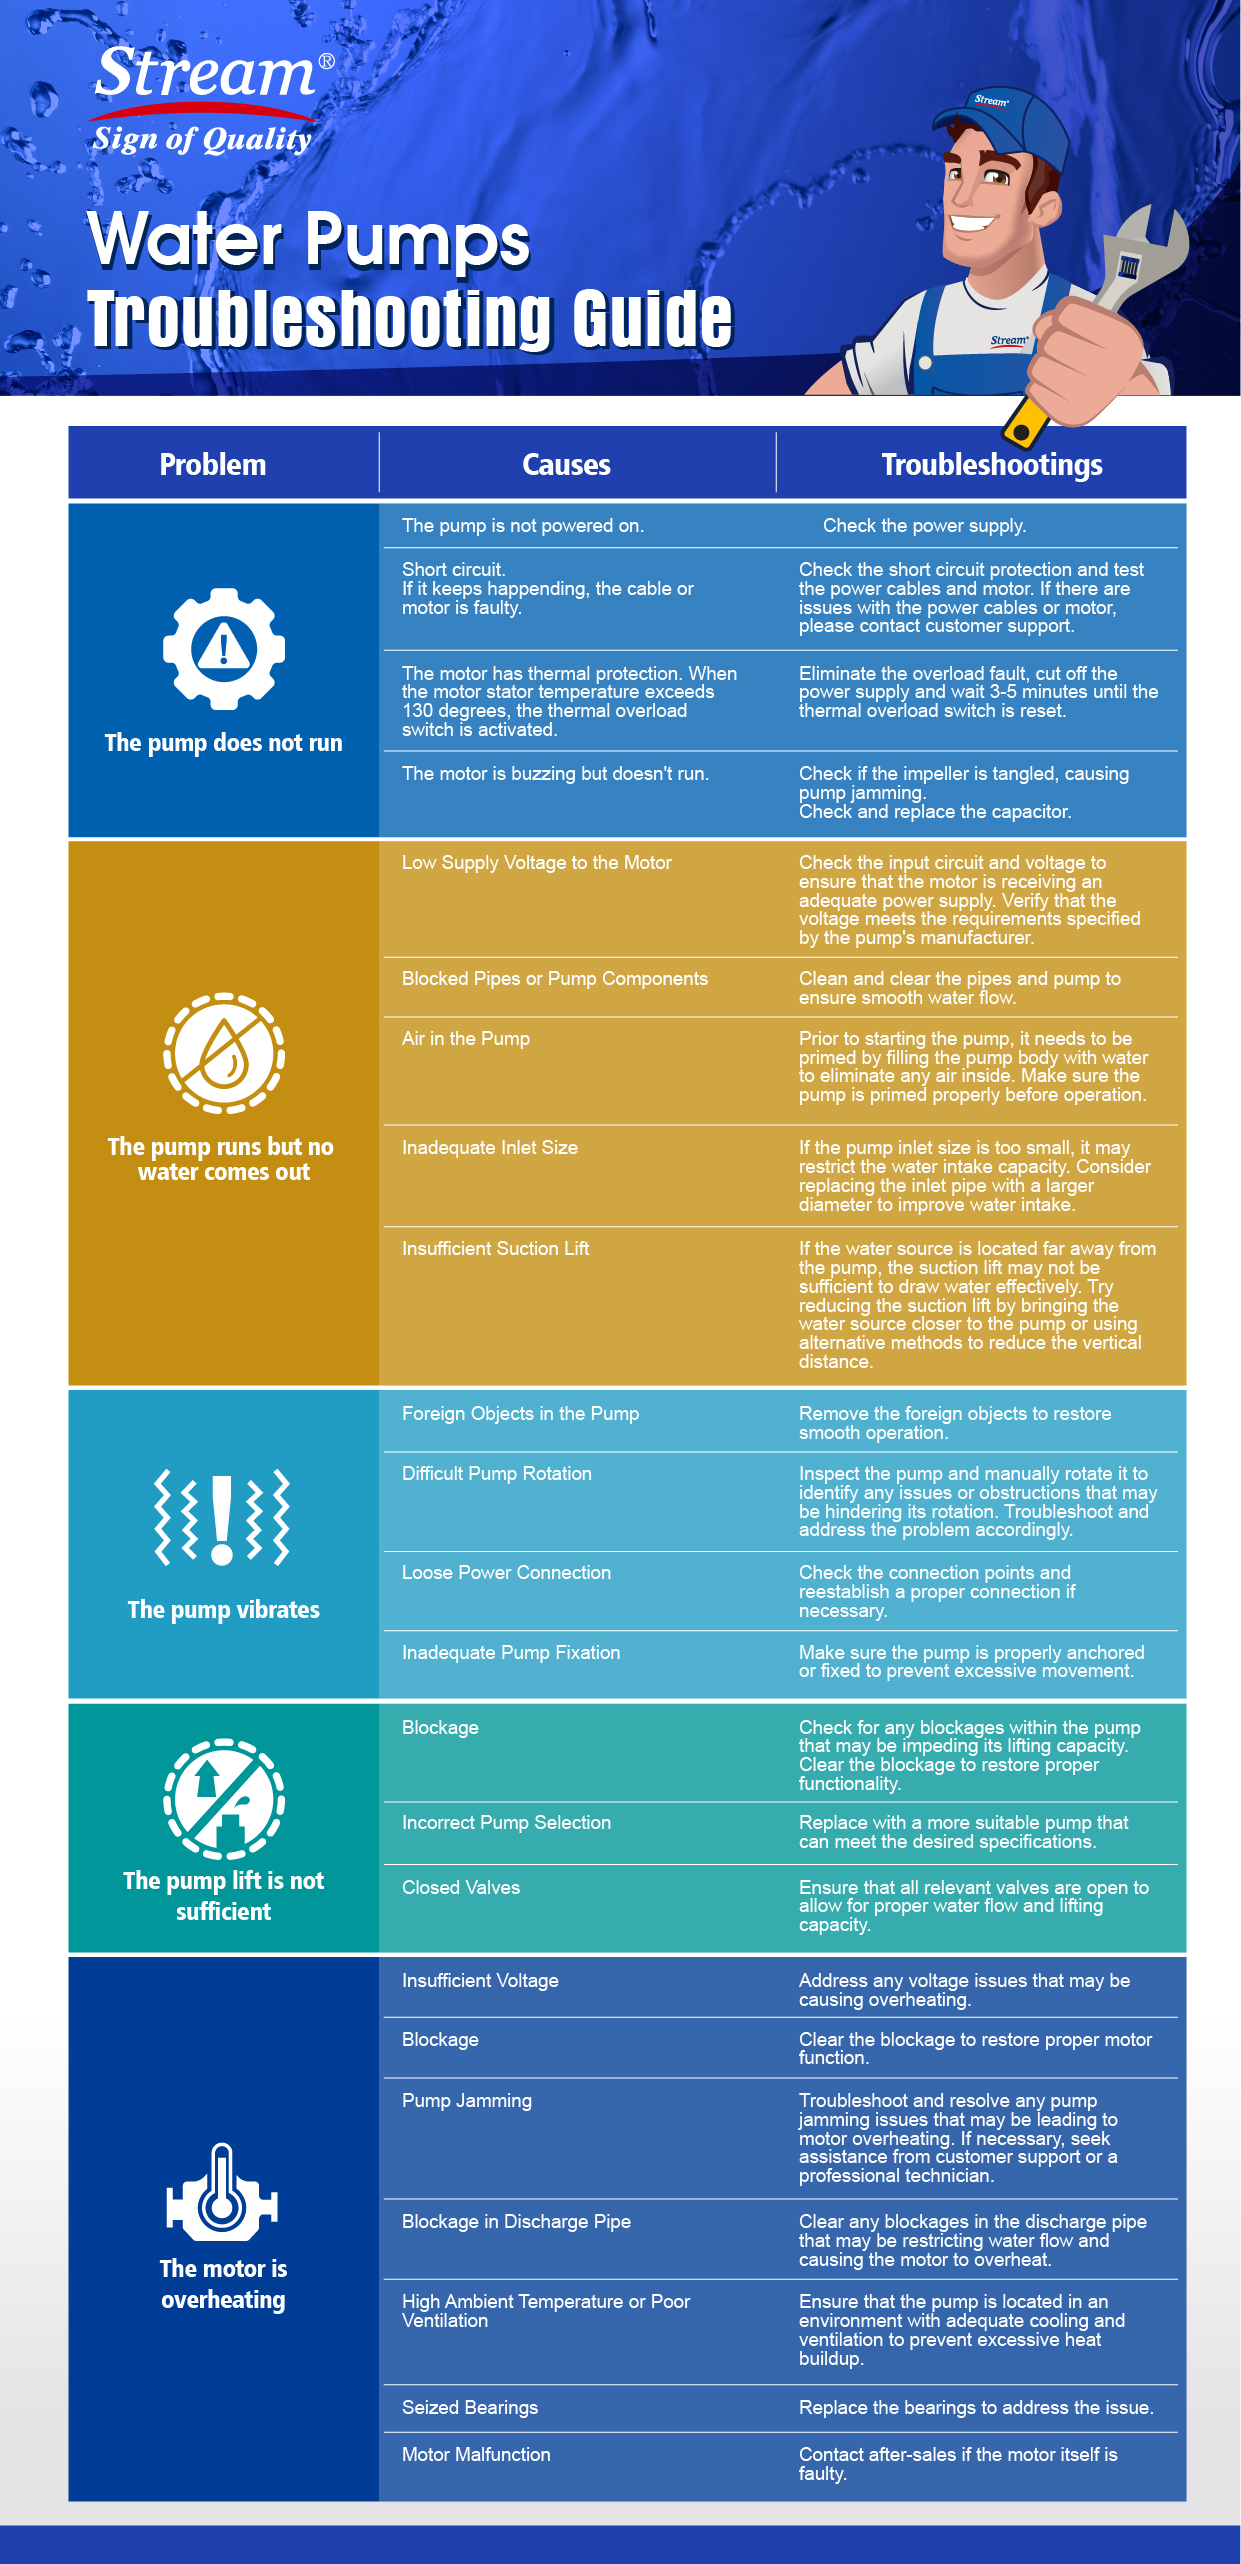
A water pump not working is often fixable with simple steps. Start with power, move to plumbing, then test electrical components. Most issues stem from tripped breakers, failed capacitors, or air locks, and these are fixable in under an hour. Regular maintenance prevents 80% of failures. Use OEM parts, follow safety protocols, and know when to call a pro. With this guide, you’re equipped to restore water fast and keep your system running for years.
Frequently Asked Questions About Water Pump Not Working
Why is my water pump running but not producing water?
This usually indicates an air lock, dry running, impeller damage, or a suction line leak. Try priming the pump first by pouring water into the bleeder valve. If that doesn’t work, check if the well has water and the intake is submerged.
How do I know if my pressure switch is bad?
Signs include the pump not starting, the pump running continuously, or rapid cycling. Inspect the switch contacts for pitting, burning, or corrosion. Replace the switch if contacts are damaged. Switches cost about $25 and are not repairable.
Can I replace the capacitor myself?
Yes. Turn off power, discharge the capacitor by shorting terminals with an insulated screwdriver, disconnect the wires, and install an exact replacement matching the microfarad and voltage rating. Capacitor failure causes 90% of pump failures.
How often should I maintain my water pump system?
Check air charge in the pressure tank annually. Replace sediment filters every 3 to 6 months. Inspect check valves yearly. Flush the system periodically to prevent mineral buildup.
When should I replace my water pump instead of repairing it?
Replace if the pump is over 10 to 15 years old, if repair costs exceed 50% of replacement cost, or if you’ve had multiple breakdowns in a single year. A new pump costs $975 to $2,750 installed.