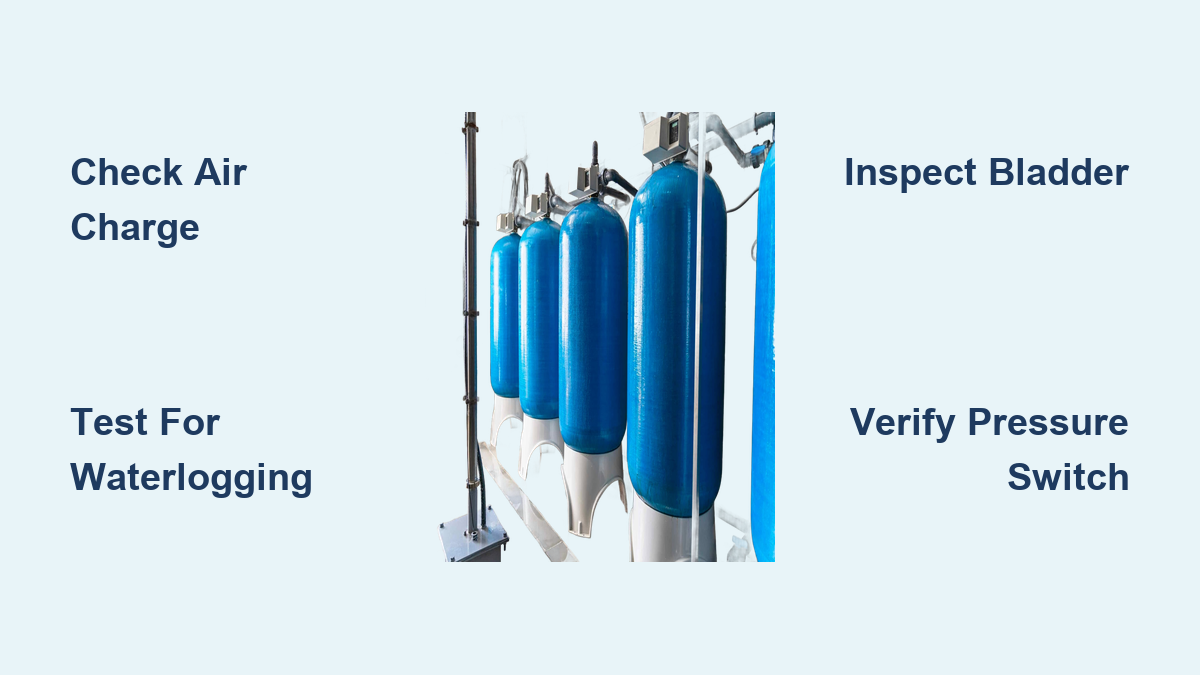
Weak water flow or a pump that won’t stop running often signals serious water pressure tank issues. These symptoms indicate your system cannot maintain the air cushion needed to regulate water delivery effectively.
You will learn to identify root causes like waterlogging, test air charges accurately, and replace faulty components. This guide provides clear steps to restore steady pressure and protect your well pump from damage.
Identify Warning Signs of Tank Failure

Recognizing specific symptoms early prevents expensive pump replacements and total system failure. Most water pressure tank issues manifest through distinct changes in water flow or pump behavior that you can observe daily.
Detect Low or Fluctuating Water Pressure
Weak streams from showers or faucets suggest the tank lacks sufficient stored energy. The system fails to push water through pipes when the internal air charge drops too low or the bladder ruptures.
- Air charge falls below required levels
- Internal bladder develops tears or holes
- Tank becomes completely waterlogged with no air space
Check your pressure gauge during operation. Readings consistently under 40 psi indicate the tank isn’t contributing to system pressure as designed.
Recognize Rapid Pump Cycling Patterns
Short cycling occurs when the pump activates every few seconds instead of running for full minutes. This rapid firing wears out motor components and spikes your electricity bill unnecessarily.
- Lost air charge prevents pressure buffering
- Water fills the entire tank volume
- Pressure switch malfunctions or gets stuck
A healthy system runs for at least one minute between cycles. Anything faster means the tank cannot absorb pressure changes during water usage.
Hear Banging Noises in Pipes
Loud thuds or knocking sounds when faucets close signal water hammer events. These noises happen because missing air cushions allow water to slam against pipe walls with force.
Measure and Adjust Tank Air Charge
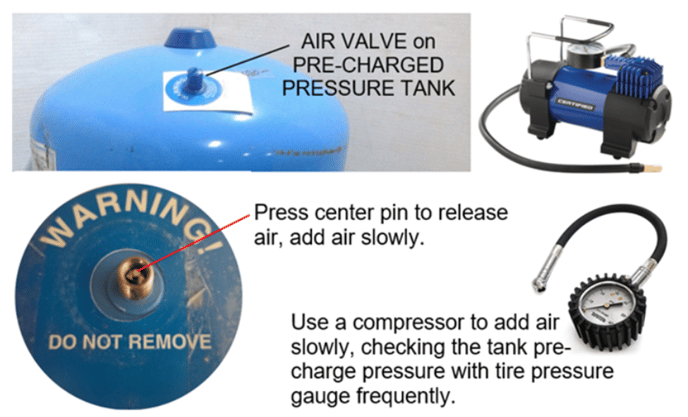
Proper air pressure forms the foundation of a working water system. Incorrect charges cause most water pressure tank issues by disrupting the balance between air and water volumes.
Test Air Pressure Correctly
Accurate testing requires removing all water weight from the equation first. Follow these steps to get a true reading of your air charge status.
- Switch off electrical power to the well pump completely
- Open a faucet and drain all water from the system
- Wait until no more water flows from the open tap
- Remove the valve cap on top of the pressure tank
- Press a tire gauge firmly onto the stem to read pressure
Target an air pressure reading 2 psi below your pump cut-in setting. Most 30/50 systems need exactly 28 psi of air when empty.
Recharge Low Air Levels Safely
Add air slowly to avoid damaging the internal bladder or creating uneven pressure zones. Use a standard bicycle pump or small air compressor for this task.
- Add air in short bursts rather than continuous streams
- Recheck pressure with your gauge after every few pumps
- Stop immediately once you reach the target number
- Never use oxygen or flammable gases for charging
Overfilling the tank creates excessive stress on the bladder material. Stick to the recommended settings for your specific pump configuration.
Avoid Common Charging Errors
Many homeowners make simple mistakes that lead to recurring problems. Understanding these pitfalls ensures your maintenance efforts actually work.
- Testing while water remains inside gives false high readings
- Ignoring the 2-psi rule causes poor bladder expansion
- Estimating air needs based on water pressure leads to errors
Always drain the tank fully before checking or adjusting air levels. Water pressure and air pressure are separate measurements that require different handling.
Diagnose a Waterlogged Pressure Tank
Waterlogging happens when water replaces the air cushion entirely. This condition forces the pump to handle every demand directly without any buffer support.
Spot Signs of Excess Water
A waterlogged tank feels different than a healthy one during inspection. You might notice the entire unit feels unusually heavy or solid when tapped.
- No air escapes when pressing the valve stem
- Pump cycles on and off every few seconds
- Rust or condensation appears near the top seam
- Tank makes a dull thud instead of a hollow ring
Steel tanks may rattle if water fills the upper chamber where air should exist. These signs point to a loss of the critical air pocket.
Perform the Tap Test Method
This simple physical test helps determine internal air versus water ratios without special tools. Use a rubber mallet or your knuckles for best results.
- Tap the side of the tank starting from the bottom
- Move upward slowly while listening to the sound
- Note where the tone changes from dull to hollow
A hollow sound at the top confirms air presence. A dull thud from bottom to top suggests the tank is full of water.
Restore Air by Draining Completely
Recharging a waterlogged tank often solves the problem if the bladder remains intact. You must remove all water before adding air back into the system.
- Turn off power to prevent accidental pump activation
- Drain all water through an open faucet or drain valve
- Inject air to the proper pressure level once empty
- Close faucets and restore power to restart the system
Recurring waterlogging usually means the internal bladder has failed. In that case, draining provides only a temporary fix.
Inspect Bladder Integrity and Interior Condition
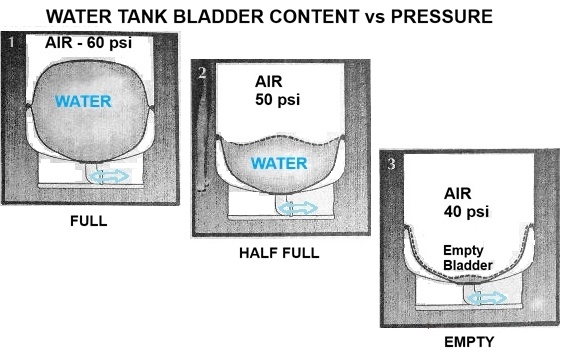
Internal damage causes many persistent water pressure tank issues in modern systems. The rubber bladder separates air and water, and its failure leads to mixing or total loss of function.
Test for Bladder Ruptures
A torn bladder allows air to mix with your water supply. You might see sputtering faucets or air escaping from showerheads unexpectedly.
- Drain the tank completely and add 10 psi of air
- Wait ten minutes without using any water
- Check if the pressure gauge holds steady
Rapid pressure drops with no visible external leaks indicate a ruptured bladder. Replacement of the entire tank is usually necessary since bladders rarely get repaired.
Examine Exterior for Corrosion
External rust often hints at internal deterioration or slow leaks. Inspect the tank surface carefully for any signs of moisture or decay.
- Rust spots near the base suggest leaking water
- Corroded valves prevent proper air charging
- Wetness around fittings indicates seepage issues
Steel tanks suffer from internal rust that reduces their lifespan significantly. Consider upgrading to composite models if corrosion is extensive.
Verify Pressure Switch and Gauge Function
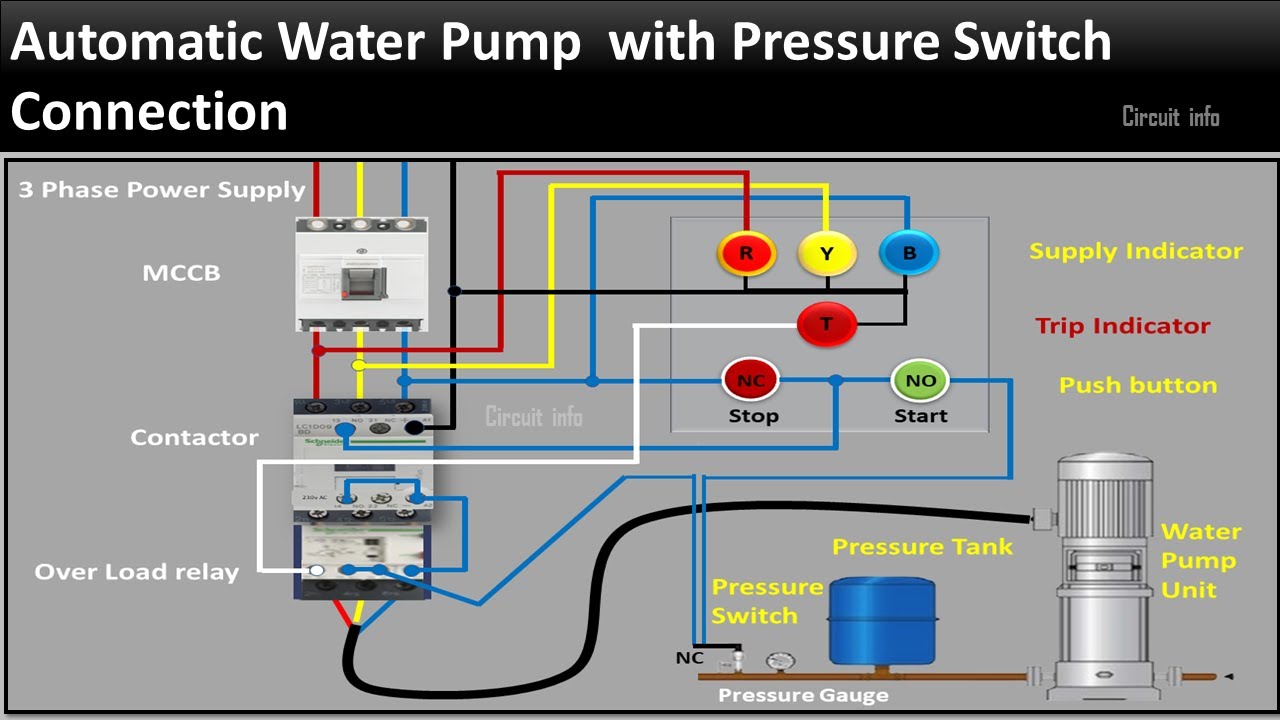
Control components dictate when your pump operates. Faulty switches or gauges create confusion and lead to incorrect diagnoses of water pressure tank issues.
Confirm Switch Activation Points
Standard systems activate at 30 psi and stop at 50 psi. Watch your gauge closely to see if the pump follows these settings accurately.
- Pump starts higher than 30 psi indicates high cut-in
- Pump stops lower than 50 psi suggests low cut-out
- Erratic starting points mean switch calibration issues
Adjust the range nut on the switch if pressures are slightly off. Replace the unit if contacts look burned or the casing is cracked.
Clean Debris From Switch Mechanisms
Mineral deposits and dirt can block the small ports in pressure switches. This buildup prevents accurate pressure sensing and causes erratic cycling.
- Cut power to the pump for safety
- Remove the cover and inspect internal contacts
- Use compressed air to blow out dust and debris
- Replace the switch if corrosion is visible
Clean switches ensure reliable operation and extend the life of your pump motor. Regular cleaning prevents many common cycling problems.
Replace Inaccurate Pressure Gauges
A broken gauge gives false information that leads to wrong adjustments. If the needle sticks or jumps wildly, trust neither the gauge nor your settings.
- Shut off power before removing the old gauge
- Wrap new gauge threads with Teflon tape
- Install a fresh 0 to 100 psi rated gauge
- Test the system to verify accurate readings
Accurate monitoring is essential for maintaining proper system balance. Never guess at pressures when a cheap gauge replacement solves the issue.
Prevent Future Water System Problems
Regular maintenance stops small issues from becoming major disasters. Proactive care extends the life of your tank and keeps water pressure consistent.
Schedule Annual System Inspections
Once a year, perform a complete checkup of your entire water system. This routine catches wear and tear before it causes failure.
- Verify air charge matches system requirements
- Inspect all connections for leaks or rust
- Test pressure switch operation and settings
- Drain sediment from the bottom of the tank
Annual checks save money by preventing emergency repairs. They also ensure your water quality remains high and safe.
Install Safety Relief Valves
Relief valves protect your system from dangerous over-pressurization events. These devices release water if the pressure switch fails to stop the pump.
Ensure your valve is installed correctly and not clogged with debris. Test it occasionally to make sure it opens and closes freely.
Consider Constant Pressure Upgrades
Modern variable speed pumps offer superior performance over traditional setups. These systems maintain steady pressure without the wide swings of older tanks.
- Maintain consistent water pressure at all fixtures
- Reduce pump cycling and energy consumption
- Extend overall system lifespan significantly
While the upfront cost is higher, the long-term savings and convenience often justify the upgrade for many homeowners.
Determine When Professional Help Is Needed
Some repairs require specialized tools or knowledge beyond typical DIY skills. Knowing your limits prevents injury and further system damage.
Handle Complex Bladder Replacements
Most modern tanks require full replacement rather than bladder repair. This job involves heavy lifting and disconnecting plumbing and electrical lines.
- Shut down the entire water and power system
- Drain all pipes and the tank completely
- Disconnect wiring and plumbing connections safely
- Lift and position the new heavy tank unit
Hire a licensed technician if you lack experience with plumbing or electrical work. Safety is paramount when dealing with high pressure and electricity.
Address Persistent Air in Water Lines
Continuous air bubbles suggest a leak in the suction line or a failing check valve. Locating these leaks often requires professional pressure testing equipment.
- Air enters through cracks in underground pipes
- Check valves may fail to hold prime properly
- Specialized tools locate hidden leaks accurately
Persistent air issues waste energy and reduce water quality. A pro can diagnose the exact source quickly.
Fix Recurring Short Cycling Problems
If the pump still cycles rapidly after your best efforts, deeper issues exist. Problems could include frozen bladders, bad switches, or well yield issues.
Professionals use flow meters and advanced diagnostics to find the root cause. Don’t risk damaging your pump further by guessing at complex electrical or hydraulic faults.
Frequently Asked Questions About Water Pressure Tank Issues
How often should I check the air charge in my pressure tank?
You should check the air charge at least once a year during routine maintenance. Systems with heavy usage or older tanks benefit from checks every six months to ensure optimal performance.
Why does my water pressure fluctuate when using multiple fixtures?
Fluctuating pressure often means the tank is waterlogged or the air charge is too low. The tank cannot buffer demand changes, causing the pump to struggle keeping up with flow requirements.
Can a pressure tank cause high electric bills?
Yes, a failing tank causes short cycling which makes the pump run constantly. This excessive operation significantly increases electricity consumption and drives up your monthly utility costs.
What causes a pressure tank to become waterlogged?
Waterlogging occurs when the internal bladder ruptures or the air charge dissipates over time. Without an air pocket, water fills the entire tank volume and eliminates pressure regulation.
Is it better to repair or replace a old steel pressure tank?
Replacement is usually better for old steel tanks due to internal corrosion risks. Modern bladder tanks last longer and provide more consistent pressure with less maintenance required.
How long does a typical water pressure tank last?
Most pressure tanks last between 10 to 15 years with proper maintenance. Water quality, usage frequency, and annual air charge checks heavily influence the actual lifespan of your unit.
Key Takeaways for Resolving Water Pressure Tank Issues
Fixing water pressure tank issues starts with accurate diagnosis of symptoms like short cycling or low flow. Regular air charge checks and annual inspections prevent most common failures before they disrupt your water supply.
Take action today by testing your tank pressure and inspecting for signs of waterlogging. If simple adjustments do not solve the problem, contact a professional technician to ensure your system runs safely and efficiently.