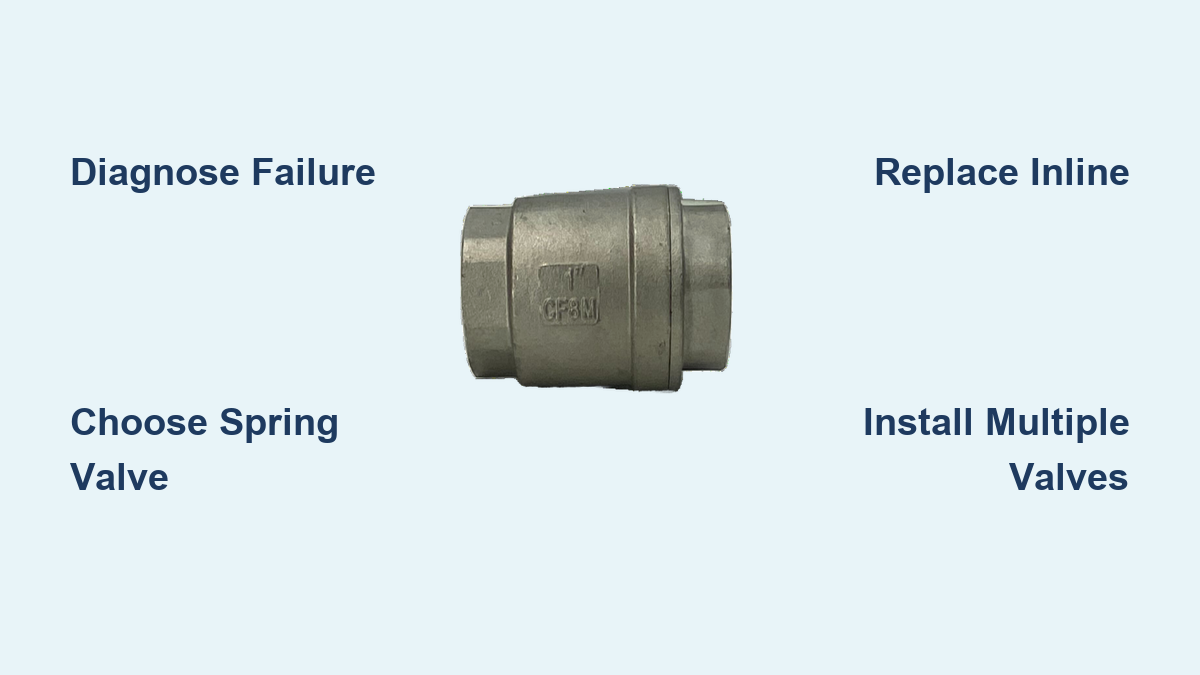
If your well pump turns on and off every few minutes or runs nonstop without water use, a failed check valve is the likely cause. This small but critical component keeps water flowing upward from your well and stops it from draining back down when the pump shuts off. When it fails, you lose pressure, the pump short-cycles, and you risk destroying the entire pump assembly.
Knowing how to replace check valve on well pump systems can save you hundreds or even thousands of dollars in premature pump failure and rising energy costs. For above-ground jet pumps or inline valves near the pressure tank, this is a manageable weekend project. For submersible pumps deep in the well, replacement requires pulling the entire pump, which calls for professional tools and training. This guide covers diagnosis, valve selection, and safe replacement whether your valve sits above ground or hundreds of feet below.
Diagnose Check Valve Failure Before Replacing Parts

Before you replace any components, confirm the check valve is actually the problem. A leaky pipe, faulty pressure switch, or failing pump can mimic the same symptoms. Use these proven diagnostic steps to isolate the real issue.
Identify the Most Common Failure Symptoms
Pump Short Cycles Constantly
If your pump turns on and off every 30 seconds to a few minutes with no water use, backflow is occurring. A failed check valve lets water drain back into the well, dropping pressure and triggering the pump to restart. This constant cycling wears out the motor fast and can triple your electricity bill.
Hearing a Loud Clunk at Shutdown
A sharp banging noise when the pump stops often signals water hammer caused by delayed valve closure. As the water column reverses, it slams into the pump or pipes. Some closure sound is normal, but a loud hammering points to poor valve performance.
Water Pressure Surges or Pulsates
You may notice pulsing water at faucets instead of steady flow. This heartbeat effect happens when the pump struggles against backflow. It can also indicate a waterlogged pressure tank, so rule that out during testing.
Loss of Prime in Jet Pumps
Jet pumps rely on a foot valve to keep the suction line full. If that valve fails, the pump loses prime and will not draw water until you manually refill the line. Repeated priming needs are a clear warning sign.
Run the Pressure Drop Test
This test separates the well system from your home plumbing to confirm where the leak lives.
-
Pressurize the System
Let the pump run until it reaches cut-off pressure (such as 60 PSI) and shuts off. -
Isolate the House Side
Close the main shutoff valve between the pressure tank and your home plumbing. -
Cut Power to the Pump
Turn off electricity at the breaker to prevent automatic restart. -
Monitor Pressure for One Hour
Watch the gauge. A drop of more than 5 PSI means the leak is in the well system, most likely the check valve or drop pipe. -
Interpret Your Results
• Stable pressure: Problem is in house plumbing.
• Steady drop: Failed check valve or cracked drop pipe.
• Rapid drop: Severe backflow or major leak.
Rule Out Pump or Tank Failure
Do not confuse valve problems with other failures. Use this quick comparison:
| Symptom | Likely Cause |
|---|---|
| Pump runs constantly, no water | Broken impeller, clogged intake, disconnected pipe |
| Pump does not start, no sound | Electrical fault, tripped breaker, failed pressure switch |
| Grinding or screeching noise | Motor bearing failure, internal pump damage |
| Pulsing pressure, cycling pump | Failed check valve or waterlogged pressure tank |
If the pump sounds normal but cycles too often, the check valve is the prime suspect.
Check Valve Placement and System Types

The location and number of check valves depend on your pump type. Proper placement prevents backspin, water hammer, and premature failure.
Submersible Pump Valve Strategy
Deep wells over 120 feet require multiple check valves to manage hydraulic shock and protect the pump.
Why One Valve Is Not Enough
In a 700-foot well, stopping the pump can create over 800 PSI of backpressure. A single valve at the bottom bears all that force, leading to rapid wear and water hammer. Staging valves breaks the water column into segments and reduces stress on each component.
Recommended Valve Placement
• Valve 1: At the pump discharge (built-in or first external).
• Valve 2: Within 25 feet of the static water level to hold vacuum if the lower valve fails.
• Valve 3 and beyond: Every 200 feet up the drop pipe.
• Valve at Surface: Optional for extra protection near the tank.
Example for a 750-foot well: Install valves at 700 ft (pump), 675 ft (within 25 ft of water), 475 ft, 275 ft, and 75 ft.
Jet Pump Valve Setup
Jet pumps sit above ground and rely on suction, making the foot valve critical.
Foot Valve at the Bottom
This valve sits at the end of the suction line in the well. It includes a strainer to block debris and must hold the prime. If it fails, the suction line drains and the pump stops working.
Inline Check Valve (Optional but Recommended)
Install a second valve near the pump or pressure tank. It reduces stress on the foot valve, maintains tank pressure, and helps prevent water hammer.
Choose the Right Check Valve for Your System
Using the wrong valve leads to early failure. Match size, type, and material to your system demands.
Select by Valve Type
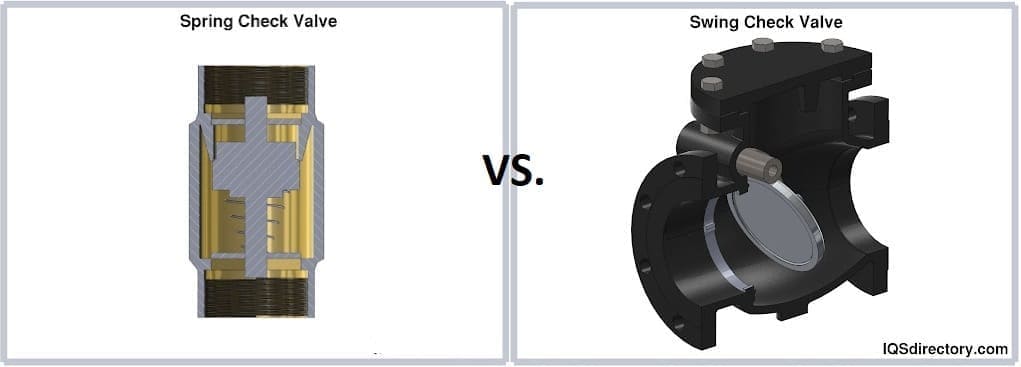
Spring-Assisted Check Valves
These are the best choice for wells. A spring ensures fast, positive closure to stop backflow and reduce water hammer. They install vertically or horizontally.
Swing Check Valves
Avoid these for well systems. They close slowly by gravity, allowing backflow and causing loud water hammer. They also require horizontal installation.
Foot Valves
Use only on jet pump suction lines. These combine a check valve with a screen and must stay submerged.
Match Material to Water Conditions
| Material | Best For |
|---|---|
| Brass | General use, moderate mineral content |
| Stainless Steel | Hard water, high pressure, deep wells |
| PVC | Shallow, low-pressure systems only |
| Ductile Iron | Large diameter, industrial applications |
For most residential wells, brass or stainless steel spring-assisted valves deliver the best results.
Confirm Size and Pressure Rating
• Pipe Size: Match your drop pipe (such as 1 inch or 1.25 inch).
• Flow Rate: Ensure the valve supports your pump’s GPM.
• Pressure Rating: Use valves rated for at least 400 PSI in deep wells.
• Flow Direction: Always install with the arrow pointing toward the pressure tank.
Gather Tools and Materials Before Starting
Prepare everything in advance to avoid mid-job delays.
Essential Tools
• Adjustable wrenches or channel locks
• Pipe wrench for stubborn fittings
• Pipe cutter and deburring tool if modifying pipe
• Wire brush to clean threads
• Torque wrench for submersible valves
• Poppet wrench if required by manufacturer
• Voltage tester to confirm power is off
Supplies Needed
• New check valve in correct type and size
• Teflon tape (PTFE) or pipe dope
• O-rings or gaskets if included
• Plugs for unused ports on replacement valves
• Safety gloves and eye protection
Replace an Inline Check Valve (DIY-Friendly)
If your valve sits near the pressure tank or pump, you can replace it yourself in under an hour.
Shut Off and Depressurize the System
- Turn off power at the breaker.
- Close the main shutoff valve on the house side of the tank.
- Open a faucet to release pressure.
- Confirm no water flows and the gauge reads zero.
Remove the Old Valve
- Locate the check valve on the discharge line between pump and tank.
- Use two wrenches: one to hold the fitting, one to unscrew the valve.
- Remove the valve and inspect for debris, sand, or mineral buildup.
- Clean both pipe ends with a wire brush.
Install the New Valve
- Wrap male threads with Teflon tape (clockwise, 3 to 4 layers).
- Check flow direction: the arrow must point toward the tank.
- Hand-tighten the new valve to avoid cross-threading.
- Use wrenches to secure, tight but not over-torqued.
- Plug any unused ports on replacement models.
Test for Leaks and Function
- Slowly open the shutoff valve.
- Check connections for leaks while the system is pressurized.
- Restore power.
- Watch the pressure gauge: the pump should reach cut-off and stop.
- Listen for smooth valve closure (a firm click, not a bang).
- Monitor for 30 minutes to confirm no short cycling occurs.
Replace a Submersible Pump Check Valve (Professional Job)

This requires pulling the entire pump from the well. Unless you have a tripod, winch, and experience, hire a professional.
Prepare and Power Down
- Shut off power at the breaker and control box.
- Lock out and tag out the system.
- Clear the area around the well head.
- Set up a tripod or hoist directly over the casing.
Pull the Pump Assembly
- Disconnect electrical wires and drop pipe at the well head.
- Attach the lifting cable to the pump’s safety rope.
- Slowly raise the pump, motor, and drop pipe.
- Lay the assembly on supports and drain water from the pipes.
Replace the Valve at Pump Discharge
- Locate the check valve, usually threaded onto the pump outlet.
- Use a poppet wrench if required by the manufacturer.
• Insert the wrench and align the notches.
• Turn clockwise to loosen and remove. - Clean pump threads and inspect for damage.
- Install the new valve:
• Apply thread sealant only if specified by the manufacturer.
• Screw in by hand, then tighten with the poppet wrench counterclockwise.
• Torque to 15 to 20 inch-pounds and do not over-tighten. - Add intermediate valves every 200 feet during reassembly.
Reinstall and Test
- Lower the pump carefully into the well to avoid snagging.
- Reconnect wiring and secure the well cap.
- Open a faucet to vent air.
- Restore power.
- Monitor startup: pressure should build steadily with no leaks or rapid cycling.
Prevent Future Check Valve Failures
A new valve will not last long without preventive care. Follow these steps to extend system life.
Install a Sediment Filter
Sand, silt, and rust are the top causes of valve failure. Add a 20 to 50 micron filter before the pressure tank to catch debris before it reaches the valve.
Monitor System Performance Weekly
Check the pressure gauge often. Sudden drops or frequent cycling mean trouble. Listen for water hammer, because early detection prevents pump damage.
Schedule Annual Professional Inspections
Have a technician inspect valves, wiring, and pump condition every year. They can spot corrosion, wear, or improper valve sizing before failure occurs.
Use Multiple Valves in Deep Wells
Never rely on a single check valve in wells over 200 feet. Multiple valves distribute hydraulic stress and protect your pump from backspin and upthrust.
Cost and Time Comparison
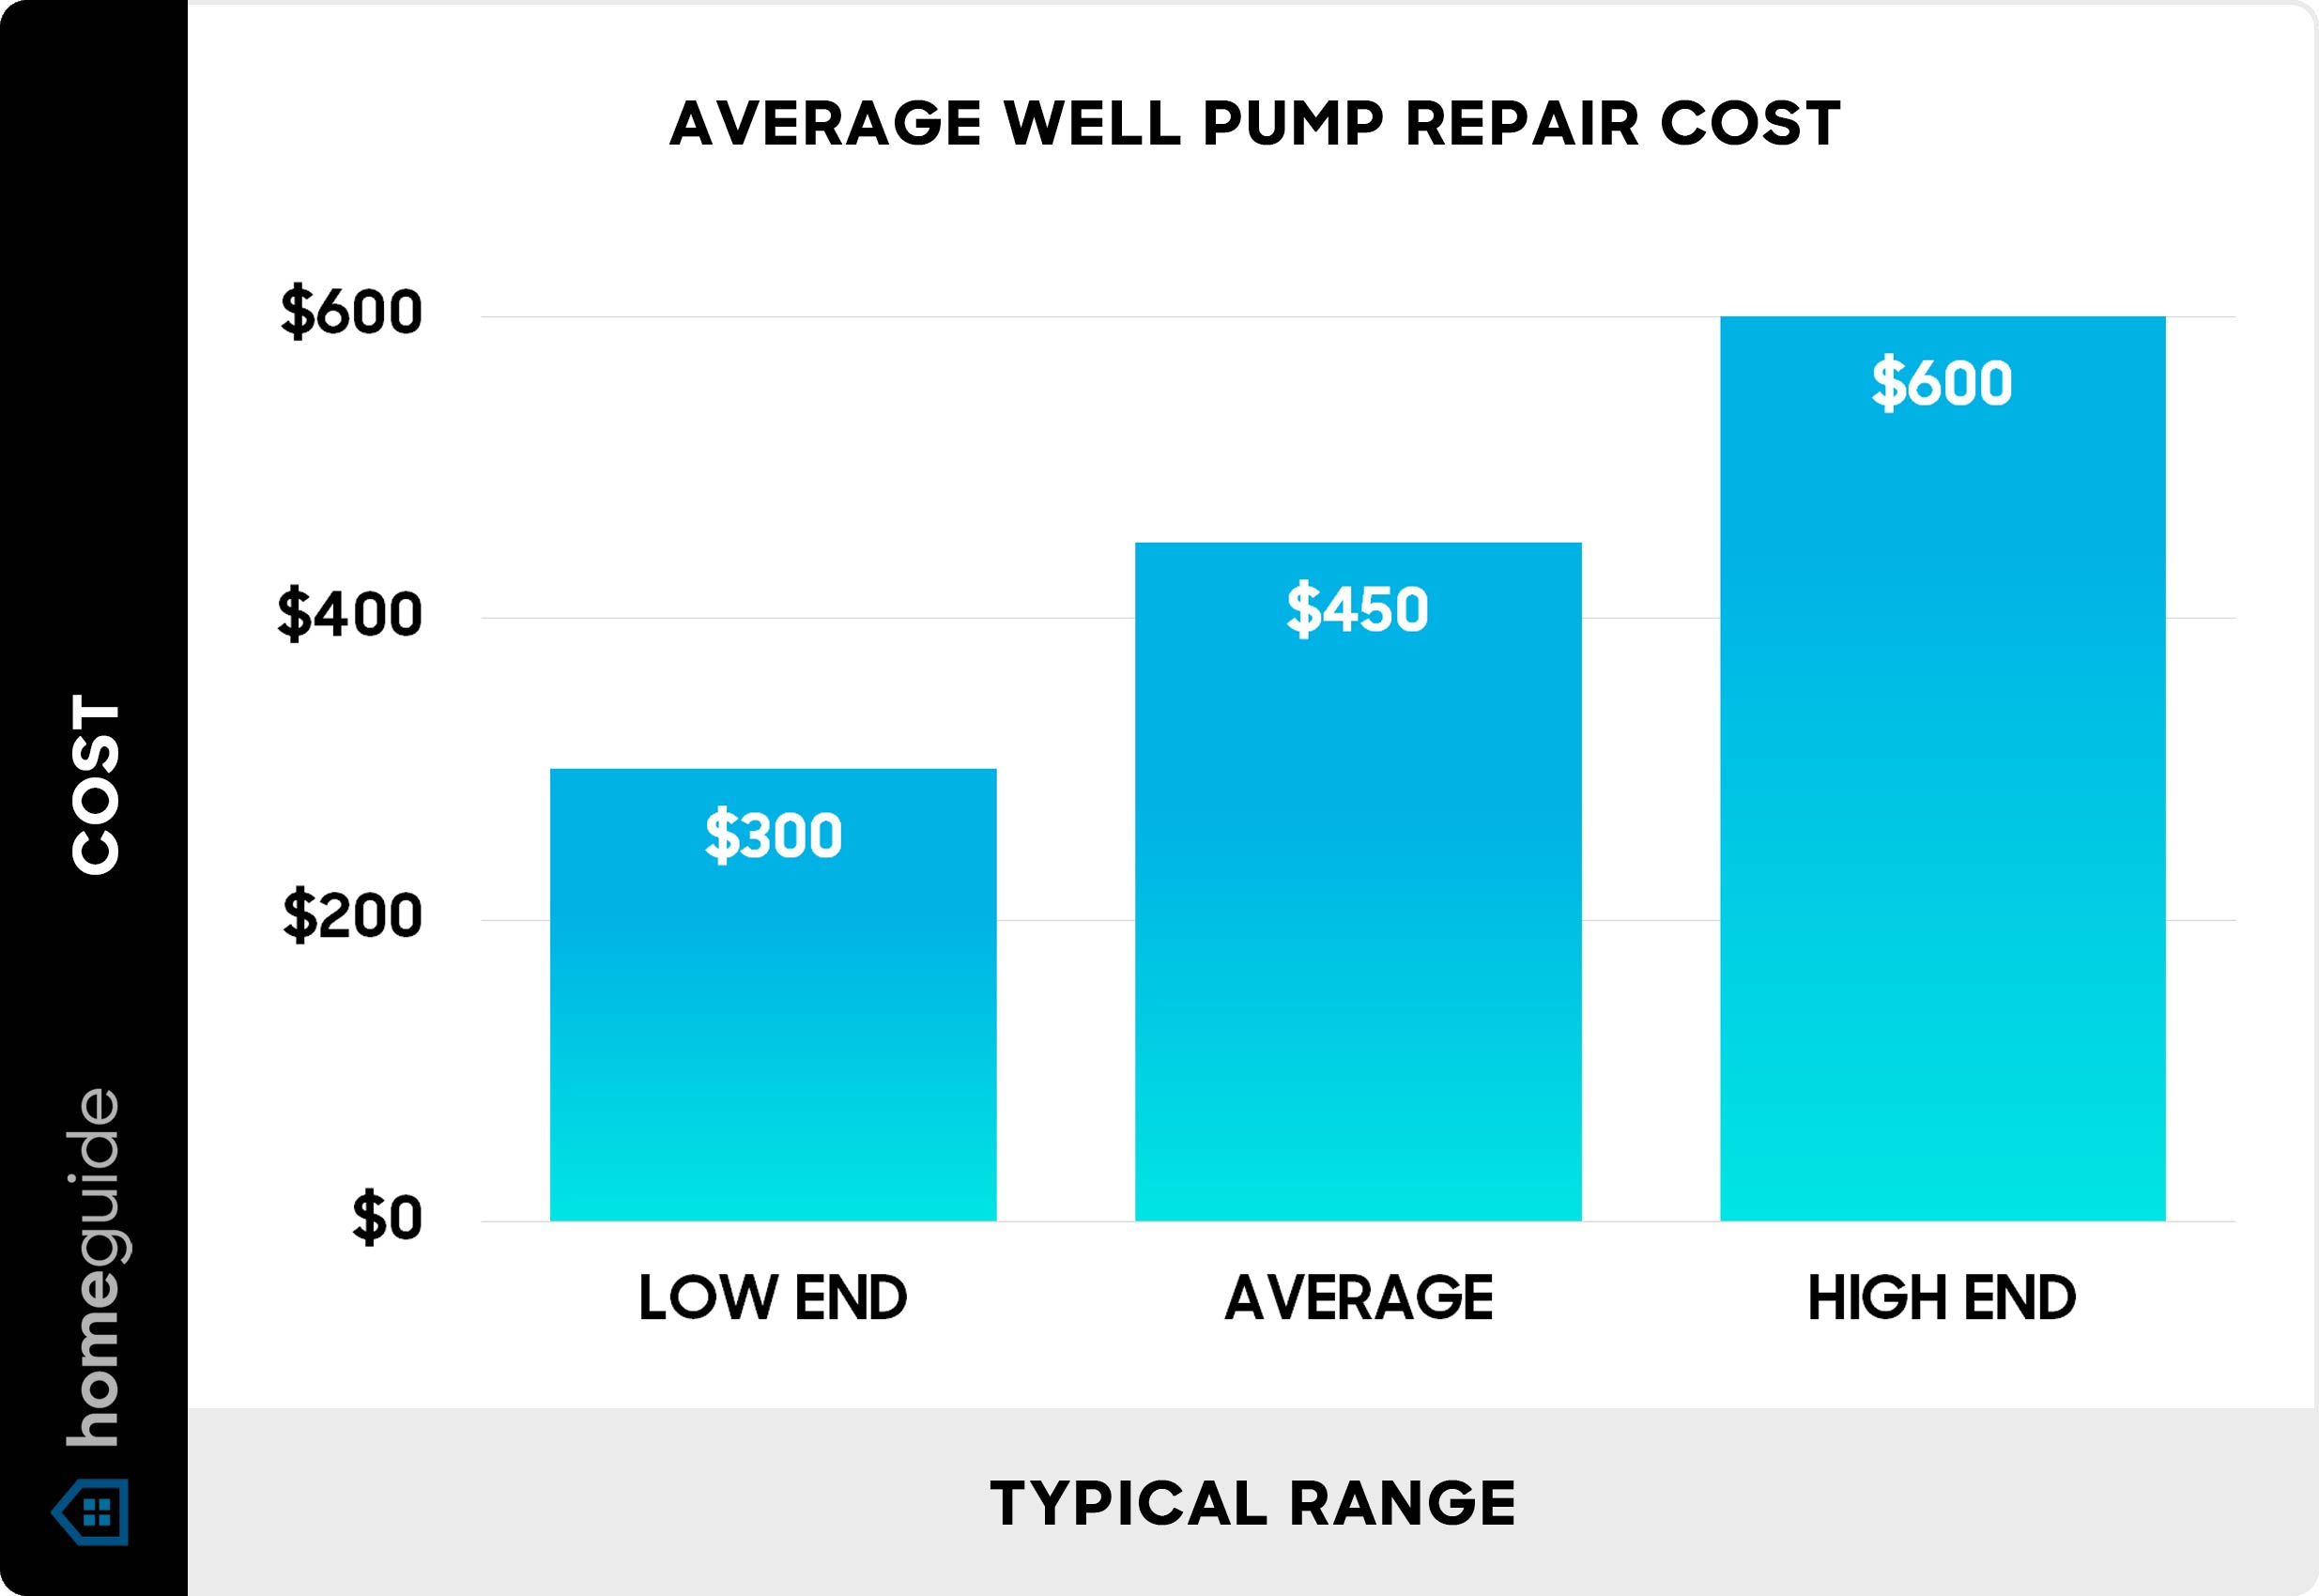
| Task | Time Required | DIY Cost | Pro Cost | Saves vs. Pump Replacement |
|---|---|---|---|---|
| Inline valve replacement | 30 to 60 min | $50 to $80 | $150 to $300 | $500+ |
| Submersible valve replacement | 2 to 4 hours | Not recommended | $300 to $1,000 | $1,500 to $3,000 |
Fixing a leaking check valve pays for itself within months through lower energy bills and avoided pump repairs.
Frequently Asked Questions About Replacing a Well Pump Check Valve
How many check valves does a well pump need?
The number depends on pump type and well depth. Jet pumps need at least one foot valve at the bottom plus optionally one inline near the tank. Submersible pumps need one at the pump discharge, a second within 25 feet of the water level, and additional valves every 200 feet of depth. A 750-foot well may require 5 to 6 valves total.
Can a bad check valve cause the pump to run continuously?
Yes. When the valve fails to hold pressure, water drains back into the well and the pressure switch constantly signals the pump to restart. This leads to nonstop cycling or continuous operation, which drastically increases energy consumption.
Is replacing a well pump check valve a DIY project?
It depends on accessibility. Inline valves near the pressure tank or jet pump suction lines above ground are DIY-friendly. Valves on submersible pumps deep in the well require heavy lifting equipment and expertise. Attempting this without proper tools can result in dropped pumps, injury, or well contamination.
What is the difference between a foot valve and a check valve?
A foot valve is a specific type of check valve with a built-in strainer, designed to sit submerged at the bottom of a suction line on jet pumps. A standard check valve is used in pressurized lines and does not include a strainer.
Why does my water pressure surge or pulse?
Surging often indicates the check valve is not holding the water column, causing the pump to cycle rapidly. It can also mean the air charge in the pressure tank has become waterlogged due to constant refilling. Diagnostics should rule out a failing pressure tank bladder as well.
How do I know if I need to replace the check valve or the whole pump?
Run the pressure drop test. If pressure drops with the house isolated, the leak is in the well system. If the pump sounds normal but cycles frequently, the valve is likely the problem. If the pump makes grinding noises, runs without water, or does not start, the motor or impellers have probably failed.
Key Takeaways for Replacing Your Well Pump Check Valve
Replacing a check valve is one of the most cost-effective repairs in well system maintenance. For accessible inline valves, this is a fast DIY project that takes under an hour and costs less than $80 in parts. For submersible systems, professional replacement costs between $300 and $1,000 but prevents pump replacement bills that can exceed $3,000.
Diagnose first using the pressure drop test, choose a spring-assisted valve in brass or stainless steel, and always install with the flow arrow pointing toward the pressure tank. In deep wells, stage multiple valves every 200 feet to distribute hydraulic stress and protect your pump for years to come.
Your next step: Check your pressure gauge right now. If your pump cycles more than once every 10 minutes with no water use, order a spring-assisted check valve in the correct size and schedule your replacement this weekend.