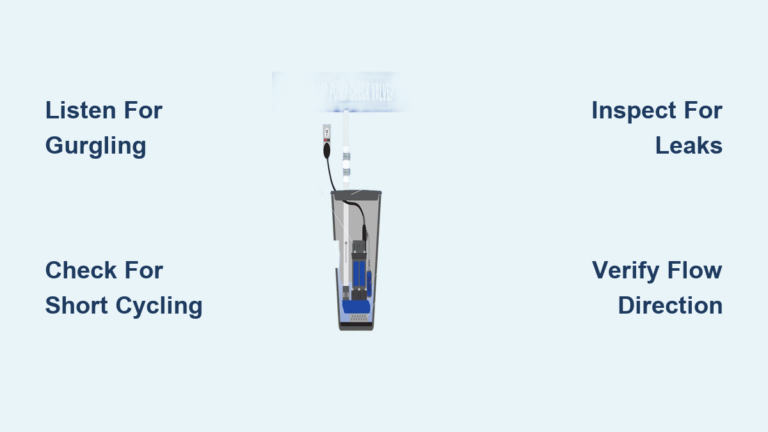
Nothing ruins an RV trip faster than a cold shower in the middle of the desert. When your rv hot water tank repair is overdue, comfort takes a backseat to survival mode. Whether you are parked in the Arizona sun or prepping for a mountain getaway, a working water heater is essential for cleaning and cooking.
The good news is that most issues can be diagnosed and fixed quickly with the right knowledge. This guide walks you through common problems, DIY fixes, and when to call a pro. You will learn to restore hot water without derailing your journey using proven methods.
Identify Common RV Water Heater Problems
Most RV hot water tank issues fall into five main categories. Identifying the right one saves time, money, and guesswork during your trip.
Why Is There No Hot Water?
If the tap runs cold, the cause could be a faulty heating element in electric mode. It might also be a bad igniter or gas valve if you run on propane. Check for a tripped reset button or a blown fuse in your power panel. An empty tank or airlock can also stop heat production instantly.
What Causes Foul or Discolored Water?
Smelly or rusty water usually means bacterial buildup inside the tank. This is common in tanks unused for weeks at a time. A sulfur reaction between the anode rod and water minerals often creates a rotten egg smell. Corroded tank lining or an old anode rod can also discolor your supply.
Where Is the Leak Coming From?
Water pooling under your RV requires immediate attention to prevent damage. The pressure relief valve is a very common source of leaks. Check the drain plug and inlet or outlet fittings for loose connections. A cracked tank usually requires full replacement rather than a simple fix.
Why Does the Tank Make Strange Noises?
Popping, rumbling, or knocking sounds often come from sediment buildup on the heating element. Thermal expansion in pipes can also create knocking noises during operation. Regular flushing prevents this mineral accumulation and keeps your system quiet.
What Causes Intermittent Heating?
If hot water cuts in and out, you likely have a faulty thermostat. Low propane pressure can also cause the flame to flicker or die. Loose electrical connections may interrupt power to the heating elements. Check your gas supply and voltage with a multimeter if you feel comfortable.
Diagnose the Power Source Before Repairs
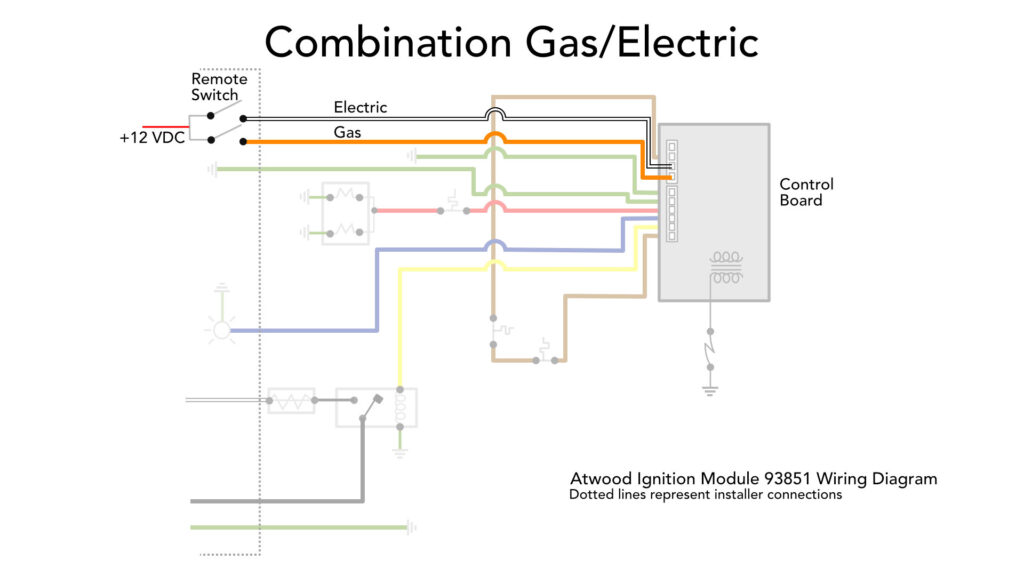
Before tearing into the tank, you must confirm power delivery to the unit. Many perceived failures are actually simple power supply issues.
How to Test Electric Function
- Plug your RV into shore power or start your generator.
- Turn on the water heater switch inside your RV.
- Listen for a click which means the thermostat activated.
- Wait 15 to 20 minutes and check for heat.
If there is no heat, check the circuit breaker and reset it if tripped. Inspect fuses in your power panel for signs of blowing. Test the heating element with a multimeter which should read 10 to 16 ohms. If the element reads “OL” or open loop, it is dead and needs replacement.
How to Check Propane Operation
- Ensure your propane tank is open and has sufficient fuel.
- Turn on the water heater at the control panel.
- Listen for ignition clicks near the burner assembly.
If there is no flame, inspect the burner assembly for dust or spider webs. Clean the orifice and gas line carefully to ensure flow. Verify DC power to the gas valve since 12 volts are required for operation. Never smell for gas leaks directly. Use soapy water on connections because bubbles mean leaks are present.
Flush the Tank to Remove Sediment Buildup
Sediment reduces efficiency and causes annoying noises during operation. You should flush your tank every six months to maintain performance.
Required Tools for Flushing
- Garden hose
- Bucket or drain line
- Wrench for drain valve
- Replacement anode rod if needed
Steps to Flush Your RV Water Heater
- Turn off all power and gas sources to the unit.
- Shut off the cold water inlet valve.
- Open a hot water tap in the RV to relieve pressure.
- Attach a hose to the drain valve and open it.
- Open the pressure relief valve to help the tank drain faster.
- Once empty, close the drain valve securely.
- Reopen the cold water valve to refill the tank.
- Close the hot tap when water flows steadily without air.
- Restore power and test the system.
This process takes about 30 to 45 minutes and is considered easy difficulty.
Replace the Anode Rod to Prevent Corrosion
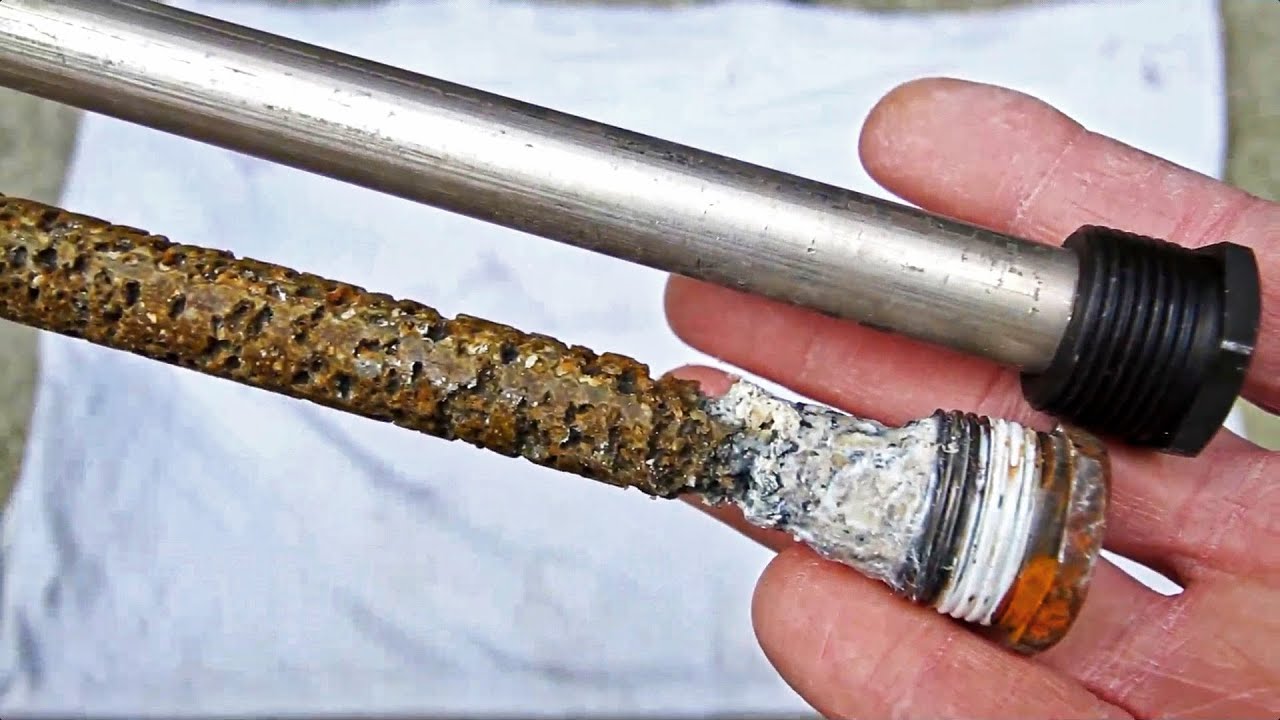
Sacrificial anode rods prevent tank corrosion by attracting minerals. You should replace this rod every one to two years depending on usage.
How to Replace the Anode Rod
- Drain the tank completely using the steps above.
- Locate the anode rod on the top or side of the tank.
- Use a socket wrench to unscrew the old rod.
- Insert a new magnesium or aluminum-zinc rod.
- Re-seal the connection and refill the tank.
Some models have combo drain and anode rods that replace as a single unit. Use dielectric grease on threads to prevent seizing in the future. This small part saves your tank from rusting out prematurely.
Fix Leaks at Fittings and Valves Quickly
Not all leaks mean total tank failure so try these fixes first. Addressing them early prevents water damage to your RV floor.
Pressure Relief Valve Leak Solutions
This leak is often caused by overheating or excess pressure in the system. Replace the valve if it drips continuously after cooling down. Never cap or block this valve because it is a critical safety device.
Drain Valve Leak Fixes
Leaks here are common on older tanks with worn seals. Replace the old valve with an RV-specific replacement part. Always ensure it is closed fully after winterizing your system.
Inlet and Outlet Fitting Leaks
Tighten these connections with a wrench but do not over-torque them. Use Teflon tape on threaded connections to ensure a tight seal. Replace O-rings immediately if they look cracked or dry. Look for white crust around fittings which indicates mineral deposits from past leaks.
Test and Replace the Heating Element
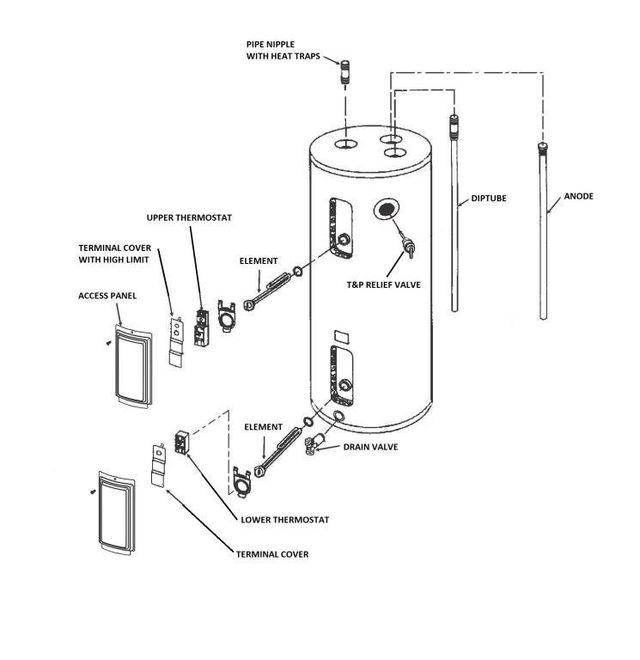
Electric-only or dual-mode heaters rely heavily on this specific part. Failure here means no hot water when running on shore power.
Removal Steps for Old Element
- Drain the tank completely.
- Shut off all power sources.
- Remove the access panel on the water heater.
- Disconnect wires from the element terminals.
- Use a socket to unscrew the element from the tank.
Install New Heating Element
- Insert a new 120V, 1500W element into the opening.
- Hand-tighten the base then give it a quarter turn with a wrench.
- Reconnect the wires to their proper terminals.
- Refill the tank completely before restoring power.
Never power an empty tank because the element will burn out instantly. This is a critical rule for rv hot water tank repair success.
Decide When to Replace the Entire Tank
Repair is not always possible if the structural integrity is compromised. Consider replacement if your tank is over 10 years old. Visible rust or bulging on the exterior signals internal failure. Internal corrosion confirmed by flakes in the water means the end is near. Multiple recurring leaks suggest the tank walls are thinning.
Tank vs. Tankless Comparison

| Feature | Tank Heater | Tankless Heater |
|---|---|---|
| Upfront Cost | $200 to $500 | $800 to $1,500 |
| Installation | Simple | Requires upgrades |
| Hot Water Supply | Limited 6 to 10 gal | Continuous |
| Fuel Efficiency | Lower | 30 to 50% more efficient |
| Space Needed | Larger footprint | Compact |
Traditional tanks are best for most RVs due to easier repair and reliability. Tankless units suit full-timers who need endless hot water and have complex needs.
Prevent Future Failures with Maintenance
Avoid breakdowns with simple habits and regular checks. Routine care extends the life of your water heater significantly.
Routine Maintenance Checklist
- Flush tank every 6 months
- Inspect anode rod annually
- Check pressure relief valve monthly
- Winterize properly by draining fully
- Run heater monthly even in storage
Add a water filter to reduce sediment entering the system. This simple step reduces buildup inside the tank.
Know the Warning Signs of Failure
Catch problems early to avoid being stranded without water. Cold water often means a bad element or no power source. A rotten egg smell indicates bacteria or anode reaction issues. Leaks under the RV point to fitting or tank failure. Clicking but no heat suggests an igniter issue needing cleaning. Short hot water supply usually means sediment buildup requiring a flush.
Final Thoughts on RV Hot Water Tank Repair
Most rv hot water tank repair tasks are manageable with basic tools and this guide. Start with power checks, flush the tank, and inspect the anode rod regularly. Stop leaks at the source and replace worn parts promptly to avoid bigger issues.
For complex gas or electrical faults, trust a certified RV technician. Investing in a new unit can improve efficiency if your current tank is old. With regular care, your water heater will last for years keeping every journey comfortable.
Frequently Asked Questions About RV Hot Water Tank Repair
How often should I flush my RV water heater?
You should flush your RV water heater every six months to remove sediment. This prevents noise and improves heating efficiency significantly.
Why does my RV water smell like rotten eggs?
This smell usually comes from a reaction between the anode rod and sulfur in the water. Flushing the tank and replacing the anode rod typically solves this issue.
Can I repair a leaking RV water heater tank?
You can fix leaks at fittings and valves, but a cracked tank cannot be repaired. If the tank itself is leaking, you must replace the entire unit.
How long does an RV water heater last?
A well-maintained RV water heater typically lasts 8 to 10 years. Regular anode rod replacement and flushing extend this lifespan significantly.
Is it hard to replace an RV heating element?
Replacing a heating element is moderate difficulty and requires basic tools. You must drain the tank and disconnect power before starting the job.
When should I call a professional for repairs?
Call a professional for gas leaks, complex electrical issues, or full tank replacements. Certified technicians ensure safety and proper installation for these critical systems.