A leaking or clogged drain valve turns simple maintenance into a messy disaster involving scalding water and wasted time. Knowing how to replace hot water tank drain valve components properly saves you from draining 50 gallons or waiting hours for reheating.
This guide details the safe “live-swap” method to change your valve in under 15 minutes while keeping hot water available. You will learn essential safety steps, how to create a vacuum seal, and why upgrading to brass prevents future failures.
Essential Safety Steps Before Repairing Your Water Heater
Isolating energy and water sources is the mandatory first step to prevent electrical shock, gas ignition, or severe burns. You must verify these systems are off before touching any plumbing connections.
Shut Off Power Sources Correctly
For electric water heaters, locate your main electrical panel and flip the dedicated breaker to the off position. Verify the unit is dead by checking that any indicator lights on the heater are dark.
Gas water heater owners must turn the gas control knob to the “Pilot” setting. This stops the main burner from firing while you work on the plumbing components.
Wait two to three hours if the unit was recently active. The water inside should feel only warm to the touch on the tank surface before you proceed.
Close the Cold Water Inlet Valve
Find the cold water shutoff valve located on the pipe entering the top of your water heater tank. Turn this valve clockwise until it is completely closed to stop new water entry.
If you have an older gate valve, open it fully first, then close it, and finally open it a quarter-turn. This specific motion helps prevent the valve from seizing in the future.
Turn off the main water supply to your entire house if no local shutoff valve exists near the heater.
Create an Airlock to Stop Water Flow
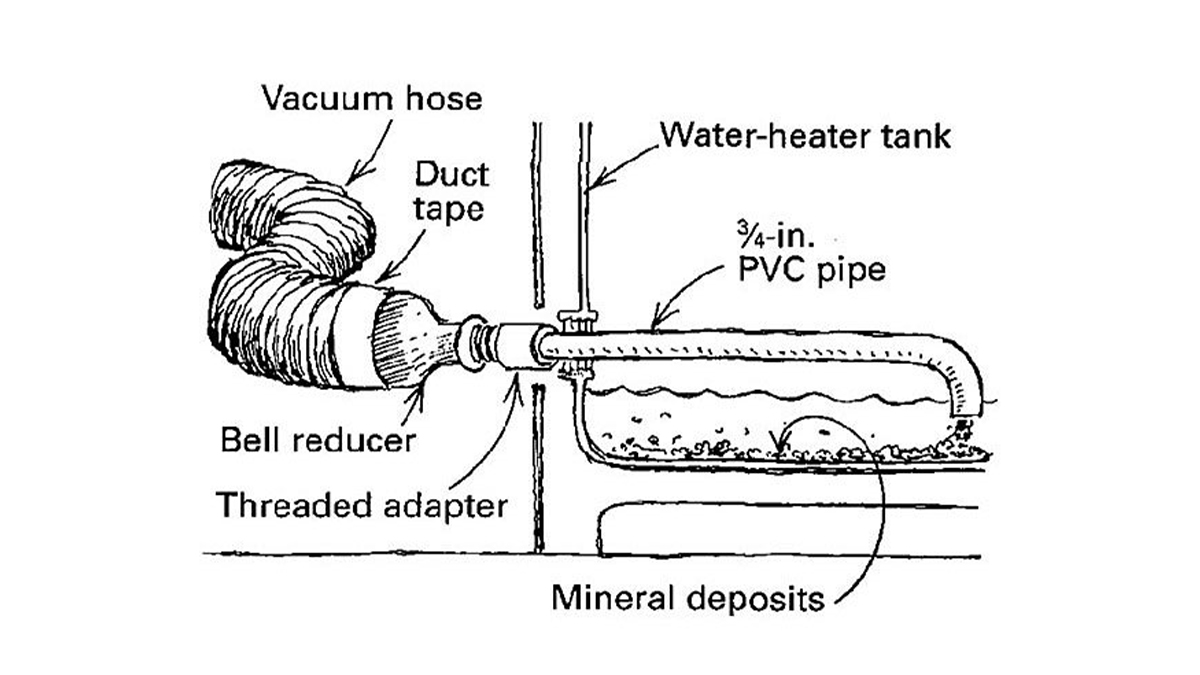
Creating a vacuum seal inside the tank allows you to remove the valve without emptying the entire unit. This technique relies on atmospheric pressure holding the water in place.
Release Internal Tank Pressure
Locate the Temperature and Pressure Relief (TPR) valve on the side or top of your tank. Lift the lever briefly until you hear a gurgling sound indicating air and water are escaping.
Allow it to run until the noise stops completely, then close the lever tightly. This action equalizes the pressure and prepares the tank for the airlock process.
Confirm the Vacuum Seal Is Active
Open your existing drain valve slightly and direct the flow into a bucket. Water will rush out initially but will slow down and stop as air enters the top of the tank.
Close the drain valve immediately once the flow stops. This confirms the airlock is active and you can proceed with the replacement safely.
Warning: Do not attempt this method if your current valve is cracked plastic. Brittle plastic can snap and release 40 gallons of scalding water instantly.
Select the Best Brass Replacement Valve

Choosing the wrong material leads to premature failure and recurring leaks. Upgrading to a high-quality brass valve ensures long-term durability and easier maintenance.
Why Brass Outperforms Plastic
Most original equipment valves are plastic, which degrades quickly under heat and pressure stress. These valves often crack or clog with sediment, making future flushing difficult.
Switch to a brass valve to resist corrosion and handle high pressure effectively. A full-port ball valve design allows for faster sediment removal during routine flushing.
Match the Shank Length Precisely
The shank is the threaded portion that screws into the tank, and its length is critical for a proper seal. The new valve shank must be equal to or longer than the old one.
A shank that is too short will not thread fully into the tank nipple, causing immediate leaks at the connection point. Remove your old valve and take it to a supply store to match the size exactly.
Standard residential sizes are typically ½-inch NPT, though ¾-inch offers better flow rates. Ensure any new component is rated specifically for potable water use.
Build Your Own or Buy Pre-Made
- Pre-made brass valve: Ideal for beginners as it comes ready to install with correct dimensions.
- Custom-built valve: Preferred by professionals using a ¾-inch full-port ball valve and a brass nipple cut to length.
- Sealant requirement: Apply Teflon tape or pipe dope to the threads of your chosen assembly before installation.
Pro Tip: Test the ball valve handle rotation before installing. Ensure it can turn 90 degrees without hitting the tank body or nearby pipes.
Remove the Old Drain Valve Safely
You can choose between a full drain for maximum safety or a live-swap for speed. Your choice depends on the condition of the existing valve and your comfort level.
Full Drain Method for Plastic Valves
Use this approach if the current valve is plastic, severely corroded, or if you cannot establish an airlock.
- Connect a garden hose to the drain valve and route the other end to a floor drain.
- Open the valve and let the tank empty completely, which may take 45 minutes.
- Close the valve once empty and disconnect the hose to begin removal.
- Proceed to unscrew the old valve with a pipe wrench.
Live-Swap Method for Speed
Replace the valve in under 15 minutes without draining the tank or losing hot water.
- Confirm the airlock is active by ensuring water stopped flowing earlier.
- Have your new brass valve ready with sealant applied to the threads.
- Quickly unscrew the old valve using a pipe wrench while holding a bucket underneath.
- Immediately insert and hand-tighten the new valve to maintain the vacuum.
Speed is key: Act fast during the swap to minimize water loss. This method saves significant time and energy costs.
Free a Stuck or Seized Valve

Mineral buildup often welds valves in place, requiring specific techniques to break them free without damage. Never force a valve as this can strip the tank threads.
Apply Penetrating Oil Generously
Spray penetrating oil like PB Blaster onto the base and threads of the stuck valve. Let it soak for 15 to 30 minutes to break down rust and scale bonds.
Use a Pipe Wrench with Leverage
An adjustable wrench often slips, so use a pipe wrench for a secure grip on the valve body. Slide a metal pipe over the wrench handle to extend leverage if needed.
Apply steady pressure using your foot or knee rather than jerking the handle. Gentle tapping on the valve body with a hammer can also help disrupt corrosion bonds.
Remove Broken Plastic Fragments
If a plastic valve cracks during removal, you must extract the pieces carefully.
- Use a hammer and flathead screwdriver to break the valve body into smaller parts.
- Pry out plastic fragments from the tank threads gently.
- Clean the tank nipple thoroughly with a wire brush.
- Avoid damaging the internal threads, as stripping them requires tank replacement.
Never use a torch on plastic valves as it can melt the material into the threads or cause ignition.
Install the New Brass Valve Correctly

Proper installation prevents leaks and ensures your new valve lasts for the life of the water heater. Follow these steps for a secure fit.
Clean and Prep the Tank Nipple
Remove all debris from the drain port on the tank before installation. Use a wire brush to scrub the threads until they are shiny and free of old sealant.
Apply Sealant to External Threads Only
- Teflon tape: Wrap clockwise around the male threads three to four times.
- Pipe dope: Apply a thin layer to the external threads only.
Warning: Never put sealant inside the valve or on sealing surfaces. This can clog flow or prevent a proper seal.
Hand-Start and Tighten Snugly
Screw the valve in by hand first to ensure you do not cross-thread the connection. Once fully started, use a pipe wrench to tighten it until snug.
Do not overtighten the valve, as this can crack the body or strip the tank threads. A snug fit plus a quarter turn is usually sufficient.
Add a Protective Plastic Sleeve
Cut a slit down the side of the old plastic valve body and slide it over the new brass valve. This acts as a buffer to prevent over-tightening in the future.
Test for Leaks and Restore Hot Water

Verify your work before returning the system to full operation. Checking for leaks now prevents water damage later.
Slowly Reintroduce Water Supply
Open the cold water supply valve slowly while watching the new drain valve connection. Look closely for any drips or signs of leaking at the threads.
Tighten the valve slightly or reapply sealant if you see any water escaping. Ensure the connection is completely dry before proceeding.
Purge Air and Restore Power
Open a hot water faucet in your kitchen or bathroom to purge air from the system. Let it run until water flows steadily without sputtering or air bursts.
- Gas units: Turn the control knob from “Pilot” to “On” to ignite the burner.
- Electric units: Flip the circuit breaker back to the on position.
Test the TPR valve by lifting the lever briefly to ensure water discharges and stops cleanly. Run hot water for two minutes to clear any initial sediment.
Prevent Future Valve Failures
Regular maintenance extends the life of your new brass valve and keeps your water heater efficient.
Flush Sediment Every Six Months
Drain two to five gallons of water every six months to remove accumulating sediment. Your new brass valve makes this quick and easy compared to plastic ones.
Note: Never leave a garden hose attached to the valve long-term. Pressure changes in the supply line can cause leaks through the hose.
Inspect for Corrosion Annually
Check the valve once a year for signs of corrosion, leaks, or a handle that is hard to turn. Early detection allows you to address issues before they become emergencies.
Common clog culprits include calcium scale, anode rod fragments, and pieces of the plastic dip tube. Regular flushing stops this buildup from killing your valve.
Frequently Asked Questions About Hot Water Tank Drain Valves
Can I replace the drain valve without draining the whole tank?
Yes, you can use the “live-swap” method by creating an airlock. Turn off the water supply, relieve pressure via the TPR valve, and open the drain until flow stops. This vacuum holds the water in while you swap the valve quickly.
What size drain valve do I need for my water heater?
Most residential water heaters use a ½-inch NPT thread, but ¾-inch is better for flow. The critical measurement is the shank length, which must be equal to or longer than your original valve to ensure a proper seal.
Why should I upgrade from plastic to brass?
Plastic valves become brittle and crack over time due to heat and pressure. Brass valves resist corrosion, handle higher pressure, and allow for effective flushing of sediment, lasting the lifetime of the tank.
How do I remove a drain valve that is stuck?
Apply penetrating oil and let it soak for 30 minutes. Use a pipe wrench with extended leverage and tap the valve gently with a hammer to break rust bonds before turning.
What causes drain valves to fail prematurely?
Sediment buildup, including calcium scale and anode rod fragments, often clogs or corrodes valves. Plastic valves also fail due to thermal cycling and becoming brittle with age.
Do I need to turn off the power to change the valve?
Yes, always turn off electricity at the breaker or set gas to “Pilot” before starting. This prevents electrical shock or accidental ignition while the system is open to the atmosphere.
Key Takeaways for Replacing Your Hot Water Tank Drain Valve
Replacing a failing drain valve is a manageable DIY task when you follow safety protocols and use the right techniques. Upgrading to a brass valve and using the airlock method saves you time, water, and energy compared to a full drain.
Prioritize matching the shank length exactly and cleaning the threads thoroughly to prevent leaks. With a properly installed brass valve, your future maintenance will be faster and your water heater more reliable.