A swing check valve installed backward or in the wrong orientation can rupture pipes, destroy pumps, and leave your system vulnerable to dangerous backflow. Most failures trace back to simple mistakes: mounting the valve upside down, placing it too close to an elbow, or ignoring minimum flow velocity requirements. These errors cost industries thousands of dollars in repairs that proper installation would have prevented.
This guide walks you through every stage of swing check valve installation, from orientation rules and pre-installation checks to step-by-step procedures and critical errors to avoid. You’ll also learn when a different valve type delivers better results and how to keep your installation running reliably for years.
Correct Valve Orientation

Orientation determines whether your swing check valve functions as intended or becomes an expensive liability. The hinge pin position and flow direction must align with gravity for reliable closure.
Horizontal: Pin at 12 O’Clock
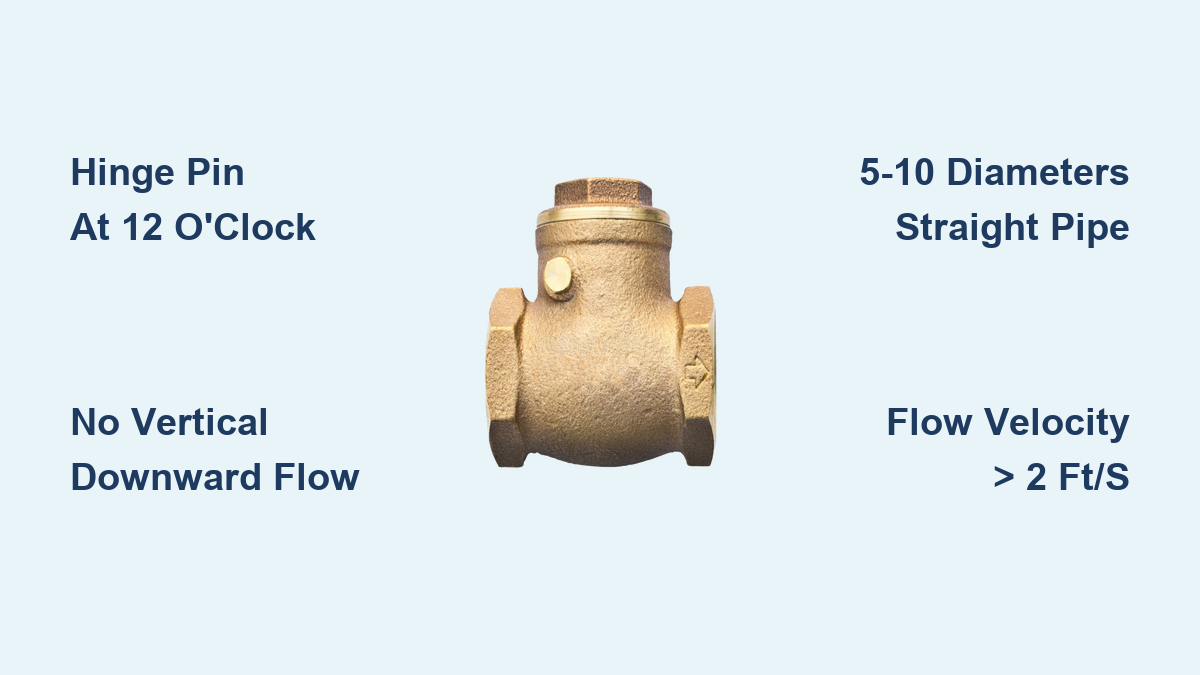
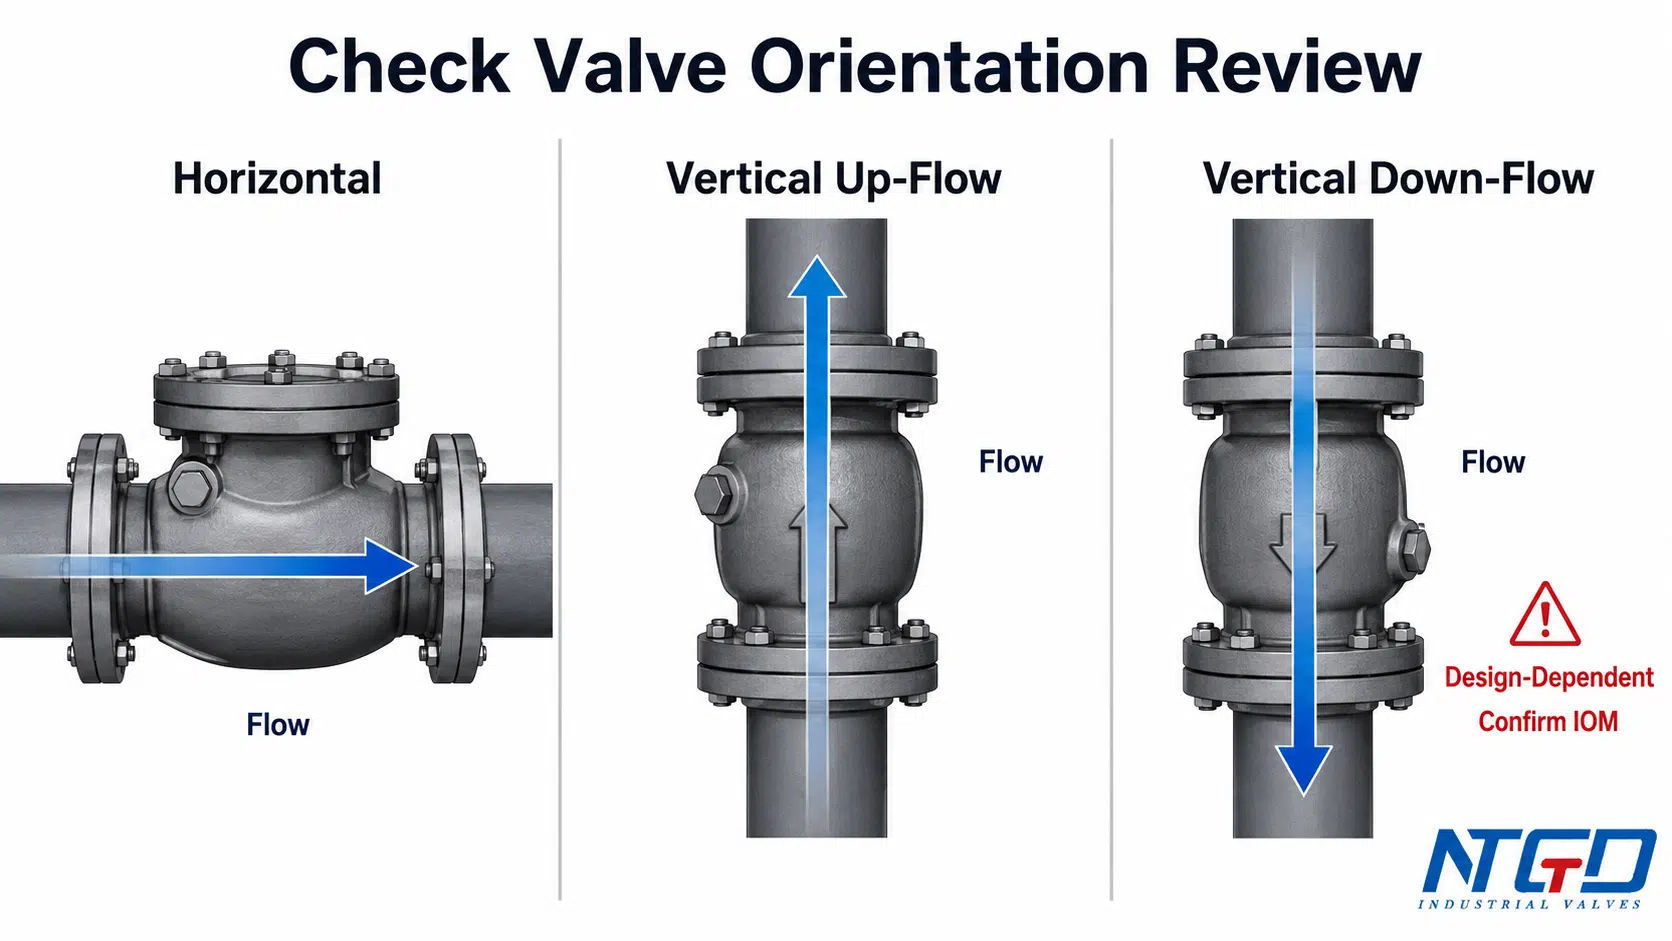
Always install swing check valves horizontally with the hinge pin at the top (12 o’clock position). This allows the disc to swing open freely with forward flow and close smoothly when flow stops. Gravity assists closure, reducing wear and minimizing water hammer risk.
Ensure the flow arrow on the valve body points in the direction of fluid travel. Even a slight misalignment can cause turbulence, leading to disc flutter or incomplete sealing.
Vertical: Upward Flow Only
Vertical installation is acceptable, but only if fluid flows upward. The flow arrow must point straight up. As fluid rises, it lifts the disc open. When flow stops, gravity pulls the disc down into the seat, sealing the line.
Never install a swing check valve in a vertical pipe with downward flow. Gravity holds the disc open, allowing backflow. When the pump shuts off, the disc slams shut under the weight of the falling fluid column, generating severe water hammer that can rupture pipes or destroy the valve.
Orientation Summary
| Flow Direction | Valve Position | Safe? | Reason |
|---|---|---|---|
| Horizontal | Any | ✅ Yes | Gravity aids closure |
| Vertical Up | Flow upward | ✅ Yes (if rated) | Disc closes via gravity |
| Vertical Down | Flow downward | ❌ No | Causes slamming and backflow |
Pre-Installation Inspection and Preparation
Skipping inspection leads to preventable failures. Always verify valve condition and system compatibility before mounting.
Match Size and Connection Type
Confirm the valve matches your pipe size exactly (1/2″, 2″, 6″, etc.) and that the connection type (threaded, socket, flanged) aligns with your system. Mismatched fittings create stress points and potential leaks.
For flanged valves, use the correct gasket material (rubber, PTFE, or metal) rated for your fluid and pressure. Allow 1 to 2 pipe diameters of clearance around the valve so the disc can swing freely without obstruction.
Inspect for Damage and Debris
- Open and examine the valve interior. Remove any shipping caps, tape, or debris.
- Check the disc and seat for scratches, cracks, or burrs. Even minor imperfections cause leaks.
- Verify the flow arrow is clearly marked and undamaged.
- Test disc movement by gently swinging it open and closed. It should move freely without binding.
Confirm Material Compatibility
Choose valve materials based on your fluid type, temperature range, and pressure rating:
- Fluid type (water, oil, chemicals)
- Temperature range (PVC fails above 140°F; stainless steel handles extreme heat)
- Pressure rating (ensure valve class exceeds maximum system pressure)
Using an incompatible material leads to corrosion, swelling, or mechanical failure. High-grade alloys resist wear and deformation in temperature extremes.
Step-by-Step Swing Check Valve Installation
Follow these steps to ensure a reliable, long-lasting installation.
Prepare the Pipeline
Never install a swing check valve immediately after an elbow, bend, or pump outlet. Turbulent flow prevents the disc from opening fully and causes vibration.
Install 5 to 10 pipe diameters of straight pipe upstream to stabilize flow. For a 2-inch pipe, that’s 10 to 20 inches of straight run before the valve.
Clean both pipe ends thoroughly. Remove weld slag, scale, or sealant residue that could enter the valve.
Align Flow Direction
Position the valve so the flow arrow points with the fluid path. In horizontal lines, ensure the hinge pin is at the top. In vertical lines, the arrow must point up.
Double-check orientation. Even experienced technicians sometimes mount valves backward during tight-space installations.
Secure the Connections
Threaded Valves:
– Apply thread sealant (Teflon tape or pipe dope) to male threads only
– Hand-tighten first, then wrench-tighten 1.5 to 2 turns past hand-tight
– Do not overtighten, as this cracks the valve body or distorts the seat
Socket Weld or Solvent-Weld Valves (PVC or CPVC):
– Deburr and clean pipe and socket
– Apply primer and cement evenly
– Push fully into socket and hold for 30 seconds to prevent pull-back
Flanged Valves:
– Place gasket centered between flanges
– Insert bolts hand-tight
– Tighten in a star pattern to distribute pressure evenly and prevent warping
Test Before Full Operation
- Isolate the section with ball valves above and below the check valve for future maintenance.
- Open supply slowly to avoid sudden pressure surges.
- Check for leaks at joints and around the body.
- Observe operation:
– Disc should open fully with flow
– Close completely when flow stops
– No chattering, vibration, or delayed closure
If the valve doesn’t open, verify it isn’t installed backward. If it leaks, shut off flow and inspect for debris or a damaged seat.
Critical Installation Errors to Avoid
Even small mistakes lead to major system failures. Avoid these common pitfalls.
Never Install in Downward Vertical Lines
This is the number one cause of swing check valve failure. In downward vertical flow:
– The disc stays open due to gravity
– Backflow occurs unchecked
– When flow stops, the disc slams shut, trapping a high-speed fluid column
Result: Severe water hammer capable of bursting pipes, damaging pumps, and destroying fittings. Water hammer can create pressure surges thousands of times higher than normal operating pressure.
Solution: Use a spring-assisted or piston-style check valve in vertical downward applications.
Avoid Placement After Elbows or Bends
Swirling, turbulent flow from elbows prevents the disc from opening evenly. This leads to:
– Partial opening and increased pressure drop
– Disc oscillation and hinge wear
– Asymmetric seating and leaks
Fix: Maintain 5 to 10 pipe diameters of straight pipe upstream of the valve.
Don’t Use in Low-Flow Systems
Swing check valves require a minimum flow velocity of 2 ft/s (0.6 m/s) to lift the disc fully.
Below this threshold:
– Disc remains partially closed
– Causes flow restriction and heating
– Leads to disc flutter and accelerated wear
Alternative: Use lift-check or spring-loaded valves in low-velocity systems such as HVAC return lines or condensate drains.
Avoid High-Cycle Applications
Frequent pump starts and stops or solenoid valve cycling cause rapid opening and closing. This subjects the hinge pin to repeated impact, leading to:
– Hinge fatigue and cracking
– Seat erosion
– Premature failure
Solution: Install a piston-style or dual-disc check valve rated for high cycling. Add a water hammer arrestor for additional protection.
Troubleshoot Common Swing Check Valve Problems
Even well-installed valves develop issues over time. Here’s how to diagnose and fix them.
Valve Leaks When Closed
Possible Causes:
– Debris on seat
– Damaged disc or seat
– Cracked body
Fix:
1. Shut off supply
2. Disassemble and clean disc and seat
3. Replace disc or gasket if damaged
4. Replace entire valve if body is cracked
Valve Won’t Open
Cause: Internal obstruction or disc jam.
Fix:
1. Remove valve
2. Flush out debris
3. Inspect hinge pin for bending or corrosion
4. Reinstall only when disc swings freely
Noisy Operation or Water Hammer
Cause: Rapid closure, improper orientation, or high flow velocity.
Fix:
1. Confirm valve is not in a downward vertical line
2. Check for upstream turbulence from elbows or pumps
3. Install a water hammer arrestor near the pump or valve
4. Consider switching to a spring-assisted swing check valve for controlled closure
Valve Chatters or Vibrates
Cause: Low flow velocity or turbulent inlet flow.
Fix:
1. Verify flow exceeds 2 ft/s
2. Add straight pipe upstream
3. Replace with a low-lift or spring-loaded design
Choose the Right Valve for the Job
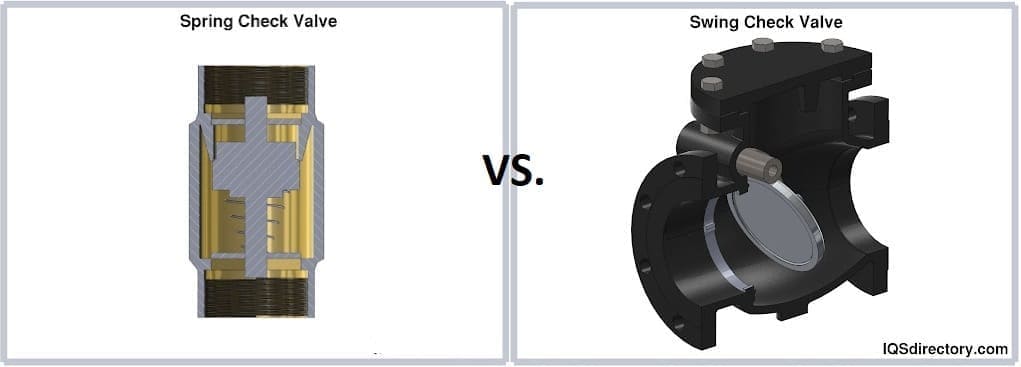
Swing check valves aren’t universal. In many cases, alternatives perform better in demanding conditions.
Use Spring Check Valves for Vertical Lines
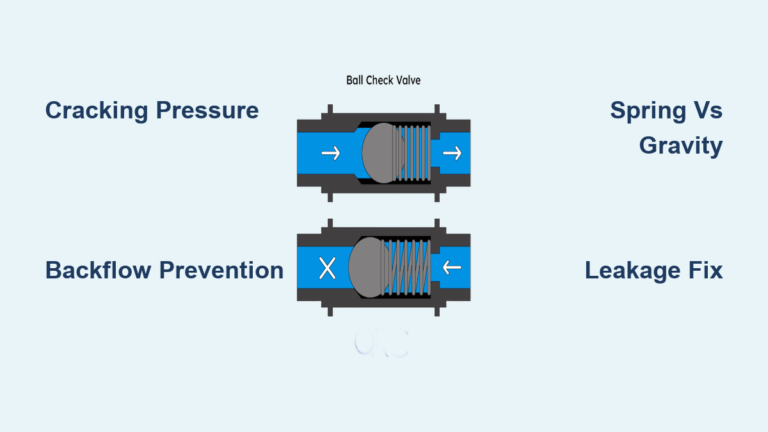
Spring check valves use a spring to close the disc instead of gravity. They work in any orientation, including vertical downward flow.
Benefits:
– Prevents water hammer with controlled closure
– Reliable in space-constrained or multi-directional systems
– Ideal for high-pressure or high-velocity applications
Install Piston Valves in High-Cycle Systems
Piston-style check valves use a guided piston and spring mechanism. They’re built for:
– Frequent cycling in pump stations and industrial processes
– High-pressure environments
– Applications where hinge failure is unacceptable
Piston valves deliver more durable performance than swing checks in demanding conditions.
Consider Nozzle or Tilting Disc Valves
Nozzle Check Valves:
– Compact, in-line design
– Direct weld or socket connection
– Excellent for tight vertical spaces
– Less prone to jamming than hinged designs
Tilting Disc Valves:
– Disc tilts open with minimal resistance
– Low pressure drop
– Resists slamming and water hammer
– Suitable for vertical and horizontal lines
Maintain Your Swing Check Valve for Longevity
Swing check valves require minimal maintenance, but ignoring it shortens lifespan.
Schedule Regular Inspections
Check every 6 to 12 months for:
– Leaks at connections
– Corrosion (especially on carbon steel)
– Disc movement (open and close manually if accessible)
– Debris buildup
Lubricate Moving Parts
Apply a small amount of valve-grade lubricant to the hinge pin annually. This prevents seizing, especially in dry or corrosive environments.
Rotate the disc gently by hand to keep it free-moving.
Replace Worn Components Early
Don’t wait for failure. Replace:
– Worn or cracked gaskets
– Bent or pitted hinge pins
– Damaged discs
If the valve body is cracked or corroded, replace the entire unit.
Final Installation Checklist
Before turning on the system, verify these critical points:
✅ Flow arrow points in correct direction
✅ Hinge pin at 12 o’clock (horizontal) or flow upward (vertical)
✅ 5 to 10 pipe diameters of straight run upstream
✅ No elbows, pumps, or tees within immediate proximity
✅ Valve size and material match system specs
✅ Connections are secure but not over-tightened
✅ No debris inside valve or pipe
✅ Test operation slowly with isolation valves closed
Frequently Asked Questions About Swing Check Valve Installation
Can a swing check valve be installed vertically?
Yes, but only with upward flow. The flow arrow must point straight up so gravity can pull the disc closed when flow stops. Vertical downward flow is strictly prohibited because gravity holds the disc open and causes severe water hammer when the disc slams shut.
What is the minimum flow velocity for a swing check valve?
Swing check valves require at least 2 ft/s (0.6 m/s) to lift the disc fully. Below this threshold, the disc remains partially closed, causing flow restriction, disc flutter, and accelerated wear. Use lift-check or spring-loaded valves in low-velocity systems.
How far upstream should straight pipe be installed?
Maintain 5 to 10 pipe diameters of straight pipe upstream of the swing check valve. For a 2-inch pipe, that’s 10 to 20 inches. This stabilizes flow and prevents turbulence from elbows or pumps from disrupting disc operation.
What causes water hammer in swing check valves?
Water hammer occurs when flowing fluid suddenly stops or reverses direction, creating a pressure shock wave. In swing check valves, rapid disc closure (especially in vertical downward installations) traps a high-speed fluid column that slams against the closed valve, generating dangerous pressure surges.
How often should a swing check valve be inspected?
Inspect swing check valves every 6 to 12 months for leaks, corrosion, debris buildup, and disc movement. Lubricate the hinge pin annually and rotate the disc manually to keep it free-moving. Replace worn gaskets, hinge pins, or discs before they fail.
When should I choose a different valve type instead?
Choose a spring check valve for vertical downward flow or water hammer prevention. Select a piston-style check valve for high-cycle applications where hinge fatigue is a concern. Use a nozzle or tilting disc valve for tight spaces or low-pressure-drop requirements.
Key Takeaways for Successful Swing Check Valve Installation
Proper swing check valve installation comes down to three critical factors: correct orientation, adequate straight pipe upstream, and matching the valve to your system’s flow conditions. Always position the hinge pin at 12 o’clock in horizontal lines or use upward flow in vertical lines. Maintain 5 to 10 pipe diameters of straight pipe before the valve, and verify flow velocity exceeds 2 ft/s.
When your application involves vertical downward flow, high cycling, or low velocity, a different valve type delivers better results and prevents costly damage. Spring check, piston, and tilting disc valves solve specific problems that standard swing checks cannot handle.
Next step: Review your system requirements against this guide before purchasing or installing any check valve. When in doubt, consult the manufacturer’s specifications or contact a fluid systems specialist to confirm your selection matches the application.